Place · Grid B1
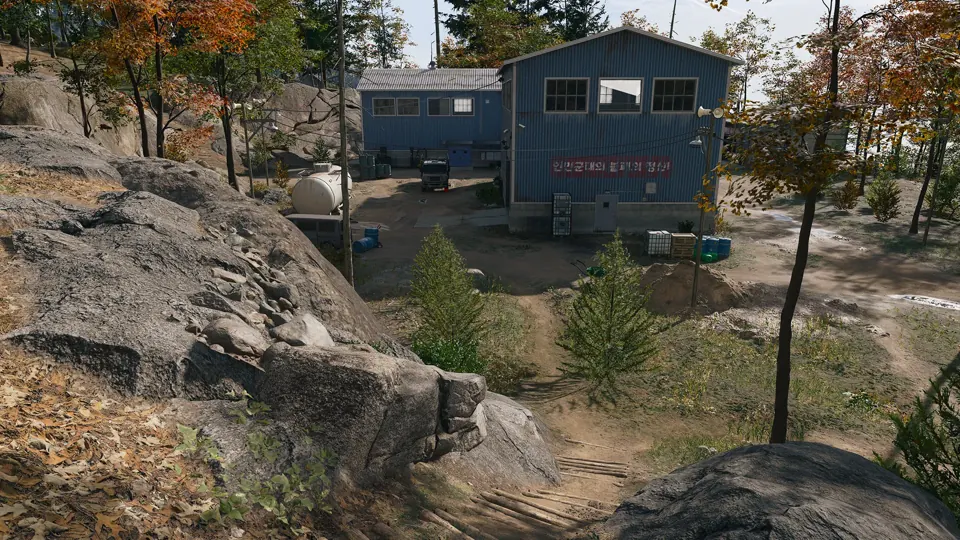
Jayon Warehouses
Warehouses in Hajin, marked on the official Call of Duty map.
Open Jayon Warehouses →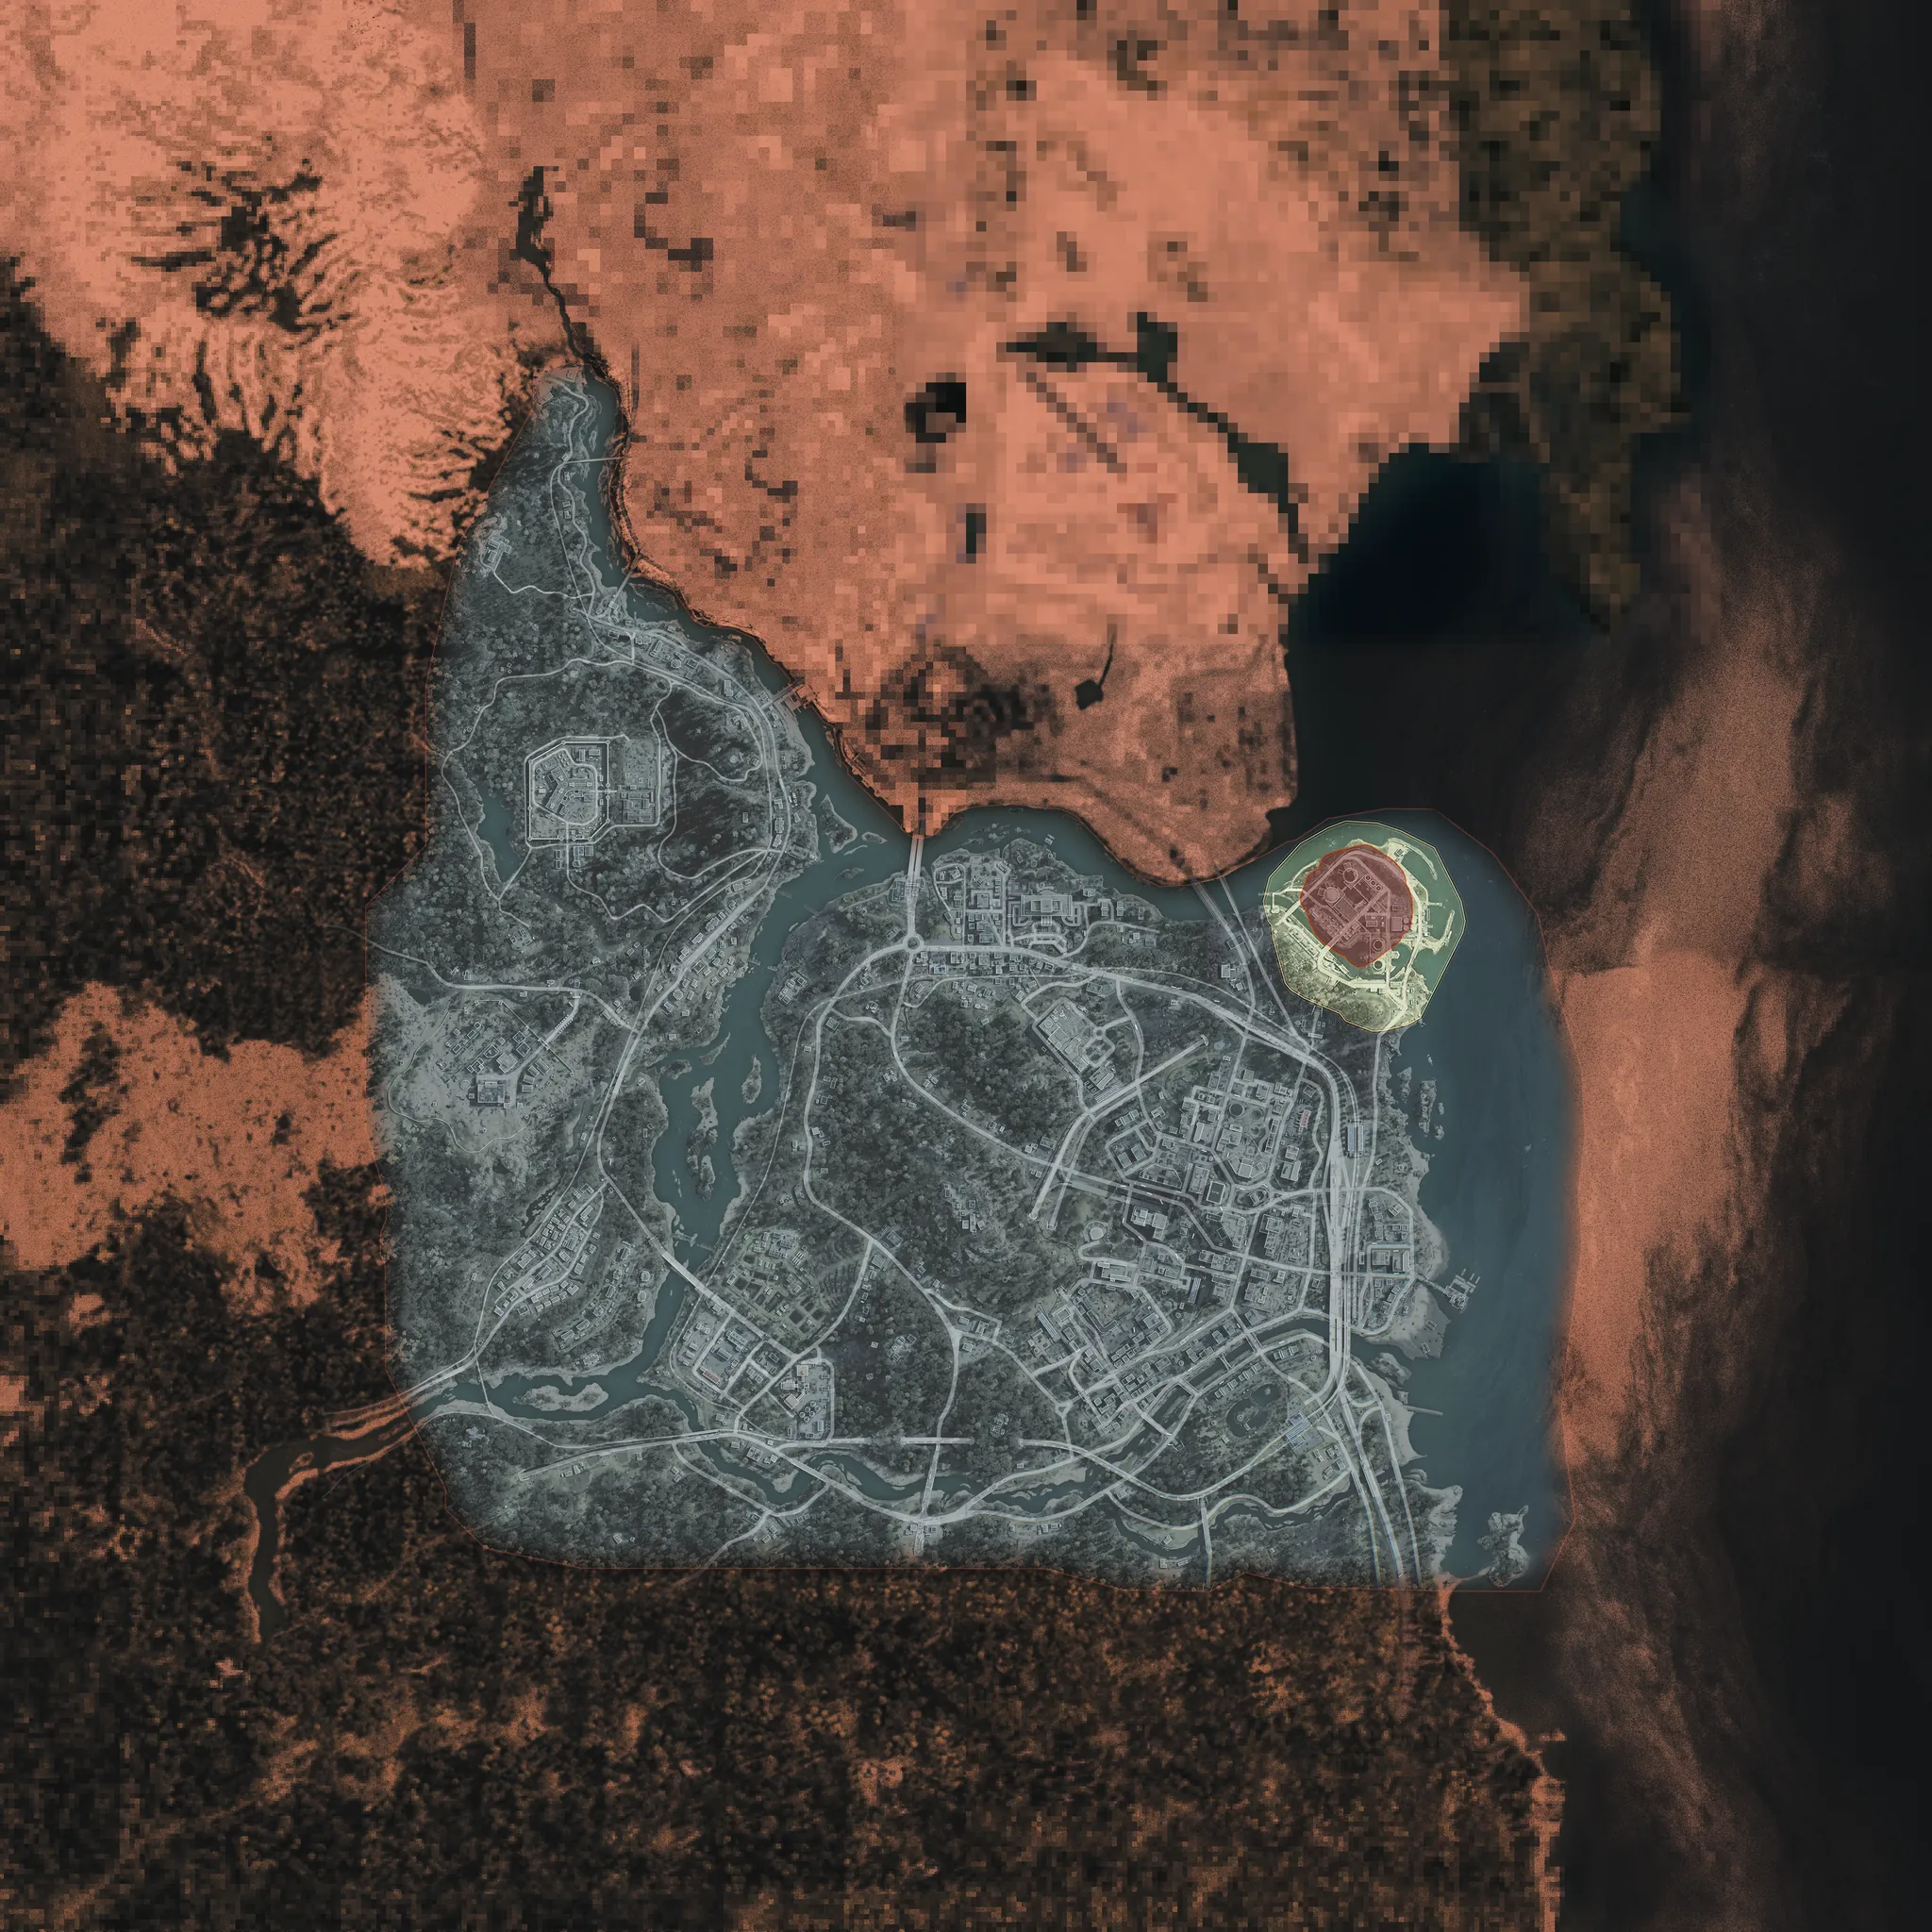
Warehouses in Hajin, marked on the official Call of Duty map.
Open Jayon Warehouses →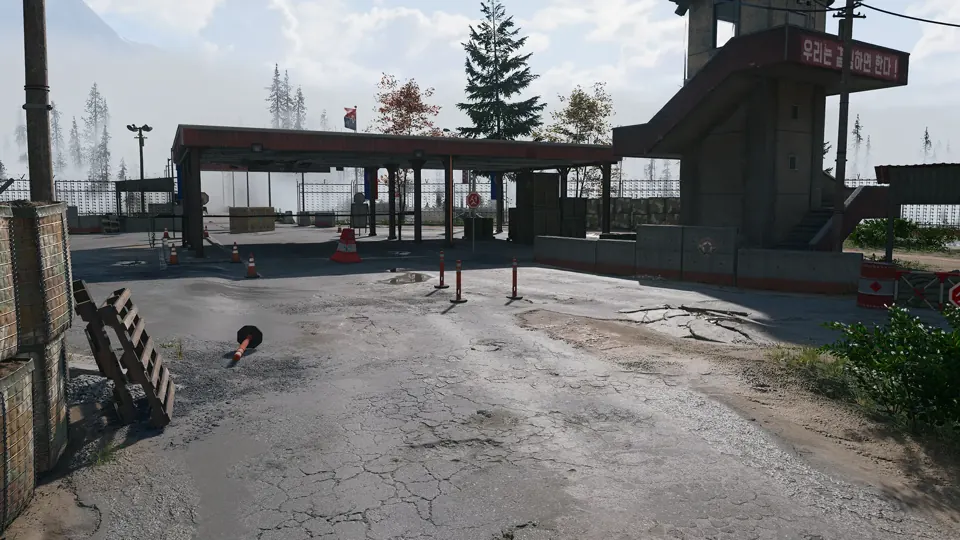
Border crossing in Hajin, marked on the official Call of Duty map.
Open Russian Border Crossing (West) →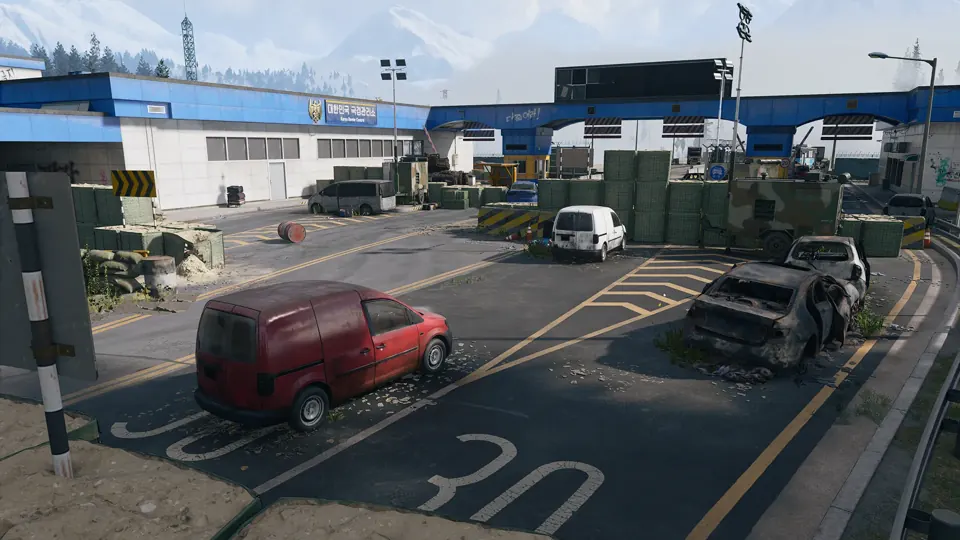
Low-threat checkpoint associated with Cheongun Village.
Open Russian Border Crossing →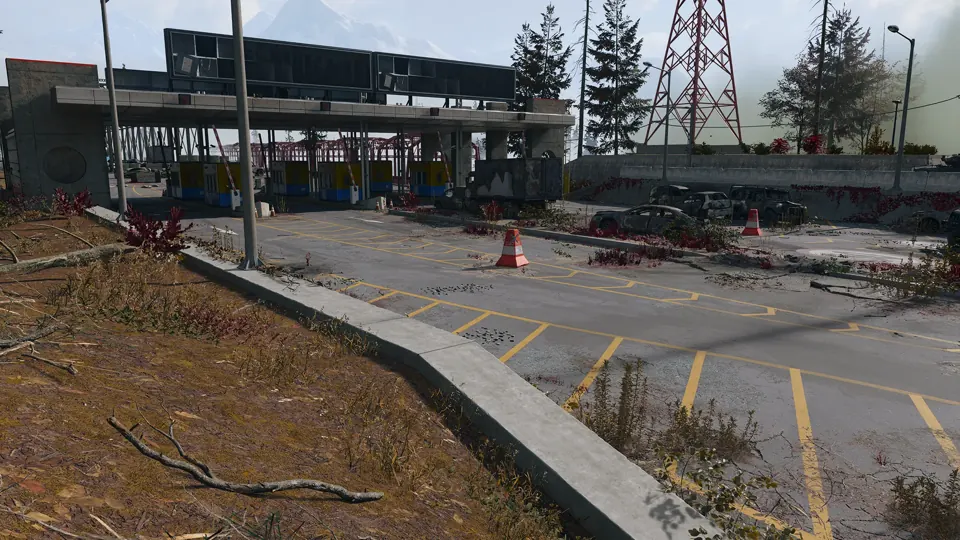
Border crossing in Hajin, marked on the official Call of Duty map.
Open Russian Border Crossing (East) →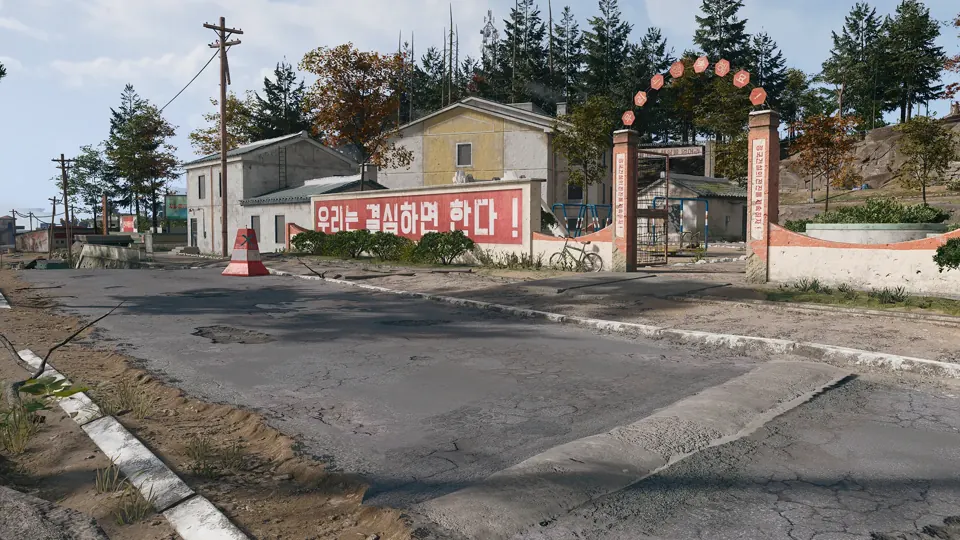
A northern Hajin village with residential loot, a fire station and a reported Black Market weapons locker.
Open Hanrim Village →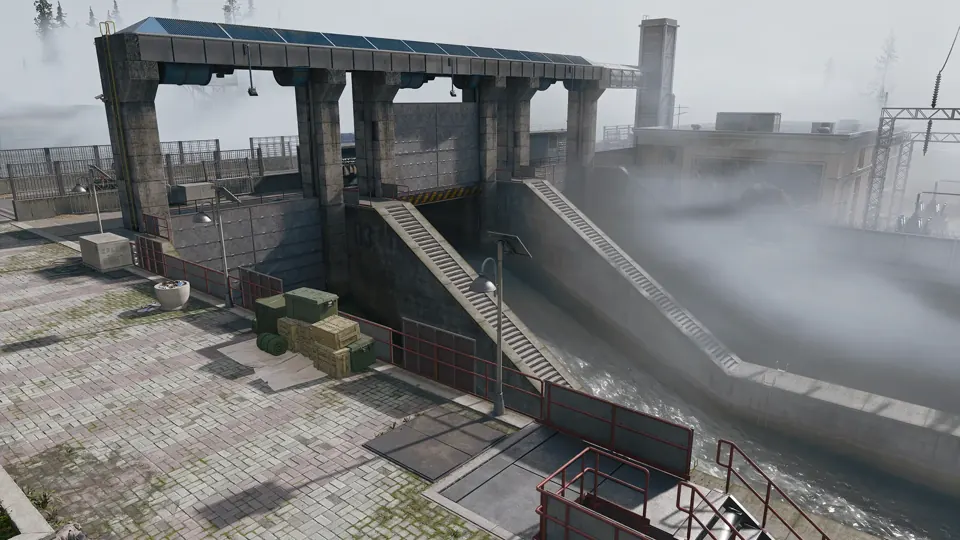
An intact dam guarded by military police, northwest of Tong-il Village.
Open Revolution Dam →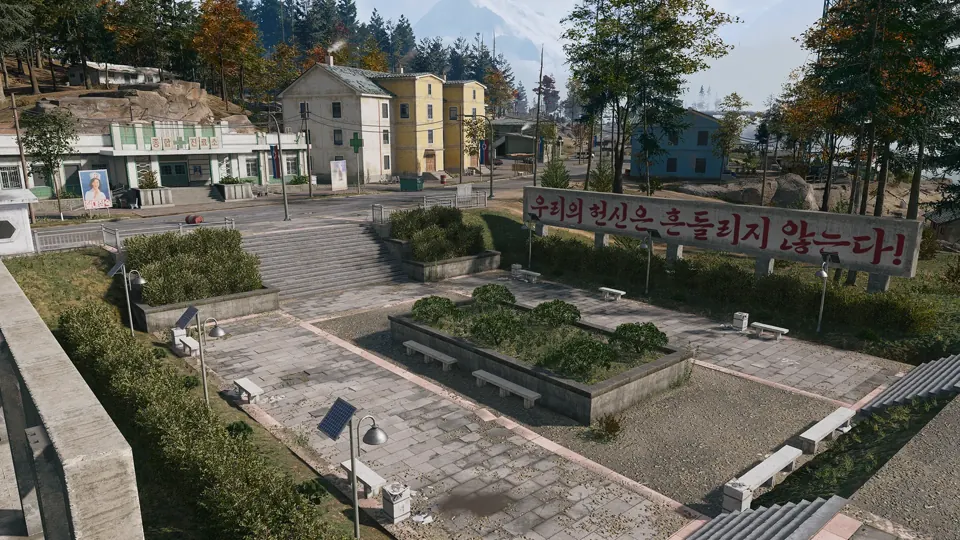
A farming village on the north delta of the Hajin River, under a large statue of a former leader.
Open Tong-il Village →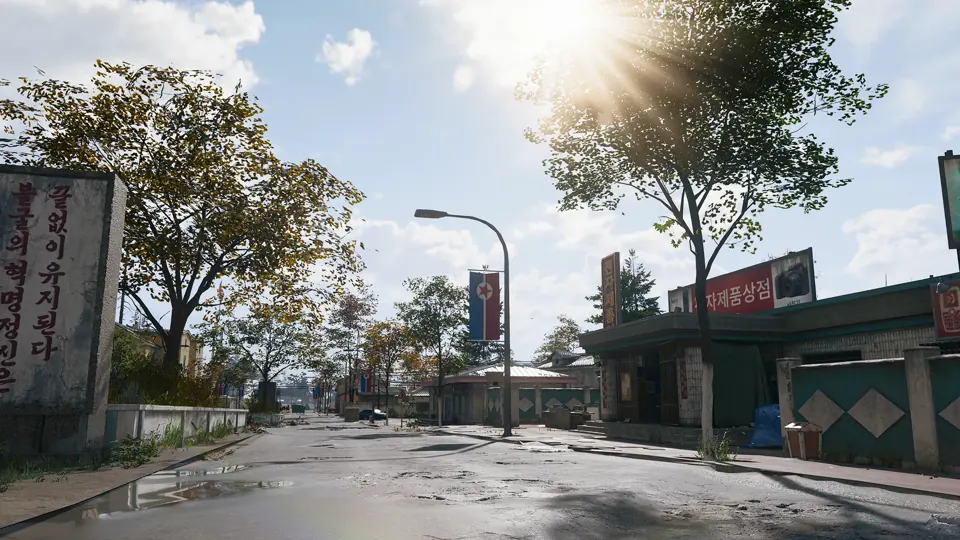
Houses and farmland west of the Hajin River, with a half-destroyed pontoon bridge for crossing by vehicle.
Open Pyonghwa Village →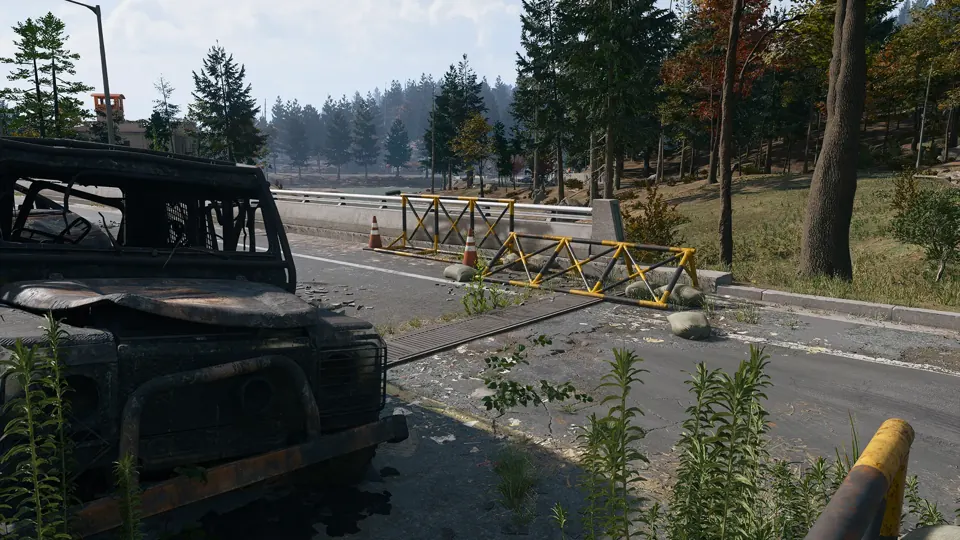
Abandoned civilian cars near a tunnel exit on Hajin’s southern edge, by the South Fork of the Hajin River.
Open Namjin Riverside →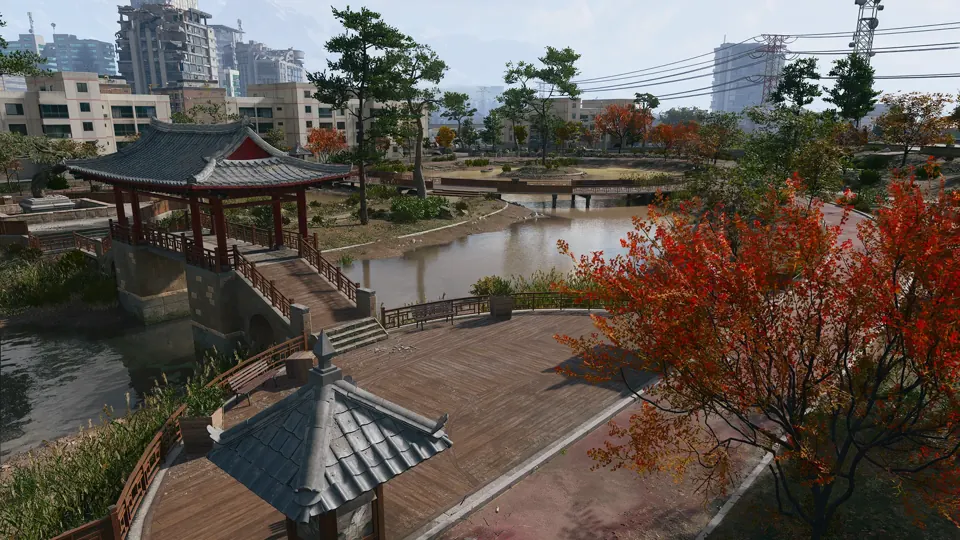
Medium-threat island area with a lone communications tower.
Open South Island →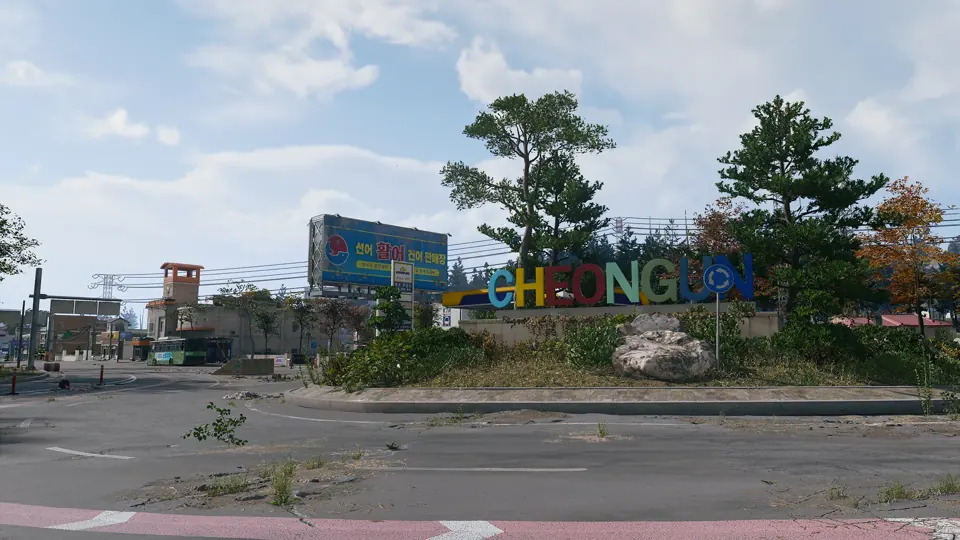
Sparser buildings and dense woodland on the west side of the village, near the South Korean border control.
Open Cheongun Outskirts →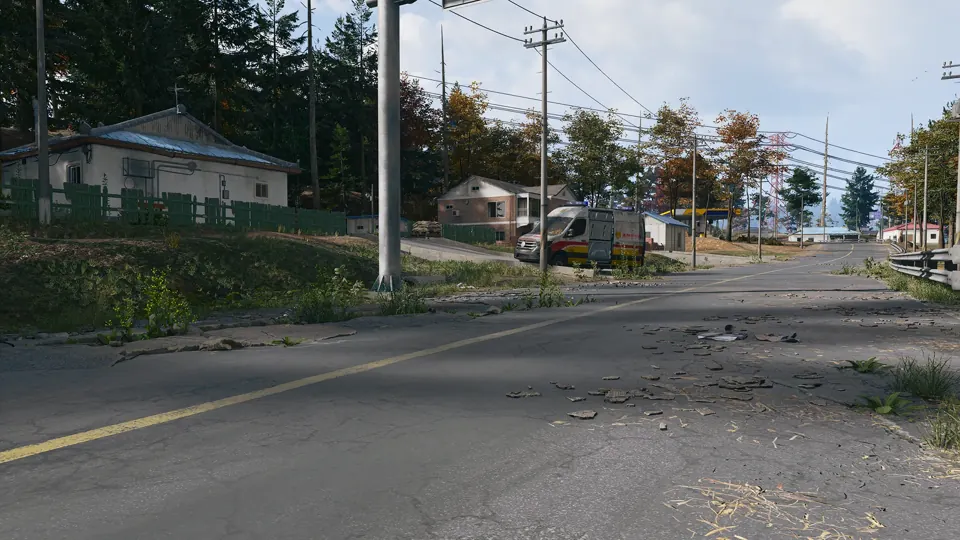
A small hamlet of farm workers on the Hajin River, at the foot of a wooded hill near the railway.
Open Imjin Suburb →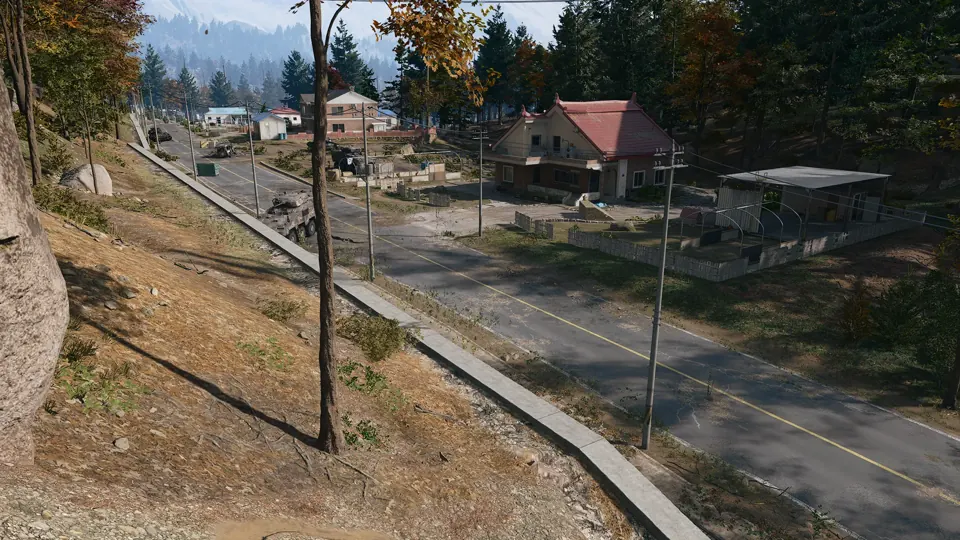
Farmland in a dell between two forests, with the Hospital to the north and the Array to the south.
Open Mujin Pass →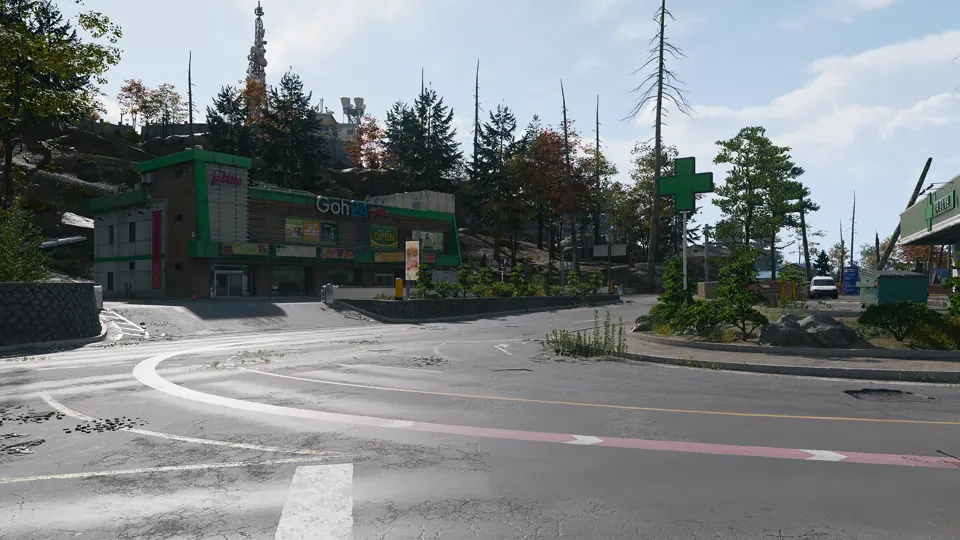
A rural settlement northeast of Imjin Farmland, its shelled road lined with burnt-out APCs.
Open Daesong Ridge →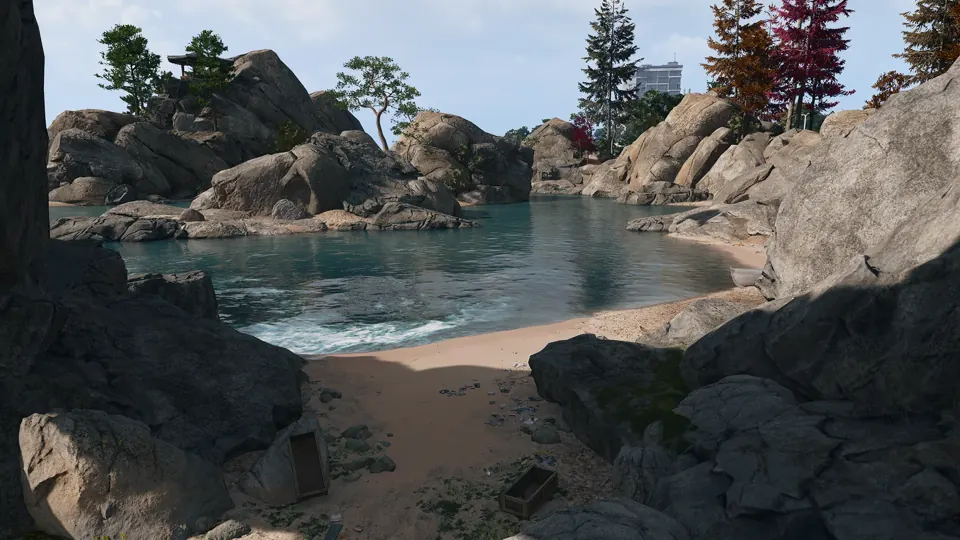
A rocky outcrop by the shore to explore or hide in.
Open Oamsik Turtle Islands →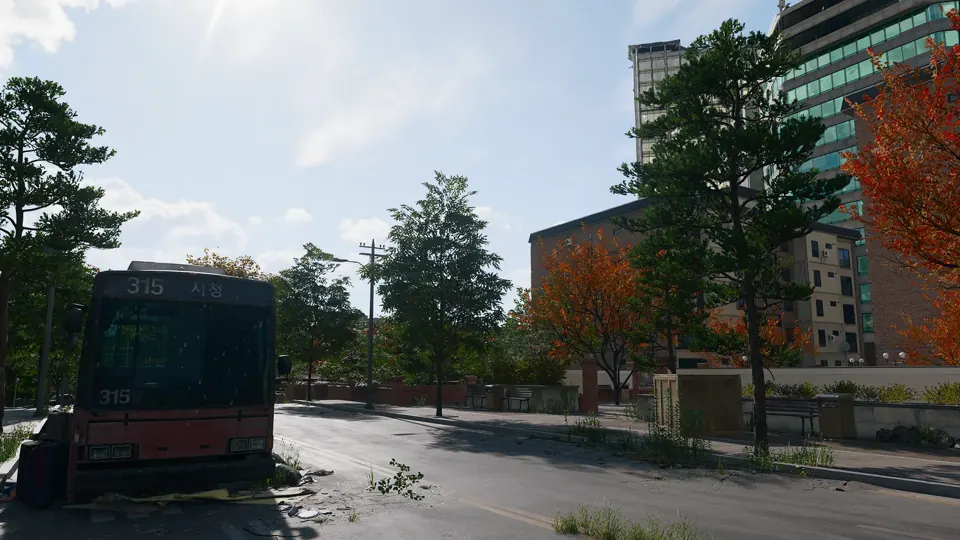
High-threat western section of the NuriGO Mall district.
Open NuriGO West →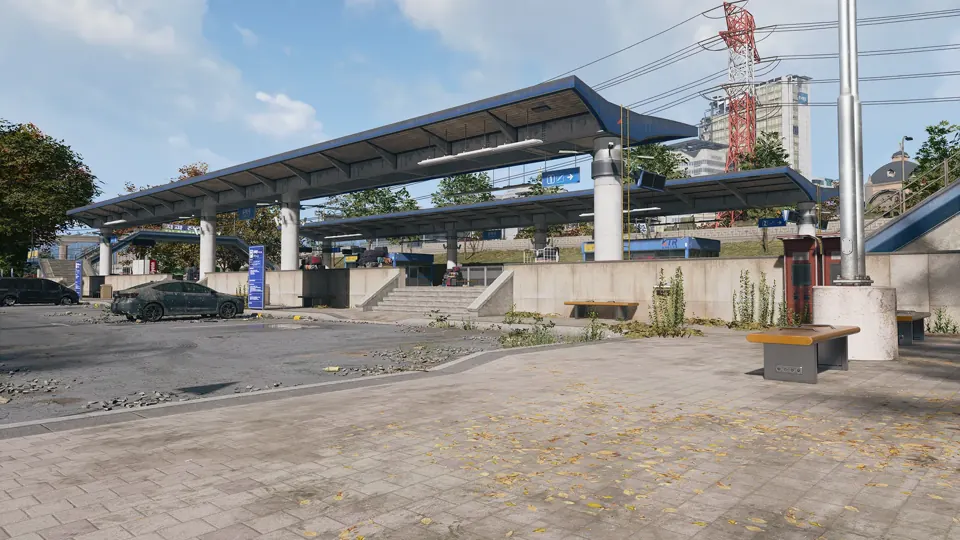
Low-threat named area in the Songdo Wharf district.
Open Shoreline Station →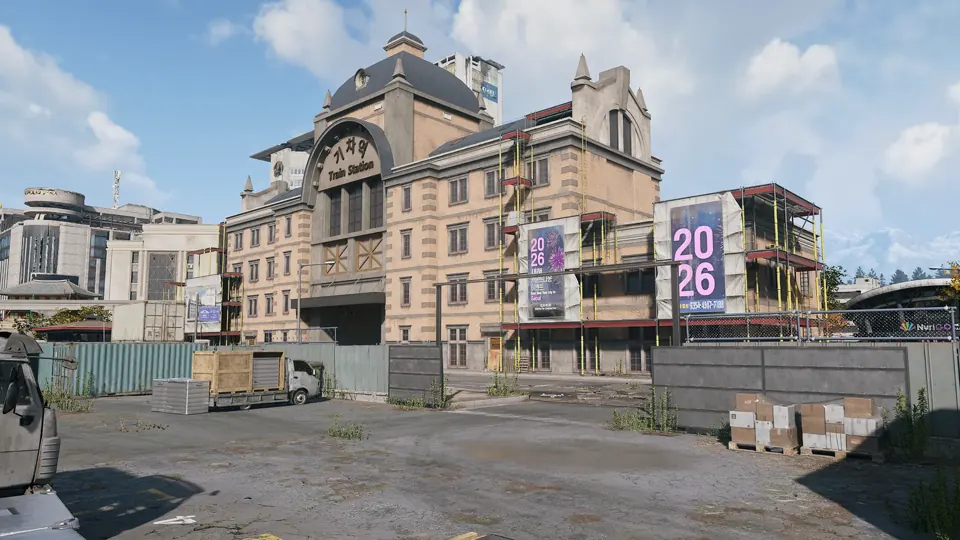
Medium-threat eastern section of the NuriGO Mall district.
Open NuriGO East →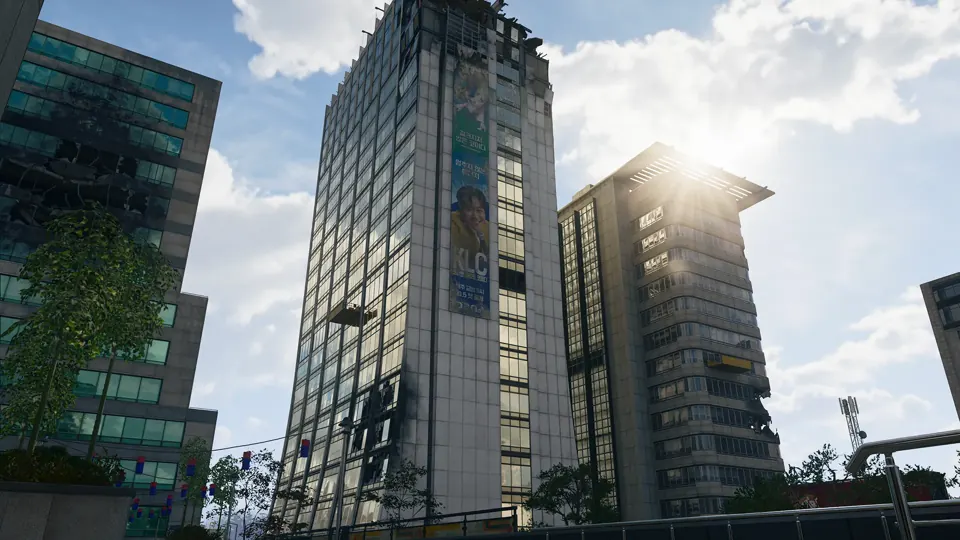
The DBN TV tower, the tallest building in Hajin.
Open DBN Headquarters →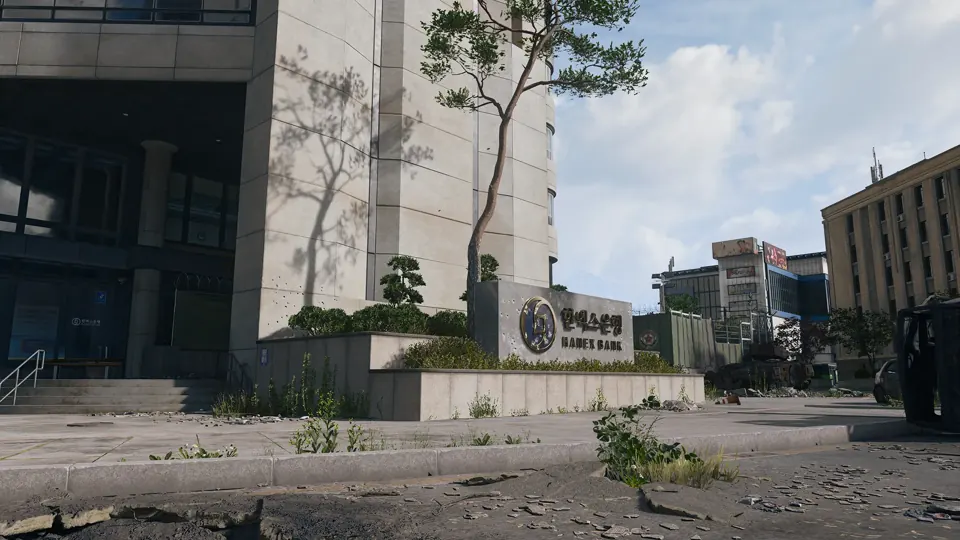
Critical-threat bank tower in The Grid, near Donpyeong Gate.
Open Hanex Bank →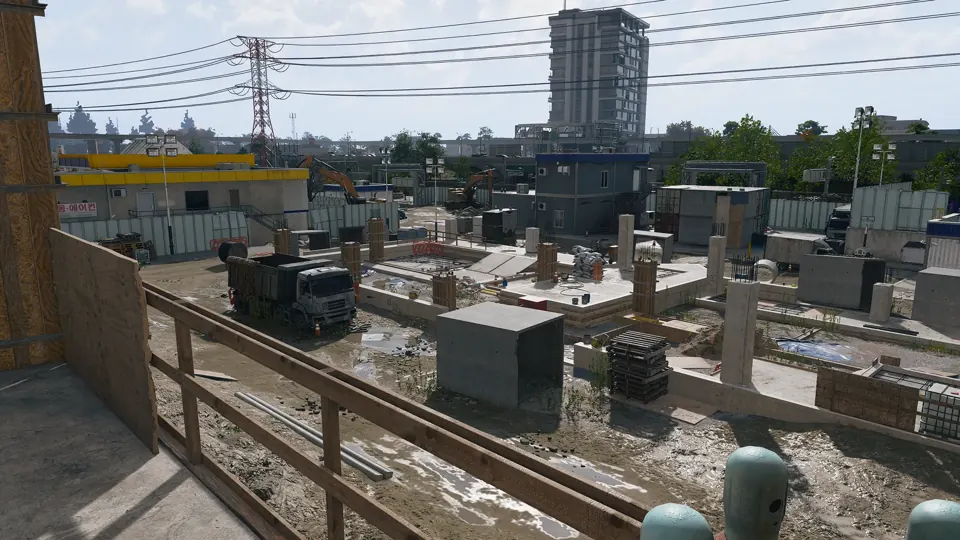
A building site across several city blocks on the eastern side of The Grid.
Open Construction Zone →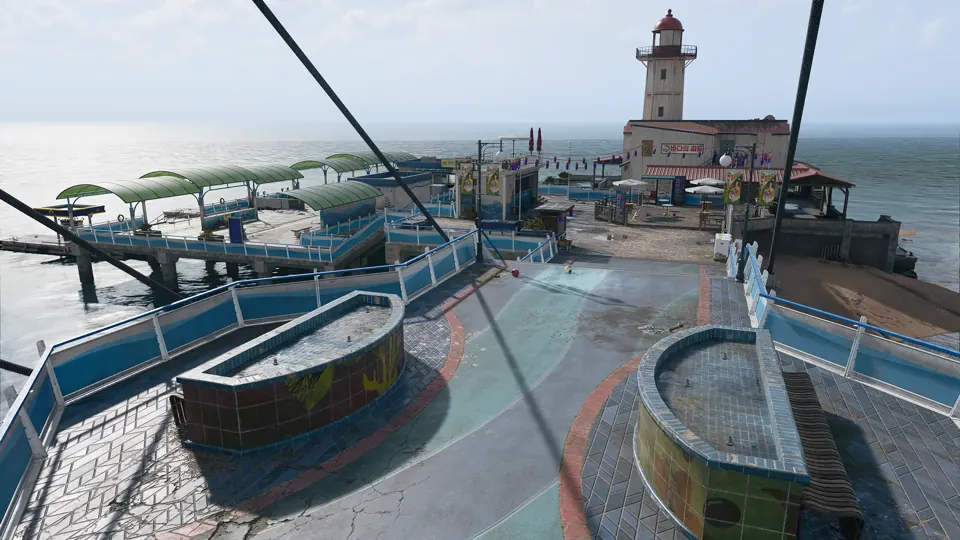
Pier in Hajin, marked on the official Call of Duty map.
Open Songdo Pier →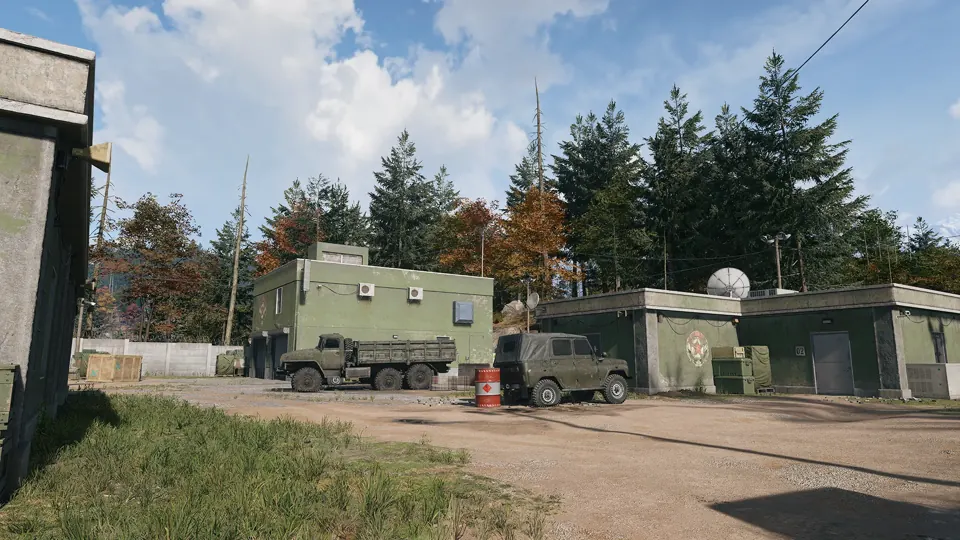
 Compounds · Grid B4
Enemy compound in Hajin, marked on the official Call of Duty map.
Open Compound Foxtrot → MW4 DMZ Compounds: clearing, safes and Medical Extraction Intel →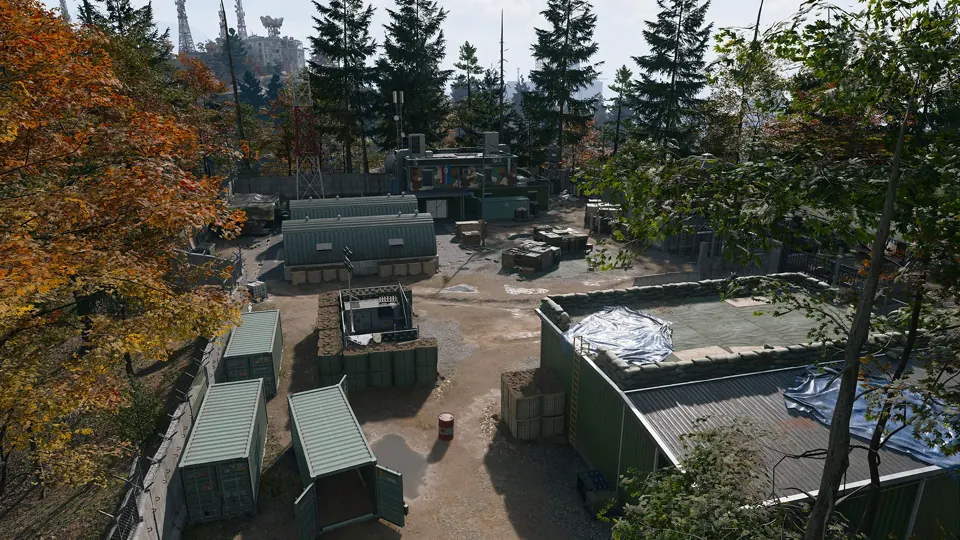 Compounds · Grid E7
Enemy compound in Hajin, marked on the official Call of Duty map.
Open Compound Alpha → MW4 DMZ Compounds: clearing, safes and Medical Extraction Intel →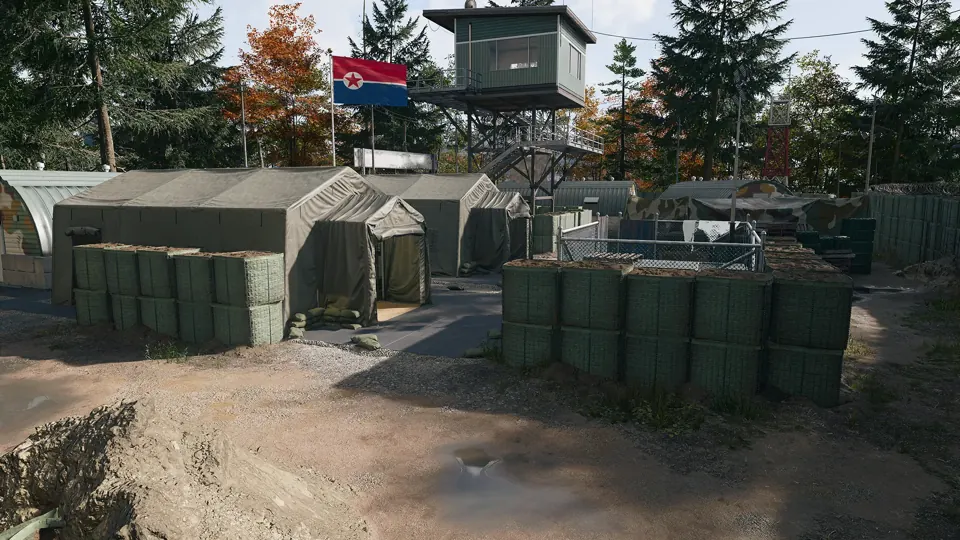 Compounds · Grid F8
Enemy compound in Hajin, marked on the official Call of Duty map.
Open Compound Bravo → MW4 DMZ Compounds: clearing, safes and Medical Extraction Intel →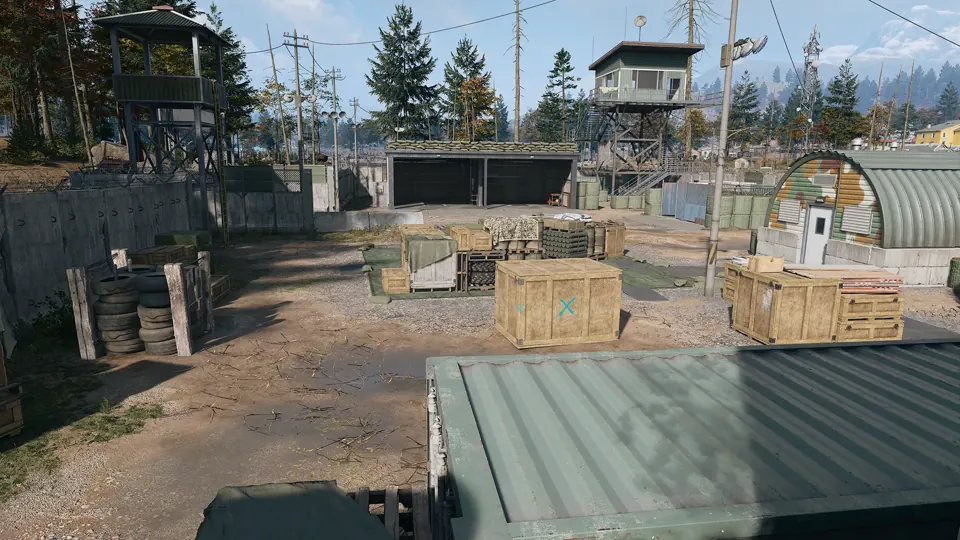 Compounds · Grid D5
Enemy compound in Hajin, marked on the official Call of Duty map.
Open Compound Charlie → MW4 DMZ Compounds: clearing, safes and Medical Extraction Intel →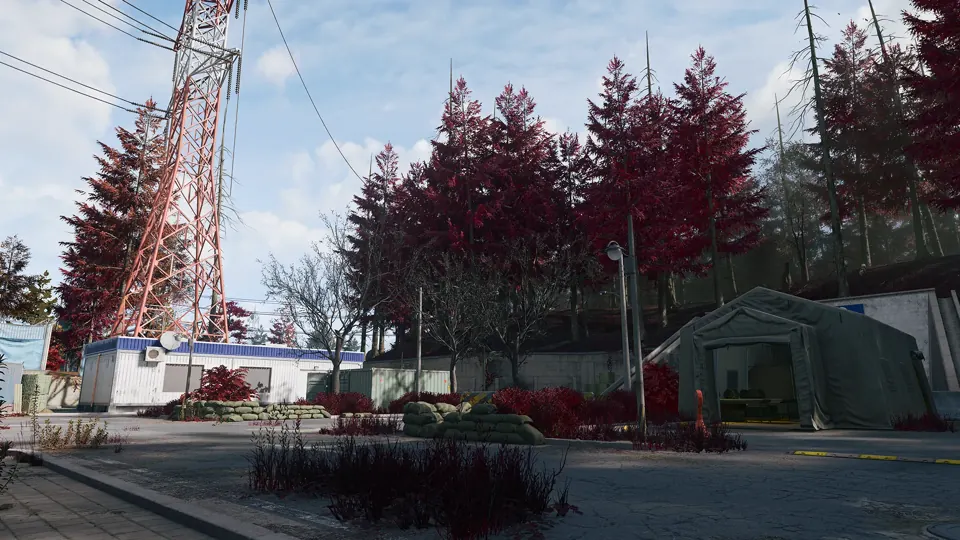 Compounds · Grid H5
Compound southwest of the reactor, mentioned as the origin of a possible tunnel approach.
Open Compound Delta → MW4 DMZ Compounds: clearing, safes and Medical Extraction Intel →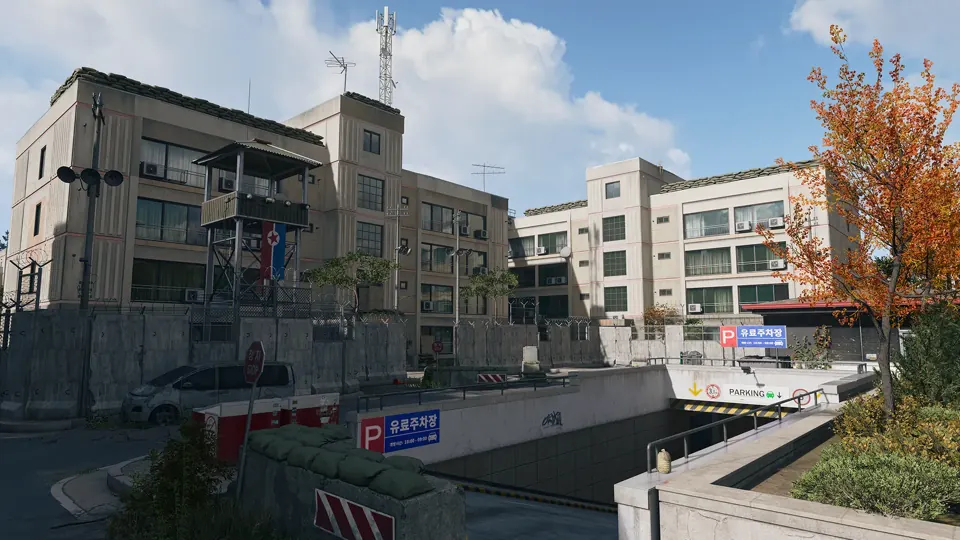 Compounds · Grid G7
An apartment building converted to a military base near the river northeast of the Heights.
Open Compound Echo → MW4 DMZ Compounds: clearing, safes and Medical Extraction Intel →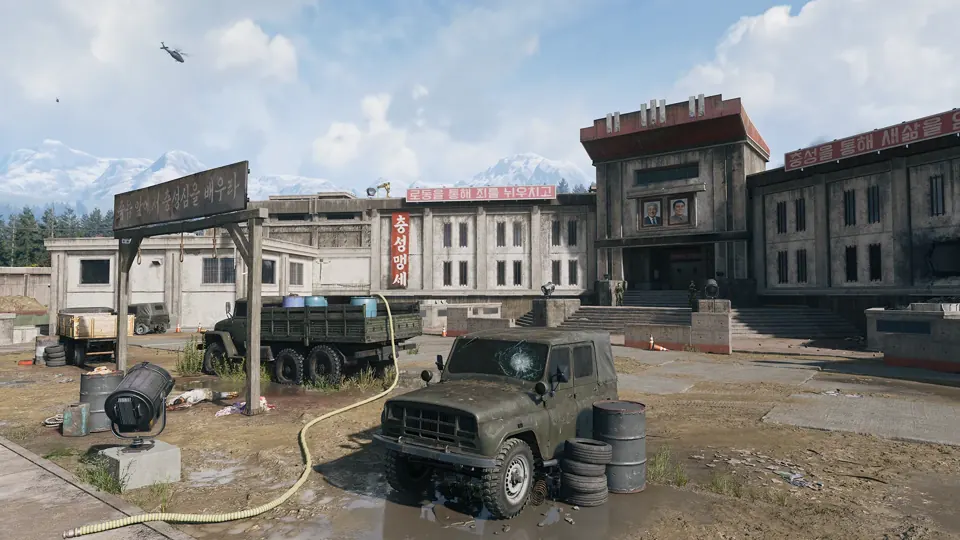
 Strongholds · Grid B3
The Y-shaped fortress inside the prison yard: gantries, cell blocks, a furnace and high value targets in a maze where squads are easily cut off.
Open The Citadel →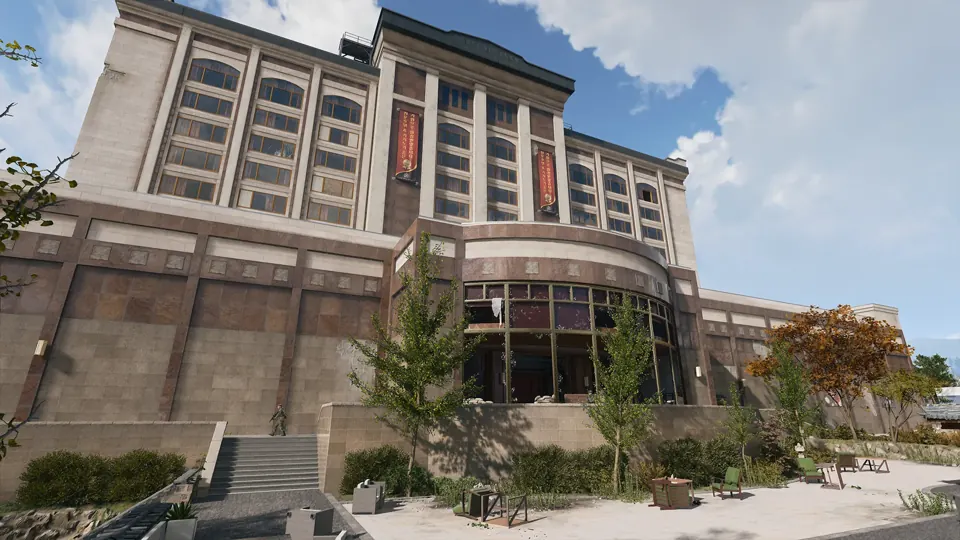 Strongholds · Grid F4
Find the casino in Cheongun Village, Hajin F4: main-floor Counting Room, Silent Ledger basement vault and underground-parking Vault Armory routes.
Open Heavenly Luck Casino →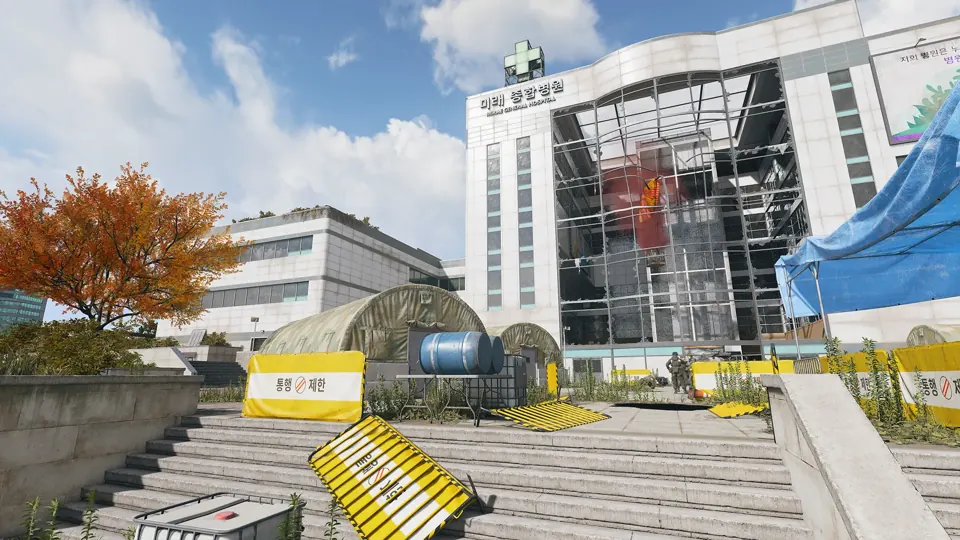 Strongholds · Grid F5
Hajin’s main hospital in the north centre, next to a train station, with triage tents and barracks outside and close-quarters fighting through its wards inside.
Open Mirae General Hospital →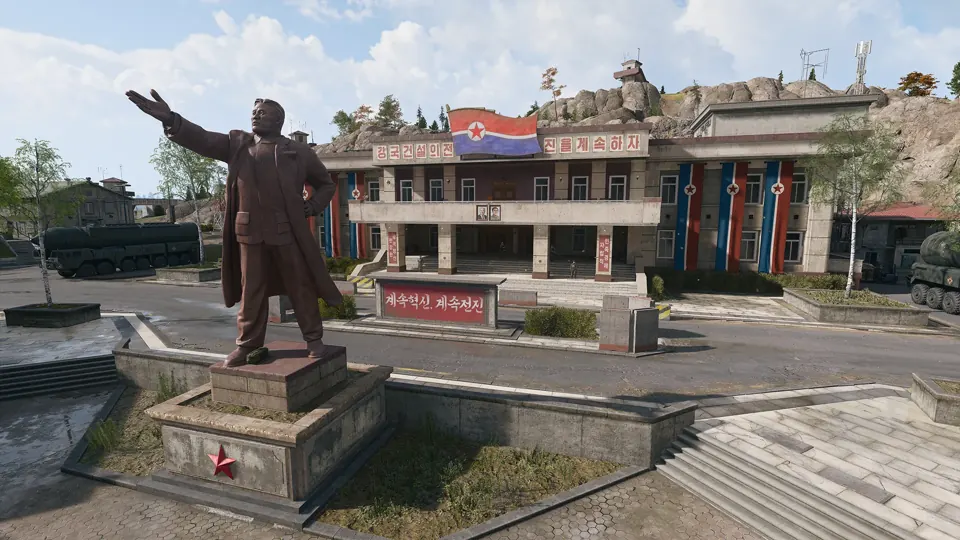 Strongholds · Grid B5
Stronghold in Hajin, marked on the official Call of Duty map.
Open Admin Complex No. 2 →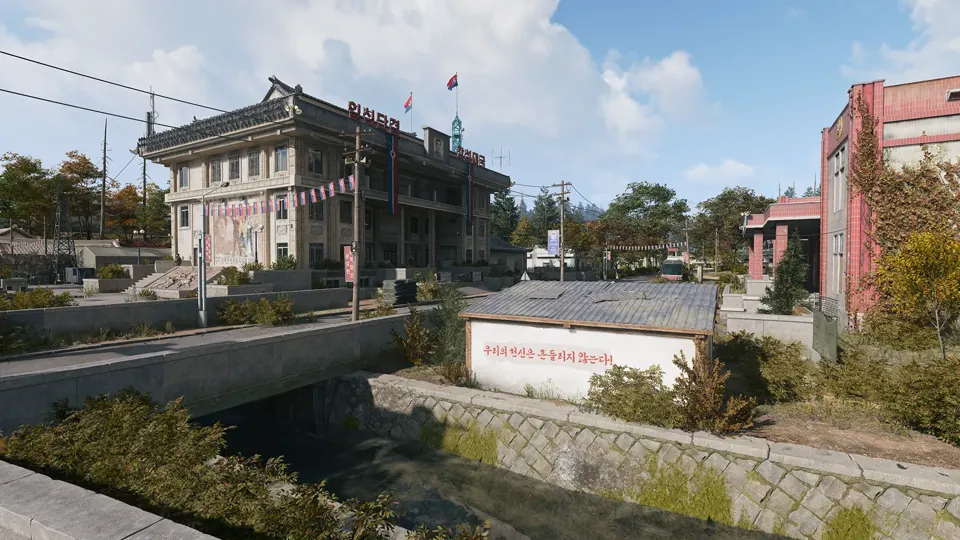 Strongholds · Grid B7
The two central Re-Education buildings, where enemy troops gather in numbers.
Open Re-Education Center →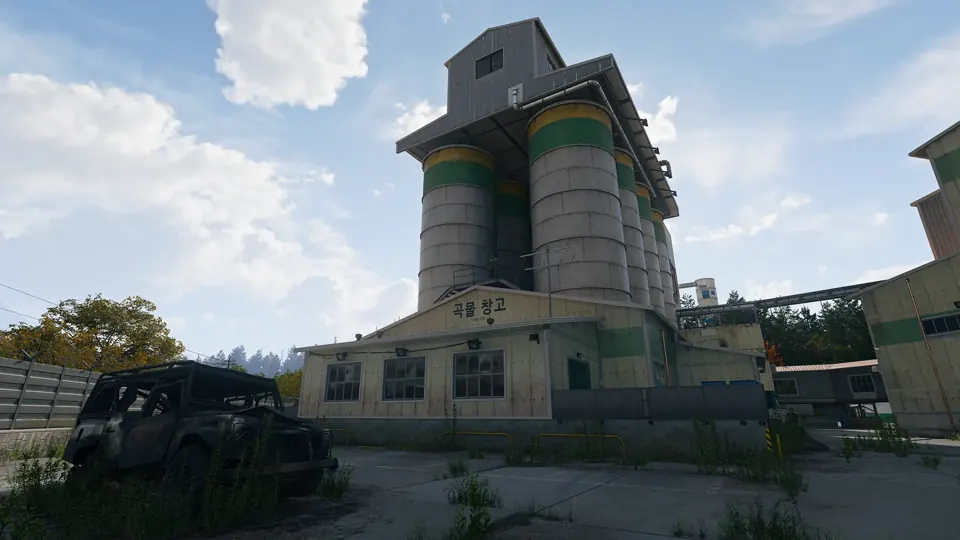 Strongholds · Grid D8
The industrial mill that towers over the farmland, a key elevated position reached through its warehouses.
Open Rice Mill →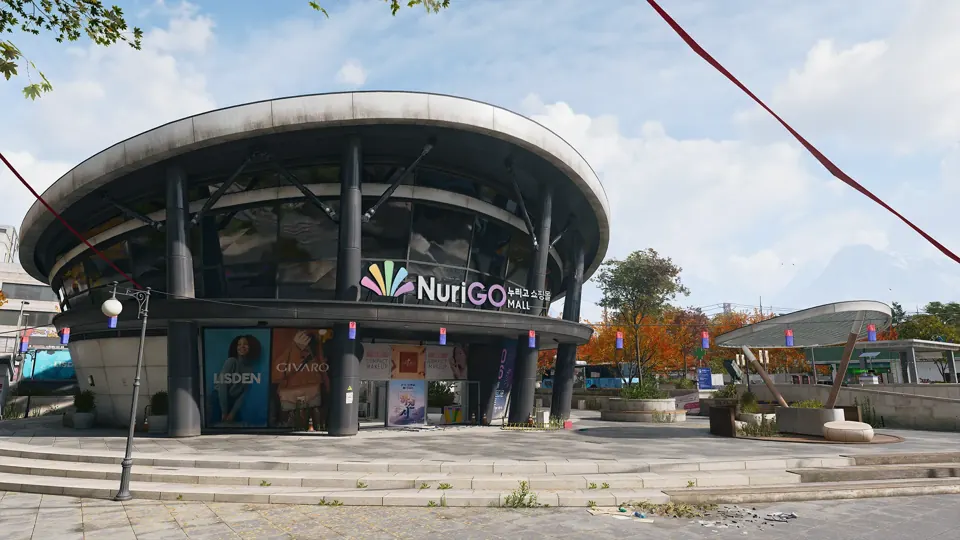 Strongholds · Grid H6
A shopping district in northeast Hajin City with shops, a police station, a clinic and City Hall above a large unlit underground mall.
Open NuriGO Mall →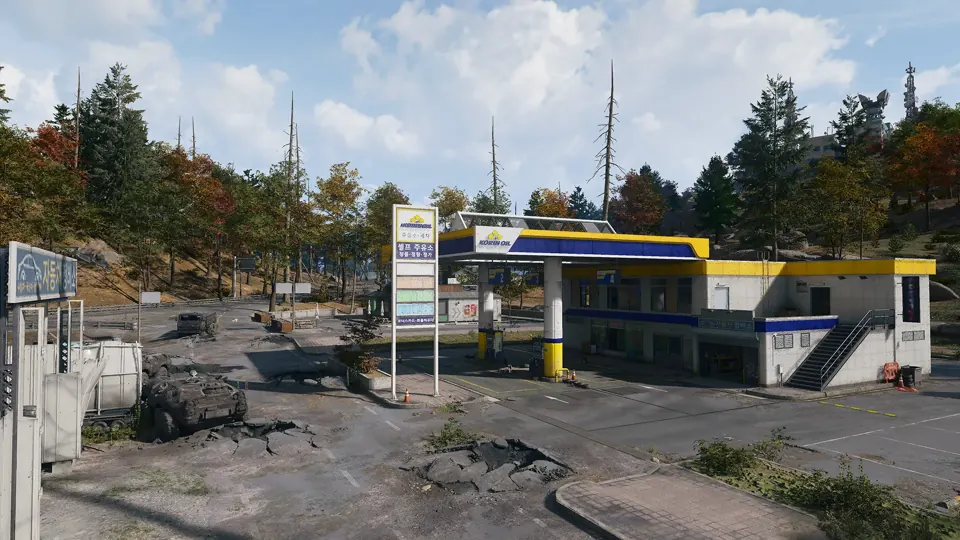
 Gas Stations · Grid D2
Repair and refuel vehicles or refill a gas can.
About Gas Stations → MW4 DMZ vehicles: infil prices, unlocks and every ride in Hajin → Gas Stations · Grid D4Repair and refuel vehicles or refill a gas can.
About Gas Stations → MW4 DMZ vehicles: infil prices, unlocks and every ride in Hajin → Gas Stations · Grid C5Repair and refuel vehicles or refill a gas can.
About Gas Stations → MW4 DMZ vehicles: infil prices, unlocks and every ride in Hajin → Gas Stations · Grid B6Repair and refuel vehicles or refill a gas can.
About Gas Stations → MW4 DMZ vehicles: infil prices, unlocks and every ride in Hajin → Gas Stations · Grid B7Repair and refuel vehicles or refill a gas can.
About Gas Stations → MW4 DMZ vehicles: infil prices, unlocks and every ride in Hajin → Gas Stations · Grid D8Repair and refuel vehicles or refill a gas can.
About Gas Stations → MW4 DMZ vehicles: infil prices, unlocks and every ride in Hajin →Gas Stations · Grid E9Repair and refuel vehicles or refill a gas can.
About Gas Stations → MW4 DMZ vehicles: infil prices, unlocks and every ride in Hajin → Gas Stations · Grid E4Repair and refuel vehicles or refill a gas can.
About Gas Stations → MW4 DMZ vehicles: infil prices, unlocks and every ride in Hajin → Gas Stations · Grid G4Repair and refuel vehicles or refill a gas can.
About Gas Stations → MW4 DMZ vehicles: infil prices, unlocks and every ride in Hajin → Gas Stations · Grid H5Repair and refuel vehicles or refill a gas can.
About Gas Stations → MW4 DMZ vehicles: infil prices, unlocks and every ride in Hajin → Gas Stations · Grid D6Repair and refuel vehicles or refill a gas can.
About Gas Stations → MW4 DMZ vehicles: infil prices, unlocks and every ride in Hajin → Gas Stations · Grid F6Repair and refuel vehicles or refill a gas can.
About Gas Stations → MW4 DMZ vehicles: infil prices, unlocks and every ride in Hajin → Gas Stations · Grid G6Repair and refuel vehicles or refill a gas can.
About Gas Stations → MW4 DMZ vehicles: infil prices, unlocks and every ride in Hajin → Gas Stations · Grid H5Repair and refuel vehicles or refill a gas can.
About Gas Stations → MW4 DMZ vehicles: infil prices, unlocks and every ride in Hajin → Gas Stations · Grid F7Repair and refuel vehicles or refill a gas can.
About Gas Stations → MW4 DMZ vehicles: infil prices, unlocks and every ride in Hajin → Gas Stations · Grid F8Repair and refuel vehicles or refill a gas can.
About Gas Stations → MW4 DMZ vehicles: infil prices, unlocks and every ride in Hajin → Gas Stations · Grid H7Repair and refuel vehicles or refill a gas can.
About Gas Stations → MW4 DMZ vehicles: infil prices, unlocks and every ride in Hajin → Gas Stations · Grid I6Repair and refuel vehicles or refill a gas can.
About Gas Stations → MW4 DMZ vehicles: infil prices, unlocks and every ride in Hajin →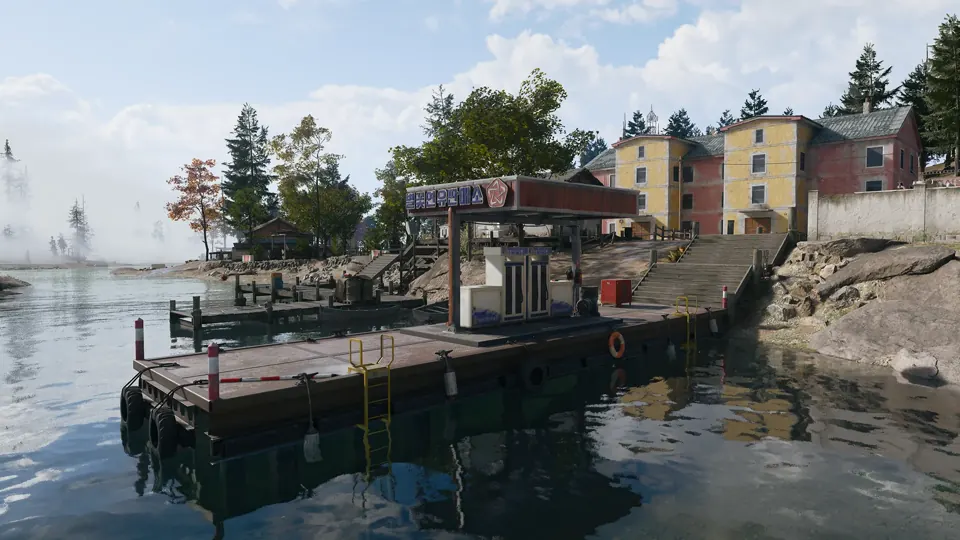
 Marine Gas Stations · Grid C2
Repair and refuel boats at a waterfront jetty with two pumps.
About Marine Gas Stations → MW4 DMZ vehicles: infil prices, unlocks and every ride in Hajin → Marine Gas Stations · Grid F4Repair and refuel boats at a waterfront jetty with two pumps.
About Marine Gas Stations → MW4 DMZ vehicles: infil prices, unlocks and every ride in Hajin → Marine Gas Stations · Grid I4Repair and refuel boats at a waterfront jetty with two pumps.
About Marine Gas Stations → MW4 DMZ vehicles: infil prices, unlocks and every ride in Hajin → Marine Gas Stations · Grid I7Repair and refuel boats at a waterfront jetty with two pumps.
About Marine Gas Stations → MW4 DMZ vehicles: infil prices, unlocks and every ride in Hajin → Marine Gas Stations · Grid G8Repair and refuel boats at a waterfront jetty with two pumps.
About Marine Gas Stations → MW4 DMZ vehicles: infil prices, unlocks and every ride in Hajin → Marine Gas Stations · Grid G9Repair and refuel boats at a waterfront jetty with two pumps.
About Marine Gas Stations → MW4 DMZ vehicles: infil prices, unlocks and every ride in Hajin →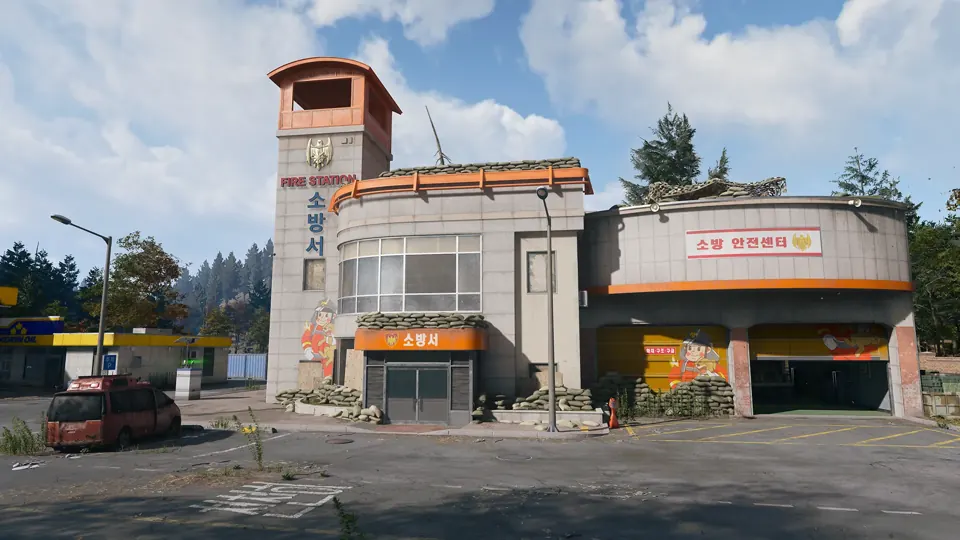
 Fire Stations · Grid C2
Search fire stations for radiation equipment and parachutes.
About Fire Stations → MW4 DMZ radiation guide: zones, protection and safe preparation → Fire Stations · Grid C5Search fire stations for radiation equipment and parachutes.
About Fire Stations → MW4 DMZ radiation guide: zones, protection and safe preparation → Fire Stations · Grid C6Search fire stations for radiation equipment and parachutes.
About Fire Stations → MW4 DMZ radiation guide: zones, protection and safe preparation → Fire Stations · Grid E4Search fire stations for radiation equipment and parachutes.
About Fire Stations → MW4 DMZ radiation guide: zones, protection and safe preparation → Fire Stations · Grid H6Search fire stations for radiation equipment and parachutes.
About Fire Stations → MW4 DMZ radiation guide: zones, protection and safe preparation → Fire Stations · Grid D8Search fire stations for radiation equipment and parachutes.
About Fire Stations → MW4 DMZ radiation guide: zones, protection and safe preparation →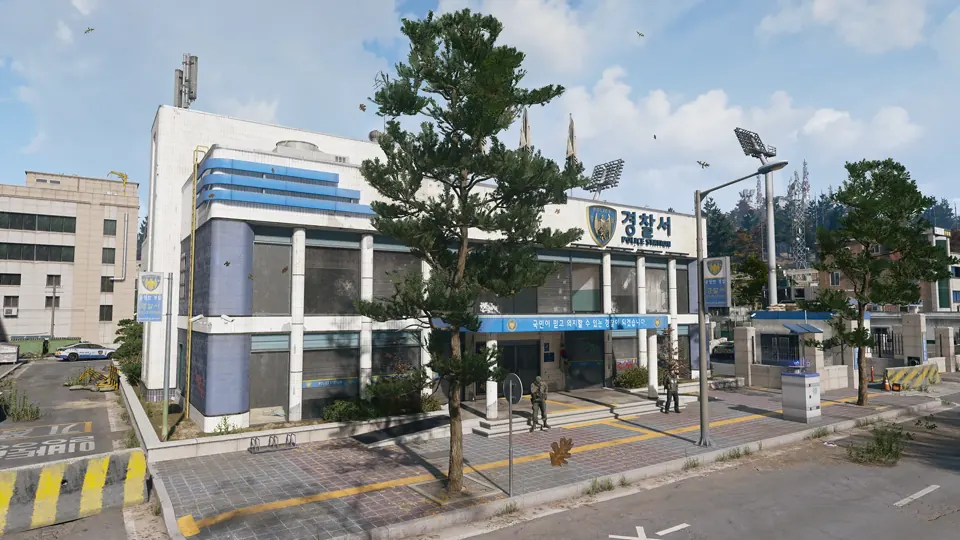
 Police Stations · Grid D3
Search police stations for military equipment and locked armories.
About Police Stations → MW4 DMZ Police Station locations: Hostile Force and armory → Police Stations · Grid C5Search police stations for military equipment and locked armories.
About Police Stations → MW4 DMZ Police Station locations: Hostile Force and armory → Police Stations · Grid F4Search police stations for military equipment and locked armories.
About Police Stations → MW4 DMZ Police Station locations: Hostile Force and armory → Police Stations · Grid H5Search police stations for military equipment and locked armories.
About Police Stations → MW4 DMZ Police Station locations: Hostile Force and armory → Police Stations · Grid G7Search police stations for military equipment and locked armories.
About Police Stations → MW4 DMZ Police Station locations: Hostile Force and armory →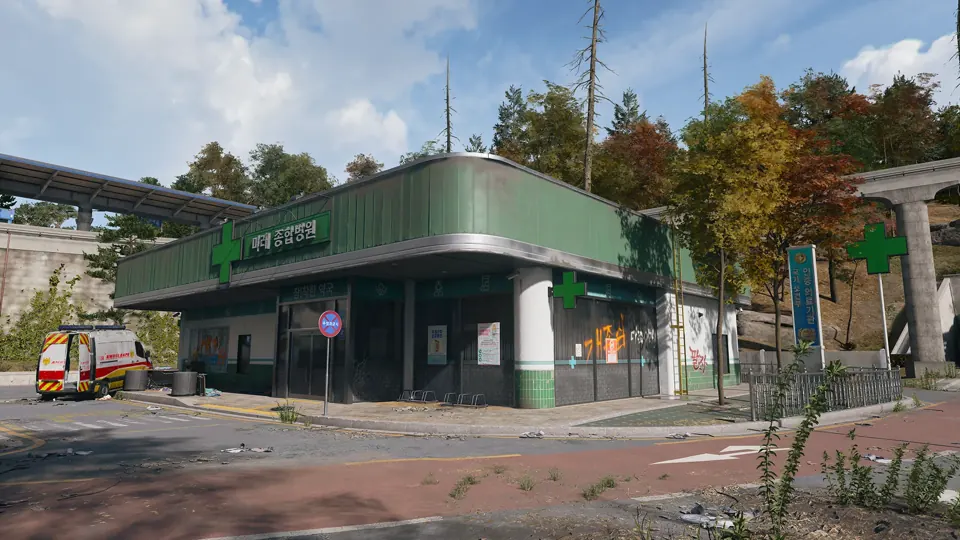
 Clinics · Grid D3
Search green-fronted clinics for medical supplies.
About Clinics → MW4 DMZ Triage Protocol: Clinic, Bandage and Chemicals → Clinics · Grid C4Search green-fronted clinics for medical supplies.
About Clinics → MW4 DMZ Triage Protocol: Clinic, Bandage and Chemicals → Clinics · Grid B5Search green-fronted clinics for medical supplies.
About Clinics → MW4 DMZ Triage Protocol: Clinic, Bandage and Chemicals → Clinics · Grid F4Search green-fronted clinics for medical supplies.
About Clinics → MW4 DMZ Triage Protocol: Clinic, Bandage and Chemicals → Clinics · Grid D5Search green-fronted clinics for medical supplies.
About Clinics → MW4 DMZ Triage Protocol: Clinic, Bandage and Chemicals → Clinics · Grid E7Search green-fronted clinics for medical supplies.
About Clinics → MW4 DMZ Triage Protocol: Clinic, Bandage and Chemicals → Clinics · Grid F7Search green-fronted clinics for medical supplies.
About Clinics → MW4 DMZ Triage Protocol: Clinic, Bandage and Chemicals →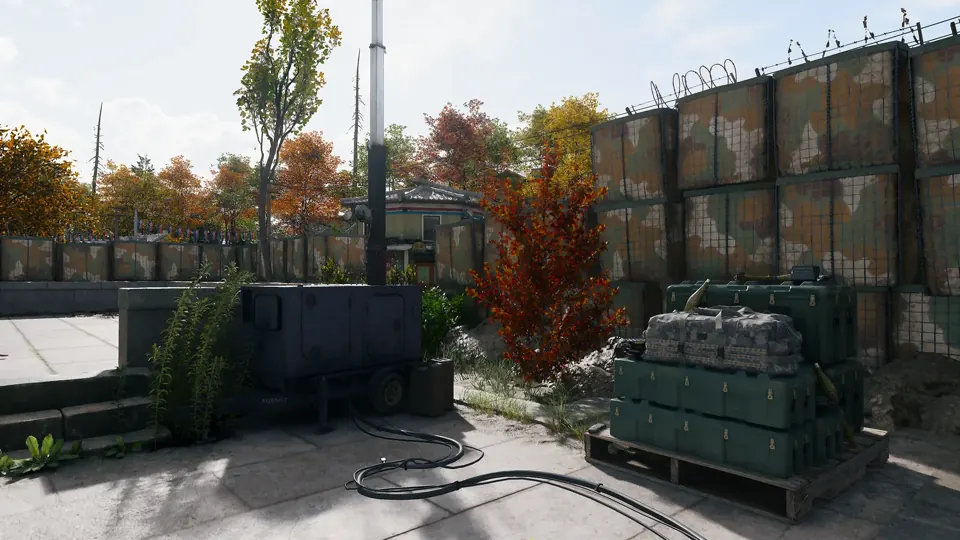
 Ammo & Armor Caches · Grid B3
Restock ammunition and armor plates, then wait for the cache cooldown before using it again.
About Ammo & Armor Caches → MW4 DMZ armor and backpacks: every plate carrier and bag → Ammo & Armor Caches · Grid B4Restock ammunition and armor plates, then wait for the cache cooldown before using it again.
About Ammo & Armor Caches → MW4 DMZ armor and backpacks: every plate carrier and bag → Ammo & Armor Caches · Grid B5Restock ammunition and armor plates, then wait for the cache cooldown before using it again.
About Ammo & Armor Caches → MW4 DMZ armor and backpacks: every plate carrier and bag → Ammo & Armor Caches · Grid B6Restock ammunition and armor plates, then wait for the cache cooldown before using it again.
About Ammo & Armor Caches → MW4 DMZ armor and backpacks: every plate carrier and bag → Ammo & Armor Caches · Grid B7Restock ammunition and armor plates, then wait for the cache cooldown before using it again.
About Ammo & Armor Caches → MW4 DMZ armor and backpacks: every plate carrier and bag → Ammo & Armor Caches · Grid D5Restock ammunition and armor plates, then wait for the cache cooldown before using it again.
About Ammo & Armor Caches → MW4 DMZ armor and backpacks: every plate carrier and bag → Ammo & Armor Caches · Grid D5Restock ammunition and armor plates, then wait for the cache cooldown before using it again.
About Ammo & Armor Caches → MW4 DMZ armor and backpacks: every plate carrier and bag → Ammo & Armor Caches · Grid F4Restock ammunition and armor plates, then wait for the cache cooldown before using it again.
About Ammo & Armor Caches → MW4 DMZ armor and backpacks: every plate carrier and bag → Ammo & Armor Caches · Grid F4Restock ammunition and armor plates, then wait for the cache cooldown before using it again.
About Ammo & Armor Caches → MW4 DMZ armor and backpacks: every plate carrier and bag → Ammo & Armor Caches · Grid F4Restock ammunition and armor plates, then wait for the cache cooldown before using it again.
About Ammo & Armor Caches → MW4 DMZ armor and backpacks: every plate carrier and bag → Ammo & Armor Caches · Grid F4Restock ammunition and armor plates, then wait for the cache cooldown before using it again.
About Ammo & Armor Caches → MW4 DMZ armor and backpacks: every plate carrier and bag → Ammo & Armor Caches · Grid F5Restock ammunition and armor plates, then wait for the cache cooldown before using it again.
About Ammo & Armor Caches → MW4 DMZ armor and backpacks: every plate carrier and bag → Ammo & Armor Caches · Grid I4Restock ammunition and armor plates, then wait for the cache cooldown before using it again.
About Ammo & Armor Caches → MW4 DMZ armor and backpacks: every plate carrier and bag → Ammo & Armor Caches · Grid H4Restock ammunition and armor plates, then wait for the cache cooldown before using it again.
About Ammo & Armor Caches → MW4 DMZ armor and backpacks: every plate carrier and bag → Ammo & Armor Caches · Grid H5Restock ammunition and armor plates, then wait for the cache cooldown before using it again.
About Ammo & Armor Caches → MW4 DMZ armor and backpacks: every plate carrier and bag → Ammo & Armor Caches · Grid H6Restock ammunition and armor plates, then wait for the cache cooldown before using it again.
About Ammo & Armor Caches → MW4 DMZ armor and backpacks: every plate carrier and bag → Ammo & Armor Caches · Grid H6Restock ammunition and armor plates, then wait for the cache cooldown before using it again.
About Ammo & Armor Caches → MW4 DMZ armor and backpacks: every plate carrier and bag → Ammo & Armor Caches · Grid G7Restock ammunition and armor plates, then wait for the cache cooldown before using it again.
About Ammo & Armor Caches → MW4 DMZ armor and backpacks: every plate carrier and bag → Ammo & Armor Caches · Grid G7Restock ammunition and armor plates, then wait for the cache cooldown before using it again.
About Ammo & Armor Caches → MW4 DMZ armor and backpacks: every plate carrier and bag → Ammo & Armor Caches · Grid H7Restock ammunition and armor plates, then wait for the cache cooldown before using it again.
About Ammo & Armor Caches → MW4 DMZ armor and backpacks: every plate carrier and bag → Ammo & Armor Caches · Grid I7Restock ammunition and armor plates, then wait for the cache cooldown before using it again.
About Ammo & Armor Caches → MW4 DMZ armor and backpacks: every plate carrier and bag → Ammo & Armor Caches · Grid G7Restock ammunition and armor plates, then wait for the cache cooldown before using it again.
About Ammo & Armor Caches → MW4 DMZ armor and backpacks: every plate carrier and bag → Ammo & Armor Caches · Grid G8Restock ammunition and armor plates, then wait for the cache cooldown before using it again.
About Ammo & Armor Caches → MW4 DMZ armor and backpacks: every plate carrier and bag → Ammo & Armor Caches · Grid D7Restock ammunition and armor plates, then wait for the cache cooldown before using it again.
About Ammo & Armor Caches → MW4 DMZ armor and backpacks: every plate carrier and bag → Ammo & Armor Caches · Grid E7Restock ammunition and armor plates, then wait for the cache cooldown before using it again.
About Ammo & Armor Caches → MW4 DMZ armor and backpacks: every plate carrier and bag → Ammo & Armor Caches · Grid F8Restock ammunition and armor plates, then wait for the cache cooldown before using it again.
About Ammo & Armor Caches → MW4 DMZ armor and backpacks: every plate carrier and bag → Ammo & Armor Caches · Grid D8Restock ammunition and armor plates, then wait for the cache cooldown before using it again.
About Ammo & Armor Caches → MW4 DMZ armor and backpacks: every plate carrier and bag → Ammo & Armor Caches · Grid D8Restock ammunition and armor plates, then wait for the cache cooldown before using it again.
About Ammo & Armor Caches → MW4 DMZ armor and backpacks: every plate carrier and bag →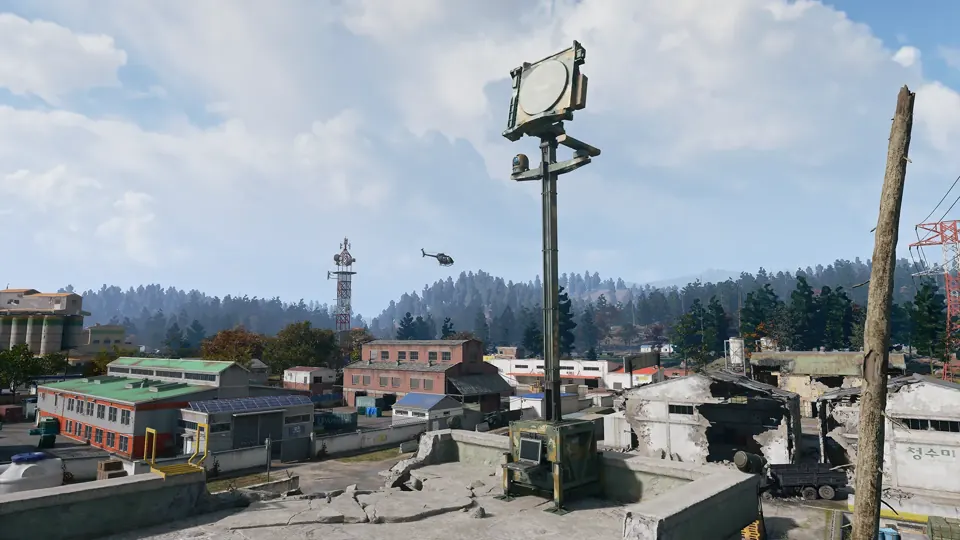
 UAV Towers · Grid B3
Activate a tower to reveal nearby operators and enemies and complete a Side Op.
About UAV Towers → MW4 DMZ UAV Towers and SAM sites: activation and defence → UAV Towers · Grid B5Activate a tower to reveal nearby operators and enemies and complete a Side Op.
About UAV Towers → MW4 DMZ UAV Towers and SAM sites: activation and defence → UAV Towers · Grid B7Activate a tower to reveal nearby operators and enemies and complete a Side Op.
About UAV Towers → MW4 DMZ UAV Towers and SAM sites: activation and defence → UAV Towers · Grid D7Activate a tower to reveal nearby operators and enemies and complete a Side Op.
About UAV Towers → MW4 DMZ UAV Towers and SAM sites: activation and defence → UAV Towers · Grid D8Activate a tower to reveal nearby operators and enemies and complete a Side Op.
About UAV Towers → MW4 DMZ UAV Towers and SAM sites: activation and defence → UAV Towers · Grid E4Activate a tower to reveal nearby operators and enemies and complete a Side Op.
About UAV Towers → MW4 DMZ UAV Towers and SAM sites: activation and defence → UAV Towers · Grid G4Activate a tower to reveal nearby operators and enemies and complete a Side Op.
About UAV Towers → MW4 DMZ UAV Towers and SAM sites: activation and defence → UAV Towers · Grid H4Activate a tower to reveal nearby operators and enemies and complete a Side Op.
About UAV Towers → MW4 DMZ UAV Towers and SAM sites: activation and defence → UAV Towers · Grid G5Activate a tower to reveal nearby operators and enemies and complete a Side Op.
About UAV Towers → MW4 DMZ UAV Towers and SAM sites: activation and defence → UAV Towers · Grid H5Activate a tower to reveal nearby operators and enemies and complete a Side Op.
About UAV Towers → MW4 DMZ UAV Towers and SAM sites: activation and defence → UAV Towers · Grid E6Activate a tower to reveal nearby operators and enemies and complete a Side Op.
About UAV Towers → MW4 DMZ UAV Towers and SAM sites: activation and defence → UAV Towers · Grid F8Activate a tower to reveal nearby operators and enemies and complete a Side Op.
About UAV Towers → MW4 DMZ UAV Towers and SAM sites: activation and defence → UAV Towers · Grid H8Activate a tower to reveal nearby operators and enemies and complete a Side Op.
About UAV Towers → MW4 DMZ UAV Towers and SAM sites: activation and defence → UAV Towers · Grid I7Activate a tower to reveal nearby operators and enemies and complete a Side Op.
About UAV Towers → MW4 DMZ UAV Towers and SAM sites: activation and defence →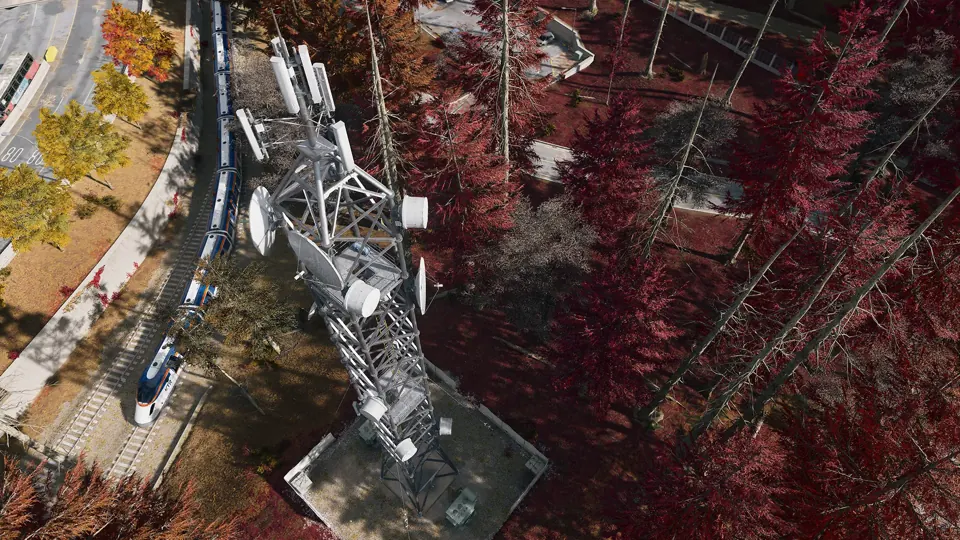
 Lieutenant Towers · Grid D3
Climb a communications tower and use its laptop to locate a nearby Lieutenant.
About Lieutenant Towers → MW4 DMZ Hunter: find and climb a Lieutenant Hunt tower → Lieutenant Towers · Grid B7Climb a communications tower and use its laptop to locate a nearby Lieutenant.
About Lieutenant Towers → MW4 DMZ Hunter: find and climb a Lieutenant Hunt tower → Lieutenant Towers · Grid G4Climb a communications tower and use its laptop to locate a nearby Lieutenant.
About Lieutenant Towers → MW4 DMZ Hunter: find and climb a Lieutenant Hunt tower → Lieutenant Towers · Grid F7Climb a communications tower and use its laptop to locate a nearby Lieutenant.
About Lieutenant Towers → MW4 DMZ Hunter: find and climb a Lieutenant Hunt tower → Lieutenant Towers · Grid H8Climb a communications tower and use its laptop to locate a nearby Lieutenant.
About Lieutenant Towers → MW4 DMZ Hunter: find and climb a Lieutenant Hunt tower → Exfils · Grid C6
Call an extraction helicopter at an active exfil and defend the area until you can board.
Active extraction sites vary by deployment. Check your Tac-Map before heading to an exit.
About Exfils → DMZ exfil guide: extraction methods and emergency plans →Exfils · Grid D7Call an extraction helicopter at an active exfil and defend the area until you can board.
Active extraction sites vary by deployment. Check your Tac-Map before heading to an exit.
About Exfils → DMZ exfil guide: extraction methods and emergency plans → SAM Sites · Grid B7
Hack and defend a SAM site to turn its missiles against enemy aircraft.
About SAM Sites → MW4 DMZ UAV Towers and SAM sites: activation and defence →SAM Sites · Grid C8Hack and defend a SAM site to turn its missiles against enemy aircraft.
About SAM Sites → MW4 DMZ UAV Towers and SAM sites: activation and defence →UAV Towers · Grid B5Activate a tower to reveal nearby operators and enemies and complete a Side Op.
About UAV Towers → MW4 DMZ UAV Towers and SAM sites: activation and defence →UAV Towers · Grid I7Activate a tower to reveal nearby operators and enemies and complete a Side Op.
About UAV Towers → MW4 DMZ UAV Towers and SAM sites: activation and defence →UAV Towers · Grid G7Activate a tower to reveal nearby operators and enemies and complete a Side Op.
About UAV Towers → MW4 DMZ UAV Towers and SAM sites: activation and defence → Radiation Zones · Grid H7
Check your Tac-Map for current radiation. Entering Haneul Nuclear Reactor requires Radiation Gear and a Gas Mask. Read the survival guide before heading into a contaminated area.
Approximate reported area. Check your current Tac-Map; boundaries and activity may change.
Radiation survival guide →The Y-shaped fortress inside the prison yard: gantries, cell blocks, a furnace and high value targets in a maze where squads are easily cut off.
Open The Citadel →Exfils · Grid D4Call an extraction helicopter at an active exfil and defend the area until you can board.
Active extraction sites vary by deployment. Check your Tac-Map before heading to an exit.
About Exfils → DMZ exfil guide: extraction methods and emergency plans →The industrial mill that towers over the farmland, a key elevated position reached through its warehouses.
Open Rice Mill →The two central Re-Education buildings, where enemy troops gather in numbers.
Open Re-Education Center →Stronghold in Hajin, marked on the official Call of Duty map.
Open Admin Complex No. 2 →Exfils · Grid F8Call an extraction helicopter at an active exfil and defend the area until you can board.
Active extraction sites vary by deployment. Check your Tac-Map before heading to an exit.
About Exfils → DMZ exfil guide: extraction methods and emergency plans →Exfils · Grid I7Call an extraction helicopter at an active exfil and defend the area until you can board.
Active extraction sites vary by deployment. Check your Tac-Map before heading to an exit.
About Exfils → DMZ exfil guide: extraction methods and emergency plans →SAM Sites · Grid I7Hack and defend a SAM site to turn its missiles against enemy aircraft.
About SAM Sites → MW4 DMZ UAV Towers and SAM sites: activation and defence →SAM Sites · Grid G7Hack and defend a SAM site to turn its missiles against enemy aircraft.
About SAM Sites → MW4 DMZ UAV Towers and SAM sites: activation and defence →SAM Sites · Grid G7Hack and defend a SAM site to turn its missiles against enemy aircraft.
About SAM Sites → MW4 DMZ UAV Towers and SAM sites: activation and defence →SAM Sites · Grid G6Hack and defend a SAM site to turn its missiles against enemy aircraft.
About SAM Sites → MW4 DMZ UAV Towers and SAM sites: activation and defence →SAM Sites · Grid G7Hack and defend a SAM site to turn its missiles against enemy aircraft.
About SAM Sites → MW4 DMZ UAV Towers and SAM sites: activation and defence →SAM Sites · Grid F8Hack and defend a SAM site to turn its missiles against enemy aircraft.
About SAM Sites → MW4 DMZ UAV Towers and SAM sites: activation and defence →Exfils · Grid G7Call an extraction helicopter at an active exfil and defend the area until you can board.
Active extraction sites vary by deployment. Check your Tac-Map before heading to an exit.
About Exfils → DMZ exfil guide: extraction methods and emergency plans →Exfils · Grid C5Call an extraction helicopter at an active exfil and defend the area until you can board.
Active extraction sites vary by deployment. Check your Tac-Map before heading to an exit.
About Exfils → DMZ exfil guide: extraction methods and emergency plans → Key Rooms · Grid B7
The Re-Education Center Annex is a ground-floor keyed room at the Re-Education Center in Deadtown. A recorded opening enters the annex side, turns immediately left and reaches the named room; underground equipment and propaganda storage are separate locks.
Required key: Re-Education Center Annex → Re-Education Center Annex: ground-floor key room and recipe search → Key Rooms · Grid F5
Opens a converted conference room in Mirae General Hospital's upper-floor offices, grid F5. Look for the wooden double office doors.
Required key: The Doctor's Command Office → The Doctor boss guide: hospital fight, office key and extraction →Exfils · Grid E4Call an extraction helicopter at an active exfil and defend the area until you can board.
Active extraction sites vary by deployment. Check your Tac-Map before heading to an exit.
About Exfils → DMZ exfil guide: extraction methods and emergency plans →Exfils · Grid B6Call an extraction helicopter at an active exfil and defend the area until you can board.
Active extraction sites vary by deployment. Check your Tac-Map before heading to an exit.
About Exfils → DMZ exfil guide: extraction methods and emergency plans →Radiation Zones · Grid C8Check your Tac-Map for current radiation. Entering Haneul Nuclear Reactor requires Radiation Gear and a Gas Mask. Read the survival guide before heading into a contaminated area.
Approximate reported area. Check your current Tac-Map; boundaries and activity may change.
Radiation survival guide → Key Rooms · Grid G6
Check the room's door for the required key.
Required key not identified. Match the named lock; this marker does not establish which key opens it.
Keys & loot rooms guide →Radiation Zones · Grid D6Check your Tac-Map for current radiation. Entering Haneul Nuclear Reactor requires Radiation Gear and a Gas Mask. Read the survival guide before heading into a contaminated area.
Approximate reported area. Check your current Tac-Map; boundaries and activity may change.
Radiation survival guide →Key Rooms · Grid D3Community-reported room area. Its identity does not match the district in the linked walkthrough; exact entrance and key compatibility are unverified.
Required key not identified. Match the named lock; this marker does not establish which key opens it.
MW4 DMZ Police Station locations: Hostile Force and armory →Key Rooms · Grid D8Imjin Farmland fire-station storage area. Look upstairs for the brown door by the stairwell in the yellow-and-red-striped corridor. Required key unknown.
Required key not identified. Match the named lock; this marker does not establish which key opens it.
About Fire Station Storage →Radiation Zones · Grid F7Check your Tac-Map for current radiation. Entering Haneul Nuclear Reactor requires Radiation Gear and a Gas Mask. Read the survival guide before heading into a contaminated area.
Approximate reported area. Check your current Tac-Map; boundaries and activity may change.
Radiation survival guide →Exfils · Grid E7Call an extraction helicopter at an active exfil and defend the area until you can board.
Active extraction sites vary by deployment. Check your Tac-Map before heading to an exit.
About Exfils → DMZ exfil guide: extraction methods and emergency plans →Exfils · Grid C4Call an extraction helicopter at an active exfil and defend the area until you can board.
Active extraction sites vary by deployment. Check your Tac-Map before heading to an exit.
About Exfils → DMZ exfil guide: extraction methods and emergency plans →Exfils · Grid H6Call an extraction helicopter at an active exfil and defend the area until you can board.
Active extraction sites vary by deployment. Check your Tac-Map before heading to an exit.
About Exfils → DMZ exfil guide: extraction methods and emergency plans → Key Rooms · Grid H7
Use the Gas Station Electrical Room key in the Construction Zone gas station near Songdo Wharf. Enter the station and descend its interior stairs; the named electrical-room door is around the basement corner.
Required key: Gas Station Electrical Room → Gas Station Electrical Room: Construction Zone basement route → Key Rooms · Grid G6
Opens the Coin Mining Den in NuriGO West; look for the grey office door beside a red fire alarm.
Required key: Coin Mining Den Key → Coin Mining Den: key reward and door route → Key Rooms · Grid F4
Opens the counting-room vault behind the Cashier shopfront on the main floor of Heavenly Luck Casino.
Required key: Counting Room Vault → MW4 DMZ Counting Room Vault key: find the casino's main-floor door → Key Rooms · Grid F4
Use the Vault Armory key in Heavenly Luck Casino's underground parking. Descend from the gaming floor and find the caged armory near the restricted-area door. The parking security gate and main-floor Counting Room use different access.
Required key: Vault Armory → Vault Armory key: casino parking route and separate vault gate → Key Rooms · Grid F7
Iskra’s Control Room key required. The room is in the broadcast building at Cheonwang Peak Array.
Required key: Iskra’s Control Room → Cheonwang Peak Array loot route: three safes and electronics → Key Rooms · Grid B5Field Depot key unlocks the first-floor gear-maintenance room in the military supply warehouse northeast of Chang-san Air Base's clinic. This existing reference marks an approximate area; match the named lock.
Required key: Field Depot → Field Depot: air-base warehouse and maintenance-room entrance → Key Rooms · Grid I6Gun-store basement weapons lockers. One observed use consumed one key for one locker; other cabinets remained locked. Two gun-store locations are mapped.
Required key: Gun Store Weapons Locker Key → MW4 DMZ Gun Store and Black Market Weapons Locker keys → Key Rooms · Grid E4Gun-store basement weapons lockers. One observed use consumed one key for one locker; other cabinets remained locked. Two gun-store locations are mapped.
Required key: Gun Store Weapons Locker Key → MW4 DMZ Gun Store and Black Market Weapons Locker keys →Radiation Zones · Grid E8Check your current Tac-Map for radiation in this area and bring appropriate protective equipment.
Approximate reported area. Check your current Tac-Map; boundaries and activity may change.
Radiation survival guide →Exfils · Grid C3Extraction reference point. Availability varies by deployment; check your current Tac-Map for active exfils.
Active extraction sites vary by deployment. Check your Tac-Map before heading to an exit.
About Exfils → DMZ exfil guide: extraction methods and emergency plans →Exfils · Grid C5Extraction reference point. Availability varies by deployment; check your current Tac-Map for active exfils.
Active extraction sites vary by deployment. Check your Tac-Map before heading to an exit.
About Exfils → DMZ exfil guide: extraction methods and emergency plans →Exfils · Grid H5Extraction reference point. Availability varies by deployment; check your current Tac-Map for active exfils.
Active extraction sites vary by deployment. Check your Tac-Map before heading to an exit.
About Exfils → DMZ exfil guide: extraction methods and emergency plans →Radiation Zones · Grid D3Check your current Tac-Map for radiation in this area and bring appropriate protective equipment.
Approximate reported area. Check your current Tac-Map; boundaries and activity may change.
Radiation survival guide → Silos · Grid C4
Silo location, previously labeled as a bunker. Access requirements and the interior route remain unverified.
DMZ silo loot route: entrances, inner doors and lockers →Exfils · Grid B1Final Exfil reference point. Check the extraction countdown and your current Tac-Map; this is not a guaranteed exit in every deployment.
Active extraction sites vary by deployment. Check your Tac-Map before heading to an exit.
About Exfils → DMZ exfil guide: extraction methods and emergency plans → Key Rooms · Grid B7Underground Propaganda Store Room beneath the Re-Education Center. Match the named lock; the exact entrance is not mapped.
Required key: Underground Propaganda Store Room → Underground Propaganda Store Room: route and lever choice →Exfils · Grid G7Extraction point.
Active extraction sites vary by deployment. Check your Tac-Map before heading to an exit.
About Exfils → DMZ exfil guide: extraction methods and emergency plans → Player Spawns · Grid H9
Player starting location.
Read spawn markers and plan →Radiation Zones · Grid I4Radiation zone. Bring protective gear.
Radiation survival guide →Exfils · Grid F8Extraction point.
Active extraction sites vary by deployment. Check your Tac-Map before heading to an exit.
About Exfils → DMZ exfil guide: extraction methods and emergency plans →Exfils · Grid B7Extraction point.
Active extraction sites vary by deployment. Check your Tac-Map before heading to an exit.
About Exfils → DMZ exfil guide: extraction methods and emergency plans → Dead Drops · Grid G8
Dead-drop container.
Dead drops & extracting gear →Player Spawns · Grid F5Player starting location.
Read spawn markers and plan →Player Spawns · Grid D3Player starting location.
Read spawn markers and plan →Exfils · Grid E5Extraction point.
Active extraction sites vary by deployment. Check your Tac-Map before heading to an exit.
About Exfils → DMZ exfil guide: extraction methods and emergency plans →Player Spawns · Grid I5Player starting location.
Read spawn markers and plan →Exfils · Grid G5Extraction point.
Active extraction sites vary by deployment. Check your Tac-Map before heading to an exit.
About Exfils → DMZ exfil guide: extraction methods and emergency plans →Exfils · Grid C6Extraction point.
Active extraction sites vary by deployment. Check your Tac-Map before heading to an exit.
About Exfils → DMZ exfil guide: extraction methods and emergency plans →Player Spawns · Grid A8Player starting location.
Read spawn markers and plan →Player Spawns · Grid A3Player starting location.
Read spawn markers and plan →Player Spawns · Grid B1Player starting location.
Read spawn markers and plan →Exfils · Grid I6Extraction point.
Active extraction sites vary by deployment. Check your Tac-Map before heading to an exit.
About Exfils → DMZ exfil guide: extraction methods and emergency plans →Player Spawns · Grid I9Player starting location.
Read spawn markers and plan →Player Spawns · Grid E4Player starting location.
Read spawn markers and plan → Key Rooms · Grid G7Opens the lower-floor armory in Gangbyeon Apartment B at the Hajin River Heights compound; the card lists G7.
Required key: Militia Arms Depot → Militia Arms Depot: Apartment B and the two keys →Key Rooms · Grid F5Room location.
Required key not identified. Match the named lock; this marker does not establish which key opens it.
The Doctor boss guide: hospital fight, office key and extraction → Key Rooms · Grid G6
Take the Hanex Guard Station key to Hanex Bank in The Grid. The recorded route climbs to floor 18, descends to 17 and reaches the keyed guard room near the vault. Nearby code safes are separate interactions.
Required key: Hanex Guard Station → Hanex Guard Station: floor 17 route and key →Key Rooms · Grid A7A named locked control room in an underground silo complex; the approach passes a stairway near silo 42.
Required key not identified. Match the named lock; this marker does not establish which key opens it.
Open Silo Control Room area → DMZ silo loot route: entrances, inner doors and lockers → Key Rooms · Grid F5Use the Mechanic's Shack key at the small standalone hut immediately south of Cheongun Village's clinic. Its card lists F5; use the clinic, hut and named lock when the map's grid placement differs.
Required key: Mechanic's Shack → Mechanic's Shack key: find the hut south of the clinic → Key Rooms · Grid B6
Second-floor office in Admin Complex No. 2. Look for the red-curtain and flag corridor, then match the named lock.
Required key: Commandant Office → Commandant Office B5: Air Base key-room route and loot →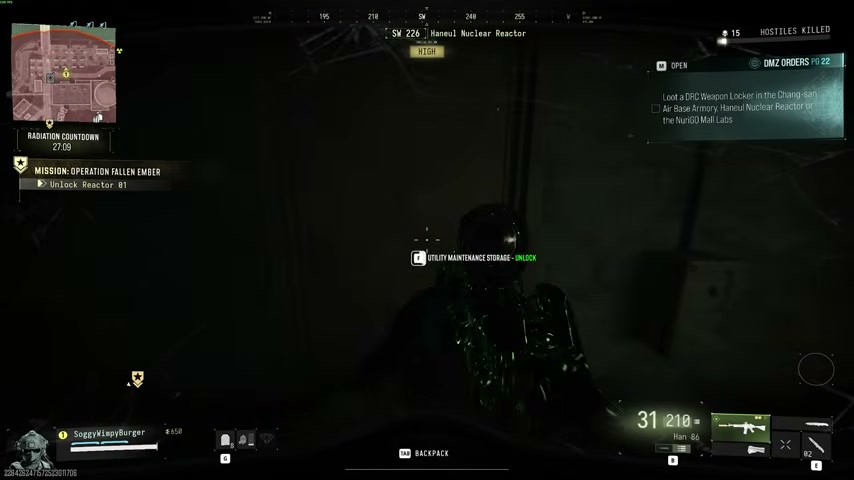 Key Rooms · Grid I4
Utility Maintenance Storage: descend beneath the transformer yard beside Reactor 01 and look for the named single door. Approximate reactor area; follow the room guide to reach the entrance.
Required key: Utility Maintenance Storage → Utility Maintenance Storage H4: Reactor 01 key-room route →Player Spawns · Grid D2Player starting location.
Read spawn markers and plan → Bounty Stations · Grid H6
Rooftop Bounty Station in NuriGO East. The marker shows the building area. Use the laptop to view Wanted players, buy intel or reduce your bounty.
About Bounty Stations → MW4 DMZ bounties: how the Wanted system works → Vehicle Sightings · Grid H6
Vehicle seen at this position during gameplay. Vehicles move and may be taken or destroyed; this is not a guaranteed spawn.
Vehicles guide →Vehicle Sightings · Grid H6Vehicle seen at this position during gameplay. Vehicles move and may be taken or destroyed; this is not a guaranteed spawn.
Vehicles guide →SAM Sites · Grid H6SAM site in The Grid. Control and availability can change; check your current Tac-Map.
About SAM Sites → MW4 DMZ UAV Towers and SAM sites: activation and defence →Vehicle Sightings · Grid H7Vehicle seen at this position during gameplay. Vehicles move and may be taken or destroyed; this is not a guaranteed spawn.
Vehicles guide → Dynamic Op Phones · Grid H7
Dynamic Op phone seen in gameplay. Available operations can vary by deployment; check your current Tac-Map.
About Dynamic Op Phones → MW4 DMZ Dynamic Ops and Side Ops: objectives and walkthroughs →Vehicle Sightings · Grid I6Vehicle seen at this position during gameplay. Vehicles move and may be taken or destroyed; this is not a guaranteed spawn.
Vehicles guide →Dynamic Op Phones · Grid I7Dynamic Op phone seen in gameplay. Available operations can vary by deployment; check your current Tac-Map.
About Dynamic Op Phones → MW4 DMZ Dynamic Ops and Side Ops: objectives and walkthroughs →Vehicle Sightings · Grid I7Vehicle seen at this position during gameplay. Vehicles move and may be taken or destroyed; this is not a guaranteed spawn.
Vehicles guide →Vehicle Sightings · Grid I7Vehicle seen at this position during gameplay. Vehicles move and may be taken or destroyed; this is not a guaranteed spawn.
Vehicles guide →Vehicle Sightings · Grid I7Vehicle seen at this position during gameplay. Vehicles move and may be taken or destroyed; this is not a guaranteed spawn.
Vehicles guide →Vehicle Sightings · Grid I8Vehicle seen at this position during gameplay. Vehicles move and may be taken or destroyed; this is not a guaranteed spawn.
Vehicles guide →Vehicle Sightings · Grid I6Vehicle seen at this position during gameplay. Vehicles move and may be taken or destroyed; this is not a guaranteed spawn.
Vehicles guide →UAV Towers · Grid F5Service location seen in gameplay. Check your current Tac-Map before heading here.
About UAV Towers → MW4 DMZ UAV Towers and SAM sites: activation and defence →Ammo & Armor Caches · Grid G5Service location seen in gameplay. Check your current Tac-Map before heading here.
About Ammo & Armor Caches → MW4 DMZ armor and backpacks: every plate carrier and bag →Compounds · Grid G5Service location seen in gameplay. Check your current Tac-Map before heading here.
About Compounds → MW4 DMZ Compounds: clearing, safes and Medical Extraction Intel →Clinics · Grid F5Service location seen in gameplay. Check your current Tac-Map before heading here.
About Clinics → MW4 DMZ Triage Protocol: Clinic, Bandage and Chemicals →Vehicle Sightings · Grid G5Vehicle seen at this position during gameplay. Vehicles move and may be taken or destroyed; this is not a guaranteed spawn.
Vehicles guide → Key Rooms · Grid H7
Use the Lucera Suite 703 Bedroom key inside Suite 703 on Hotel Lucera's upper apartment floors. Reach the high lobby zipline landing, orient by the stairwell's 12 sign and continue upstairs to the suite; 703 is the suite number, not proof of floor seven.
Required key: Lucera Suite 703 Bedroom → Lucera Suite 703 Bedroom: hotel ascent and inner locked door →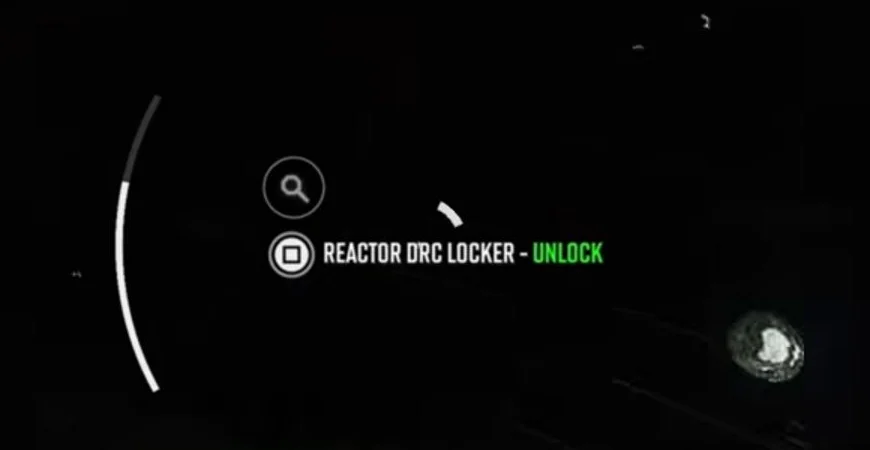
 Key Rooms · Grid I4
Reactor DRC Locker: search the underwater pool area and match the named locker prompt. The map marks the reported area; use the walkthrough for the approach and prepare to surface between searches.
Required key: Reactor DRC Locker → Reactor DRC Locker: key, underwater location and loot → Key Rooms · Grid B7
Upstairs school armory with exterior access.
Required key: Haksan School Armory → Haksan School Armory: upstairs door and key → Key Rooms · Grid B7Blackmarket weapons-locker basement area in Southern Deadtown. Hanrim Village is a separate destination. Match the named lock; the exact entrance is unverified.
Required key: Black Market Weapons Locker Key → MW4 DMZ Gun Store and Black Market Weapons Locker keys → Medical Containers · Grid B8
Search this medical container for supplies.
Loot: keep, sell or craft →Medical Containers · Grid B8Search this medical container for supplies.
Loot: keep, sell or craft →Medical Containers · Grid B8Search this medical container for supplies.
Loot: keep, sell or craft →Medical Containers · Grid F9Search this medical container for supplies.
Loot: keep, sell or craft → Bags & Clothing · Grid F9
Search bags and clothing for loot.
Loot: keep, sell or craft →Medical Containers · Grid F9Search this medical container for supplies.
Loot: keep, sell or craft → Key Rooms · Grid D6
Haejeok Radio Station: look for the red radio tower and small flat-roof building in Imjin Suburb, then the brown interior door beside three framed pictures. Match the named lock. Approximate location.
Required key: Haejeok Radio Station → Haejeok Radio Station key: room and entrance →Radiation Zones · Grid I9Radiation zone. Bring protective gear.
Approximate reported area. Check your current Tac-Map; boundaries and activity may change.
Radiation survival guide → Key Rooms · Grid G7Auxiliary armory beside the Wolves Stadium police station. Use the Police Weapon Depository key; the exact doorway is unverified.
Required key: Police Weapon Depository → MW4 DMZ Police Station locations: Hostile Force and armory →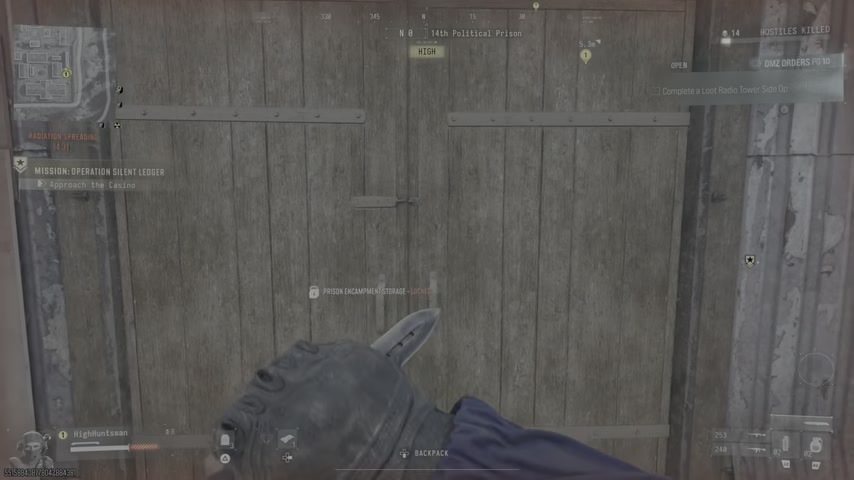 Key Rooms · Grid C3
Prison Encampment Storage: follow the narrow passage between the white building and fence to the wooden double doors. Check the named lock. Approximate location.
Required key: Prison Encampment Storage → Prison Encampment Storage: key and entrance →SAM Sites · Grid H8SAM site.
About SAM Sites → MW4 DMZ UAV Towers and SAM sites: activation and defence →SAM Sites · Grid G5SAM site.
About SAM Sites → MW4 DMZ UAV Towers and SAM sites: activation and defence →Clinics · Grid B7Clinic in Deadtown.
About Clinics → MW4 DMZ Triage Protocol: Clinic, Bandage and Chemicals →Radiation Zones · Grid B3Radiation zone. Bring protective gear.
Approximate reported area. Check your current Tac-Map; boundaries and activity may change.
Radiation survival guide → Hidden Caches · Grid B2
Cache inside the corrugated rusty shack. Search inside the structure rather than only around its exterior.
Rockets, caches & bodies →Hidden Caches · Grid C5Cache inside a highway service tunnel, near the sewer outlet pipe.
Rockets, caches & bodies → Decontamination · Grid I4
Decontamination station for irradiated containers at Haneul Nuclear Reactor.
About Decontamination → MW4 DMZ Irradiated Container: how to decontaminate it → Lootable Corpses · Grid C2
Lootable body underneath the highway bridge. This is a static loot reference, not a current player-death marker.
Rockets, caches & bodies →UAV Towers · Grid I4UAV tower.
About UAV Towers → MW4 DMZ UAV Towers and SAM sites: activation and defence →SAM Sites · Grid H4SAM site.
About SAM Sites → MW4 DMZ UAV Towers and SAM sites: activation and defence →Radiation Zones · Grid D9Radiation zone. Bring protective gear.
Approximate reported area. Check your current Tac-Map; boundaries and activity may change.
Radiation survival guide → Key Rooms · Grid D8Hoesik Supply Room area. Check the key-marked building and match the lock name; exact doorway unverified.
Required key: Hoesik Supply Room → Hoesik Supply Room: Rice Mill office route →Bounty Stations · Grid F4Bounty station.
About Bounty Stations → MW4 DMZ bounties: how the Wanted system works →SAM Sites · Grid F5SAM site.
About SAM Sites → MW4 DMZ UAV Towers and SAM sites: activation and defence →Bounty Stations · Grid D8Bounty station.
About Bounty Stations → MW4 DMZ bounties: how the Wanted system works →Exfils · Grid F5Final extraction point.
Active extraction sites vary by deployment. Check your Tac-Map before heading to an exit.
About Exfils → DMZ exfil guide: extraction methods and emergency plans →Hidden Caches · Grid G9Hidden cache beside a broken tree. Use the tree as an approach clue; contents vary.
Rockets, caches & bodies → Key Rooms · Grid G7
Room location.
Required key: Gangbyeon Apartment B → Militia Arms Depot: Apartment B and the two keys →Key Rooms · Grid B7Named Underground Equipment Storage lock confirmed on a weathered green metal door in the Re-Education Center basement. Reported approach: southern entrance, descend twice and follow the right wall. Separate from the Propaganda Store Room; this is an approximate area marker.
Check the named lock for the required key. Follow the room guide for access.
Equipment Storage route →Key Rooms · Grid E4Cheongun Village fire-station storage area. Follow the upstairs striped stairwell route. This is separate from the Imjin station; shared-key compatibility is untested.
Required key not identified. Match the named lock; this marker does not establish which key opens it.
About Fire Station Storage →Key Rooms · Grid G7Police-station armory area. This is separate from Police Weapon Depository; the matching key is not established here.
Required key not identified. Match the named lock; this marker does not establish which key opens it.
MW4 DMZ Police Station locations: Hostile Force and armory →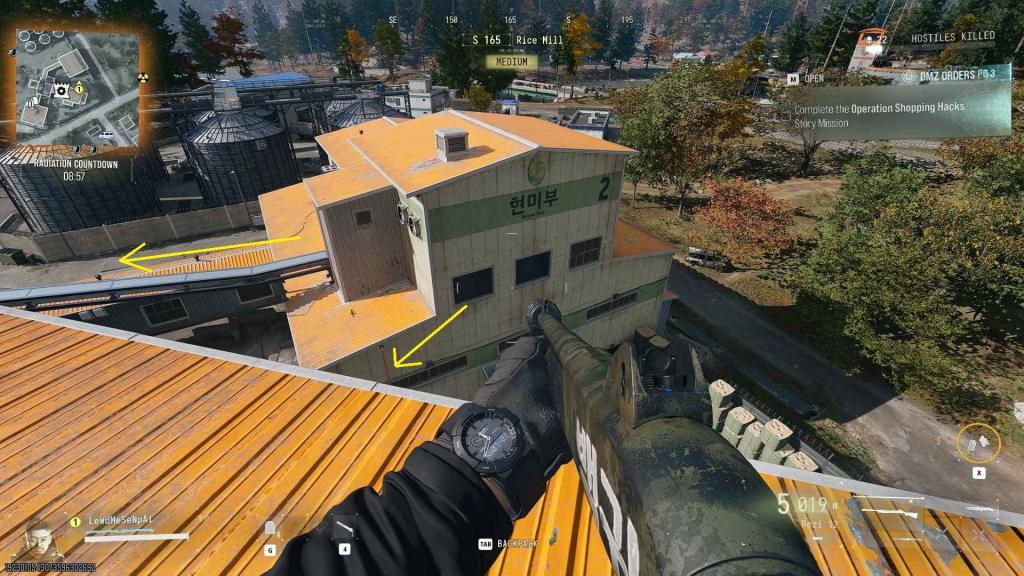
 Key Rooms · Grid D8
Rice Mill roof: climb the pipe at building 2, cross the conveyor platform and climb past the broken stairs to the Scout Overlook.
Required key: Gorani’s Scout Overlook → Gorani’s Scout Overlook key: room and entrance →Key Rooms · Grid F4Room location.
Floor reference only. Identify the actual room or vault before choosing a key.
MW4 DMZ Counting Room Vault key: find the casino's main-floor door → Key Rooms · Grid F4Casino lounge area. Follow the generator and penthouse route, then match JIN-TAE’S PRIVATE LOUNGE on the lock.
Required key: Jin-Tae’s Private Lounge → MW4 DMZ Jin-Tae’s Private Lounge key: casino penthouse route →Key Rooms · Grid C4Room location.
Required key not identified. Match the named lock; this marker does not establish which key opens it.
DMZ silo loot route: entrances, inner doors and lockers →Key Rooms · Grid A5Room location.
Required key not identified. Match the named lock; this marker does not establish which key opens it.
DMZ silo loot route: entrances, inner doors and lockers → Key Rooms · Grid B3Citadel secondary control-room area. Use the matching key, then the security station to open the camera-controlled gates. Approximate location.
Required key: The Citadel Secondary Control Room → Prison loot route: K9 cores, armory key and security cells →Hidden Caches · Grid C4Cache tucked into an exterior corner of the small electrical-substation building west of Pyonghwa Village.
Rockets, caches & bodies → Loot Rockets · Grid C4
Rocket inside a North Korean Wilderness bungalow, between the kitchen and lounge after penetrating the roof.
Rockets, caches & bodies → Key Rooms · Grid I7Use the Old Barber Shop key beside the crab shack on the southern side of Songdo Wharf. The key lists I7. The visible crab sign is the useful exterior landmark before checking the barber-shop lock.
Required key: Old Barber Shop → Old Barber Shop key: crab-shack landmark at Songdo Wharf → Safes · Grid B5
Community-reported safe location. Check whether it is present and unopened; contents vary.
Find and open safes →Radiation Zones · Grid H8Radiation area. This point does not show the hazard boundary; check your Tac-Map and prepare protection.
Approximate reported area. Check your current Tac-Map; boundaries and activity may change.
Radiation survival guide → Key Rooms · Grid F7The Shop Records Room key is used in the shop building south of Wolves Stadium's clinic, in the F7 search area. Use the supermarket/pharmacy frontage to identify the building, climb its stairs and confirm the named room.
Required key: Shop Records Room → Shop Records Room: Wolves Stadium shop and upstairs door →Safes · Grid F6Community-reported safe location. Check whether it is present and unopened; contents vary.
Find and open safes →Player Spawns · Grid A6Player starting area. Starting positions vary by deployment; a nearby team is not guaranteed.
Read spawn markers and plan → Key Rooms · Grid C2Approximate community-reported room area; match the named lock. The exact door is not mapped.
Required key: Black Market Weapons Locker Key → MW4 DMZ Gun Store and Black Market Weapons Locker keys →Player Spawns · Grid B9Player starting area. Starting positions vary by deployment; a nearby team is not guaranteed.
Read spawn markers and plan →Key Rooms · Grid D8Rice Mill bunker area. The required access item and exact entrance are unverified; this is separate from the Foreman’s Office.
Required key not identified. Match the named lock; this marker does not establish which key opens it.
Keys & loot rooms guide → Key Rooms · Grid D8Use the Imjin Mill Foreman's Office key at Rice Mill in Imjin Farmland, in the D8 search area. The written route clears the ground level, climbs one floor and finds the office on the far-left side of the upper room.
Required key: Imjin Mill Foreman's Office → Imjin Mill Foreman's Office: Rice Mill upstairs key route →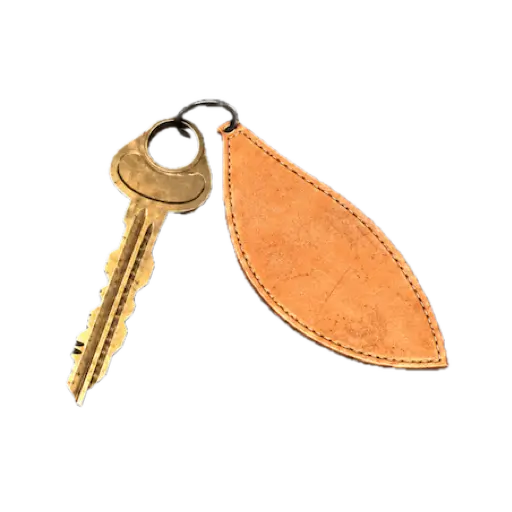 Key Rooms · Grid G6
Approximate community-reported room area; match the named lock. The exact door is not mapped.
Required key: Roze's High-Rise Armory → Roze’s High-Rise Armory: Netshin door route →Safes · Grid H5Community-reported safe location. Check whether it is present and unopened; contents vary.
Find and open safes →Loot Rockets · Grid E5Community-reported rocket loot site. Check the site in your deployment; contents are not guaranteed.
Rockets, caches & bodies →Player Spawns · Grid G6Approximate Story Mission starting area. Select this mission before deployment.
MW4 DMZ Shopping Hacks: K9 cores, lab computers and extraction →Player Spawns · Grid F5Approximate Story Mission starting area. Select this mission before deployment.
MW4 DMZ Silent Ledger: generator, basement vault and extraction →Player Spawns · Grid G5Approximate Story Mission starting area. Select this mission before deployment.
MW4 DMZ Critical Extraction: General Kang and rooftop rescue →Safes · Grid H5Community-reported safe location. Check whether it is present and unopened; contents vary.
Find and open safes →Safes · Grid E6Community-reported safe location. Check whether it is present and unopened; contents vary.
Find and open safes →Safes · Grid B5Community-reported safe location. Check whether it is present and unopened; contents vary.
Find and open safes →Safes · Grid E6Community-reported safe location. Check whether it is present and unopened; contents vary.
Find and open safes →Safes · Grid G8Community-reported safe location. Check whether it is present and unopened; contents vary.
Find and open safes →Hidden Caches · Grid E9Cache between rocks. Search the ground-level gaps; no fixed contents are established.
Rockets, caches & bodies → Key Rooms · Grid G6Approximate community-reported room area in The Grid. Match the named lock; the exact entrance is unverified.
Required key: Executive Arms Auction → Executive Arms Auction: DBN tower and door route → Key Rooms · Grid G6Approximate community-reported room area in The Grid. Match the named lock; the exact entrance is unverified.
Required key: Netshin IT Room → MW4 DMZ Netshin IT Room key: location, floor route and exit → Key Rooms · Grid H6Approximate community-reported room area in NuriGO Mall underground. Match the named lock; the exact entrance is unverified.
Required key: Shopping DRC Locker → Shopping DRC Locker: key, extra cores and lab route →SAM Sites · Grid E4Approximate community-reported SAM site north of Cheongun Village. Check the current match; the exact position and activation are unverified.
About SAM Sites → MW4 DMZ UAV Towers and SAM sites: activation and defence → Keypad Doors · Grid B7
Eundeok Restaurant keypad-door area in Deadtown. Code unknown; do not assume a key opens this door. Approximate location.
MW4 DMZ keypad codes: find your mission's code and the right lock →Hidden Caches · Grid B7Look for a round hidden cache between two bodies at a sewer opening. A gameplay image shows the container; this map position is community-reported and approximate. Loot and availability are not guaranteed.
Rockets, caches & bodies →Hidden Caches · Grid F7Eundeok Restaurant keypad-door area in Deadtown. Code unknown; do not assume a key opens this door. Approximate location.
Rockets, caches & bodies → Lost Supply Drops · Grid B6
Search near North Korean wilderness for red smoke and an orange parachute. Some crates hang in trees and must be cut down. A drop is not present here in every deployment.
MW4 DMZ Crashed Crate: Lost Supply Drops and Loot Radio Tower →Lost Supply Drops · Grid C7Search near Hajin river bridge for red smoke and an orange parachute. Some crates hang in trees and must be cut down. A drop is not present here in every deployment.
MW4 DMZ Crashed Crate: Lost Supply Drops and Loot Radio Tower →Lost Supply Drops · Grid H5Search near Reactor outskirts for red smoke and an orange parachute. Some crates hang in trees and must be cut down. A drop is not present here in every deployment.
MW4 DMZ Crashed Crate: Lost Supply Drops and Loot Radio Tower →Lost Supply Drops · Grid D4Search near Cheongun outskirts for red smoke and an orange parachute. Some crates hang in trees and must be cut down. A drop is not present here in every deployment.
MW4 DMZ Crashed Crate: Lost Supply Drops and Loot Radio Tower →Lost Supply Drops · Grid E8Search near South Korean wilderness for red smoke and an orange parachute. Some crates hang in trees and must be cut down. A drop is not present here in every deployment.
MW4 DMZ Crashed Crate: Lost Supply Drops and Loot Radio Tower →Lost Supply Drops · Grid E7Search near Daesong Ridge for red smoke and an orange parachute. Some crates hang in trees and must be cut down. A drop is not present here in every deployment.
MW4 DMZ Crashed Crate: Lost Supply Drops and Loot Radio Tower →Lost Supply Drops · Grid F6Search near Mujin Pass for red smoke and an orange parachute. Some crates hang in trees and must be cut down. A drop is not present here in every deployment.
MW4 DMZ Crashed Crate: Lost Supply Drops and Loot Radio Tower →Hidden Caches · Grid D4Approximate hidden-cache area. Availability and contents vary.
Rockets, caches & bodies →Hidden Caches · Grid D8Approximate hidden-cache area. Availability and contents vary.
Rockets, caches & bodies →Hidden Caches · Grid I8Approximate hidden-cache area. Availability and contents vary.
Rockets, caches & bodies →Hidden Caches · Grid F5Hidden cache south of Cheongun Village. A more precise entrance or landmark is not supplied by this report.
Rockets, caches & bodies →Loot Rockets · Grid E8Approximate loot-rocket area. Availability and contents vary.
Rockets, caches & bodies →Lootable Corpses · Grid I7Approximate lootable-body area. Availability and contents vary.
Rockets, caches & bodies →Lootable Corpses · Grid B3Approximate lootable-body area. Availability and contents vary.
Rockets, caches & bodies → Key Rooms · Grid E5
A community map places Rail Depot Storage underground near the Cheongun fire station. This is the existing Train Depot Storageroom alias; the marker shows a reported area, not a verified doorway or key spawn.
Required key: Train Depot Storageroom → MW4 DMZ Rail Depot Storage key: E5 basement route →Player Spawns · Grid A6Approximate Story Mission starting area. Select this mission before deployment.
MW4 DMZ Iron Citadel walkthrough: access card, armory and LTV →Player Spawns · Grid H6Approximate Story Mission starting area. Select this mission before deployment.
MW4 DMZ Grid Assault walkthrough: code segments and Heli unlock →Player Spawns · Grid H5Approximate Story Mission starting area. Select this mission before deployment.
MW4 DMZ Fallen Ember walkthrough: reactor puzzle and escape →Lost Supply Drops · Grid F5Possible supply-drop landing area. A drop is not present here in every deployment; follow the active marker.
MW4 DMZ Crashed Crate: Lost Supply Drops and Loot Radio Tower →Lost Supply Drops · Grid I6Possible supply-drop landing area. A drop is not present here in every deployment; follow the active marker.
MW4 DMZ Crashed Crate: Lost Supply Drops and Loot Radio Tower →Lootable Corpses · Grid I4Lootable-body location. Search the immediate area; this is not an enemy spawn marker.
Rockets, caches & bodies →Keypad Doors · Grid E4Keypad-door area. The access code is unconfirmed; inspect the correct door in game.
MW4 DMZ keypad codes: find your mission's code and the right lock →Lootable Corpses · Grid C7Lootable-body location. Search the immediate area; this is not an enemy spawn marker.
Rockets, caches & bodies →Loot Rockets · Grid I5Loot-rocket location. Search the site in game; contents are not guaranteed.
Rockets, caches & bodies →Lost Supply Drops · Grid H5Possible supply-drop landing area. A drop is not present here in every deployment; follow the active marker.
MW4 DMZ Crashed Crate: Lost Supply Drops and Loot Radio Tower → Key Rooms · Grid B5Use the Weapons Mod Workshop key upstairs in the military repair garage directly west of Chang-san Air Base's clinic. B5 is the key's search area; match the named workshop lock after climbing the interior stairs.
Required key: Weapons Mod Workshop → Weapons Mod Workshop: air-base key and upstairs route → Chemical Lockers · Grid I4
Chemical-cabinet area. Contents vary; match any named lock before choosing a key.
Where to find crafting materials in MW4 DMZ →Chemical Lockers · Grid F4Chemical-cabinet area. Contents vary; match any named lock before choosing a key.
Where to find crafting materials in MW4 DMZ →Loot Rockets · Grid F8Loot rocket south of Woodland Barracks in Hajin City. Use the barracks as an approach landmark; loot varies.
Rockets, caches & bodies →Chemical Lockers · Grid F7Chemical-cabinet area. Contents vary; match any named lock before choosing a key.
Where to find crafting materials in MW4 DMZ →Loot Rockets · Grid I5Loot-rocket location. Search the site in game; contents are not guaranteed.
Rockets, caches & bodies →Hidden Caches · Grid C8Hidden-cache location. Search the immediate area; contents are not guaranteed.
Rockets, caches & bodies → Key Rooms · Grid H4Community-reported room area. Match the named door; its exact entrance and floor are not verified.
Required key: Reactor 02 Control Room → Haneul Reactor first-run plan: entry, loot and extraction →Safes · Grid H6Safe area. Check the room and floor; safe counts and contents vary.
Find and open safes →Safes · Grid B4Safe area. Check the room and floor; safe counts and contents vary.
Find and open safes →Keypad Doors · Grid E7Keypad-door area. The access code is unconfirmed; inspect the correct door in game.
MW4 DMZ keypad codes: find your mission's code and the right lock →Safes · Grid B5Safe area. Check the room and floor; safe counts and contents vary.
Find and open safes →Keypad Doors · Grid I4Keypad-door area. The access code is unconfirmed; inspect the correct door in game.
MW4 DMZ keypad codes: find your mission's code and the right lock →Lootable Corpses · Grid A5Underwater lootable body. Check the water and your air supply; this is not an enemy spawn marker.
Rockets, caches & bodies →Keypad Doors · Grid I7Keypad-door area. The access code is unconfirmed; inspect the correct door in game.
MW4 DMZ keypad codes: find your mission's code and the right lock →Safes · Grid I7Safe area. Check the room and floor; safe counts and contents vary.
Find and open safes →Lootable Corpses · Grid A5Lootable-body location. Search the immediate area; this is not an enemy spawn marker.
Rockets, caches & bodies →Lootable Corpses · Grid A5Lootable-body location. Search the immediate area; this is not an enemy spawn marker.
Rockets, caches & bodies → Key Rooms · Grid H6Community-reported room area. Match the named door; its exact entrance and floor are not verified.
Required key: Jang-ui's Converted Power Room → Jang-ui boss guide: Netshin fight, mall key and Shopping Hacks → Banks · Grid G6
Bank location. Match the building and vault before following a key route.
Bank vault guide →Clinics · Grid H5Clinic location. Confirm the medical icon and building in game.
About Clinics → MW4 DMZ Triage Protocol: Clinic, Bandage and Chemicals →Banks · Grid G7Bank location. Match the building and vault before following a key route.
Bank vault guide →Safes · Grid B7Safe area. Check the room and floor; safe counts and contents vary.
Find and open safes → Banks · Grid G8
Wolves Stadium bank area, also listed as Bank Vault on community maps. Use Bank Branch Vault Access at the access door; the vault has separate power and code steps. Exact vault door not mapped.
Required key: Bank Branch Vault Access → Bank vault guide →Keypad Doors · Grid G8A contributor reports a paper clue with one unknown fourth digit for this keypad. The room identity and a successful opening are not established.
MW4 DMZ keypad codes: find your mission's code and the right lock →Safes · Grid G8Safe area. Check the room and floor; safe counts and contents vary.
Find and open safes →Banks · Grid F4Bank location. Match the building and vault before following a key route.
Bank vault guide →Banks · Grid I7Bank location. Match the building and vault before following a key route.
Bank vault guide →Keypad Doors · Grid G6Keypad-door area. The access code is unconfirmed; inspect the correct door in game.
MW4 DMZ keypad codes: find your mission's code and the right lock →Safes · Grid G6Safe area. Check the room and floor; safe counts and contents vary.
Find and open safes →Keypad Doors · Grid F4A contributor reports a code note inside this building with the final digit to work out. Read your own note; the room identity is not established.
MW4 DMZ keypad codes: find your mission's code and the right lock →Safes · Grid F4Safe area. Check the room and floor; safe counts and contents vary.
Find and open safes →Safes · Grid F4Safe area. Check the room and floor; safe counts and contents vary.
Find and open safes →Chemical Lockers · Grid H6Chemical-cabinet area. Contents vary; match any named lock before choosing a key.
Where to find crafting materials in MW4 DMZ →Loot Rockets · Grid D6Rocket northeast of the military wet-gap bridge, on the eastern riverbank in Imjin Farmland.
Rockets, caches & bodies → Key Rooms · Grid G6Community-reported room area. Match the named door; its exact entrance and floor are not verified.
Required key: Netshin Security Office → Security Office & override note →Chemical Lockers · Grid B5Chemical-cabinet area. Contents vary; match any named lock before choosing a key.
Where to find crafting materials in MW4 DMZ →Chemical Lockers · Grid B5Chemical-cabinet area. Contents vary; match any named lock before choosing a key.
Where to find crafting materials in MW4 DMZ →Chemical Lockers · Grid B5Chemical-cabinet area. Contents vary; match any named lock before choosing a key.
Where to find crafting materials in MW4 DMZ →Lost Supply Drops · Grid C5Possible supply-drop landing area. A drop is not present here in every deployment; follow the active marker.
MW4 DMZ Crashed Crate: Lost Supply Drops and Loot Radio Tower →Loot Rockets · Grid F5Loot-rocket location. Search the site in game; contents are not guaranteed.
Rockets, caches & bodies →Chemical Lockers · Grid F5Chemical-cabinet area. Contents vary; match any named lock before choosing a key.
Where to find crafting materials in MW4 DMZ →Lootable Corpses · Grid F5Lootable body on hospital basement level 1. Search below ground rather than only around the surface marker.
Rockets, caches & bodies →Lootable Corpses · Grid C7Group of lootable bodies in a sewer. The pin marks a search area, not a confirmed body count.
Rockets, caches & bodies →Chemical Lockers · Grid C4Chemical-cabinet area. Contents vary; match any named lock before choosing a key.
Where to find crafting materials in MW4 DMZ →Chemical Lockers · Grid D5Chemical-cabinet area. Contents vary; match any named lock before choosing a key.
Where to find crafting materials in MW4 DMZ →Bounty Stations · Grid B7Bounty-terminal area. Check the building and current Tac-Map before planning a route.
About Bounty Stations → MW4 DMZ bounties: how the Wanted system works →Chemical Lockers · Grid D3Chemical-cabinet area. Contents vary; match any named lock before choosing a key.
Where to find crafting materials in MW4 DMZ →Chemical Lockers · Grid E7Chemical-cabinet area. Contents vary; match any named lock before choosing a key.
Where to find crafting materials in MW4 DMZ →Chemical Lockers · Grid B7Chemical-cabinet area. Contents vary; match any named lock before choosing a key.
Where to find crafting materials in MW4 DMZ →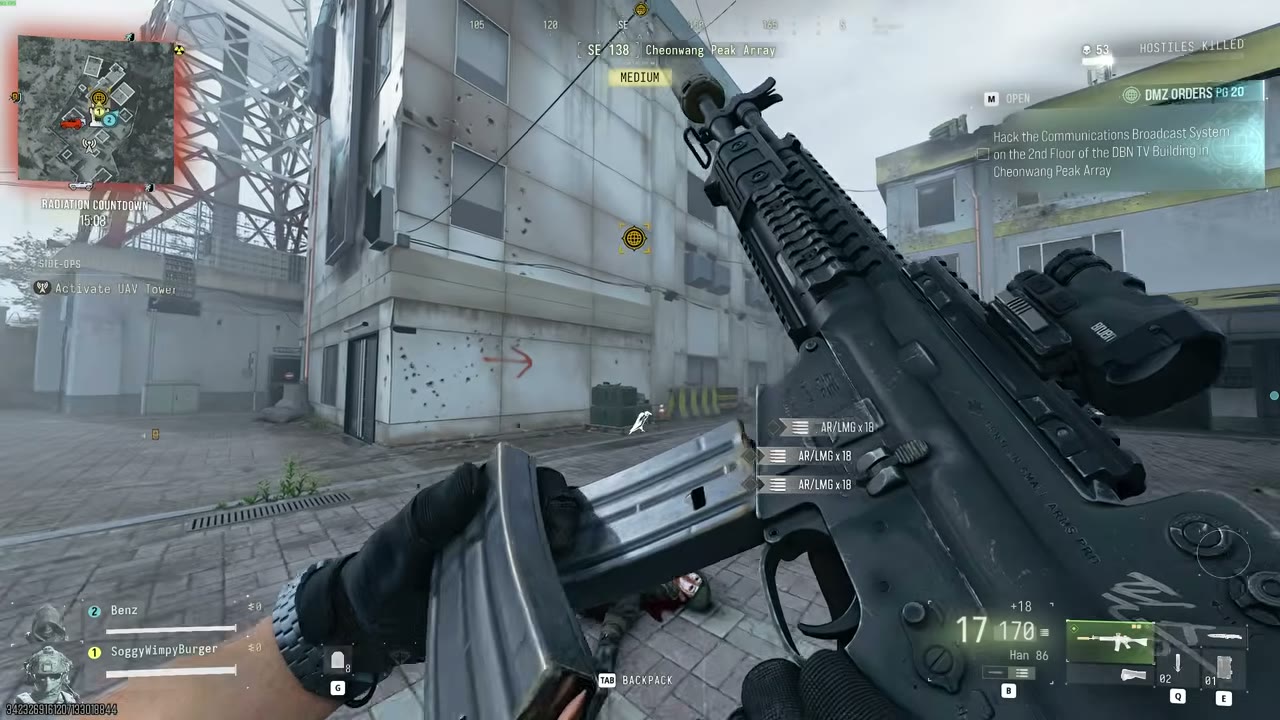
 Mission Destinations · Grid F6
Ears Everywhere destination at Cheonwang Peak Array. Hack the communications system on the second floor, then collect the Encrypted Voice Logs.
Ears Everywhere guide →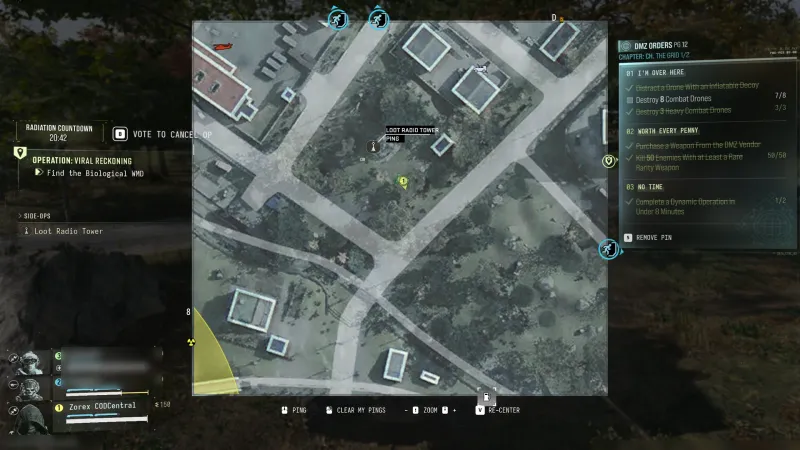 Mission Destinations · Grid D8
Observed Loot Radio Tower Side Op site. Follow the live activity marker; the activity is not guaranteed in every deployment.
Loot Radio Tower guide →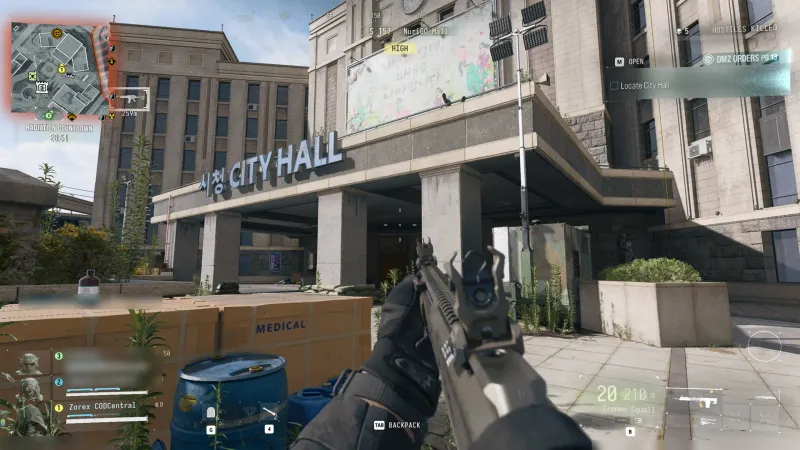 Mission Destinations · Grid H6
Civil Service destination south of NuriGO Mall. Find the Financial Ledger Fragments on the second floor and extract them.
Open City Hall → Civil Service guide →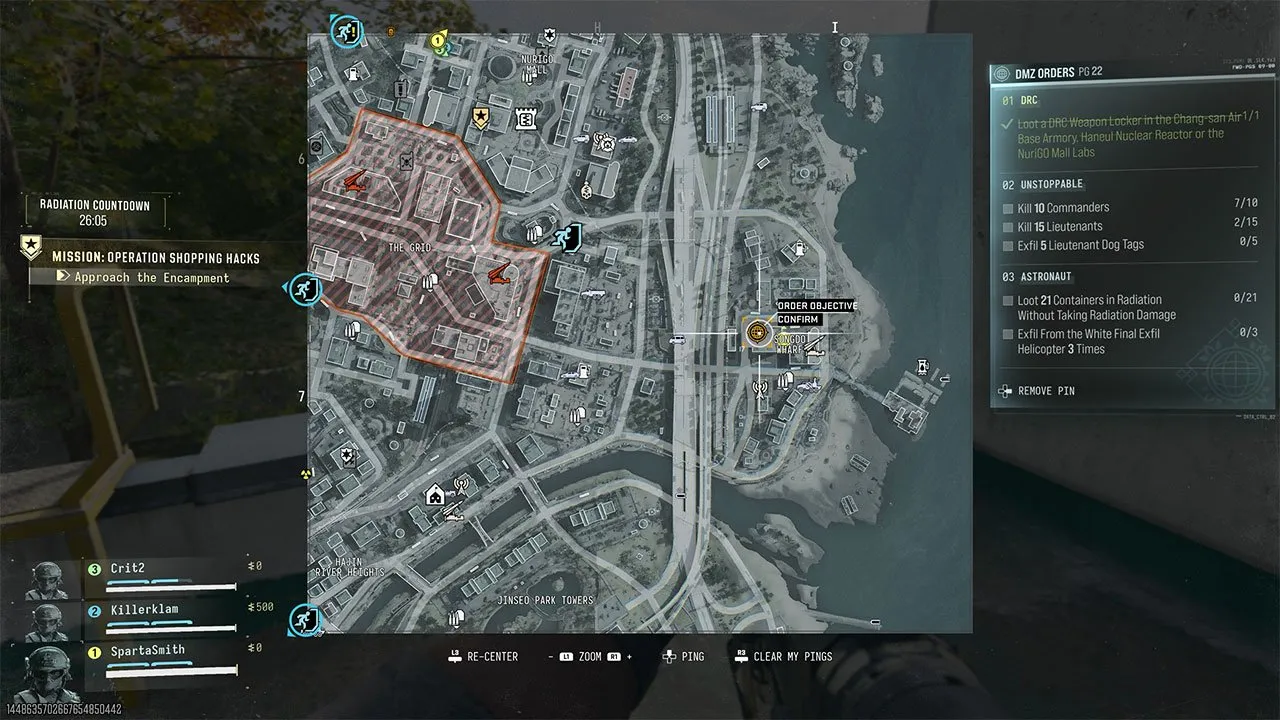 Mission Destinations · Grid I7
Triangulation destination in Songdo Wharf. Use the south-side elevators, then the stairs to the raised rooftop to place the transmitter.
Triangulation guide →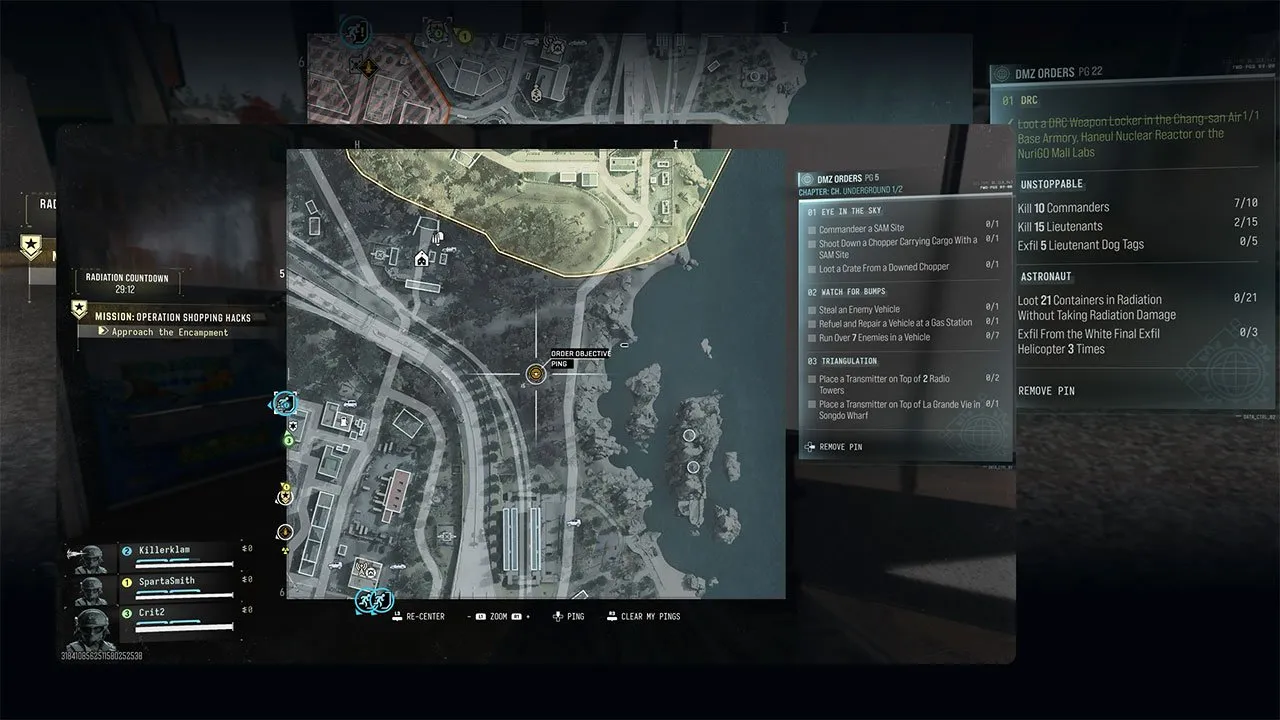 Mission Destinations · Grid I5
Triangulation radio-tower objective. Climb to the upper platform and plant the transmitter; follow the next marker toward La Grande Vie.
Triangulation guide →UAV Towers · Grid D8UAV tower location. Confirm the tower and its current state in game.
About UAV Towers → MW4 DMZ UAV Towers and SAM sites: activation and defence →Exfils · Grid E6Extraction area. Active sites vary by deployment; check your current Tac-Map.
Active extraction sites vary by deployment. Check your Tac-Map before heading to an exit.
About Exfils → DMZ exfil guide: extraction methods and emergency plans → Key Rooms · Grid G7The Hanwoori key card lists G7. The source site's linked room label says H7; that reference is unverified. Match the named room in game. The exact entrance and floor position are unverified.
Required key: Hanwoori Art Records Room → Room guide →Safes · Grid B4Safe area. Check the room and floor; safe counts and contents vary.
Find and open safes → Key Rooms · Grid F5Community-reported room area. Match the named door; its exact entrance and floor are not verified.
Required key: Mirae Electrical Room → Room guide →Exfils · Grid I8Extraction area. Active sites vary by deployment; check your current Tac-Map.
Active extraction sites vary by deployment. Check your Tac-Map before heading to an exit.
About Exfils → DMZ exfil guide: extraction methods and emergency plans →Exfils · Grid B5Extraction area. Active sites vary by deployment; check your current Tac-Map.
Active extraction sites vary by deployment. Check your Tac-Map before heading to an exit.
About Exfils → DMZ exfil guide: extraction methods and emergency plans →Exfils · Grid D3Extraction area. Active sites vary by deployment; check your current Tac-Map.
Active extraction sites vary by deployment. Check your Tac-Map before heading to an exit.
About Exfils → DMZ exfil guide: extraction methods and emergency plans →Exfils · Grid C1Extraction area. Active sites vary by deployment; check your current Tac-Map.
Active extraction sites vary by deployment. Check your Tac-Map before heading to an exit.
About Exfils → DMZ exfil guide: extraction methods and emergency plans → Key Rooms · Grid I5Community-reported room area. Match the named door; its exact entrance and floor are not verified.
Required key: Hazard Storehouse → Room guide → Sniper Towers · Grid B8
Sniper-tower location. Check the tower and nearby threats in game.
Exfils · Grid B7Extraction area. Active sites vary by deployment; check your current Tac-Map.
Active extraction sites vary by deployment. Check your Tac-Map before heading to an exit.
About Exfils → DMZ exfil guide: extraction methods and emergency plans →Key Rooms · Grid I4Community-reported room area. Match the named door; its exact entrance and floor are not verified.
Mission key: follow the active Fallen Ember objectives. This is separate from the Chemist armory and Reactor DRC keys.
Fallen Ember mission →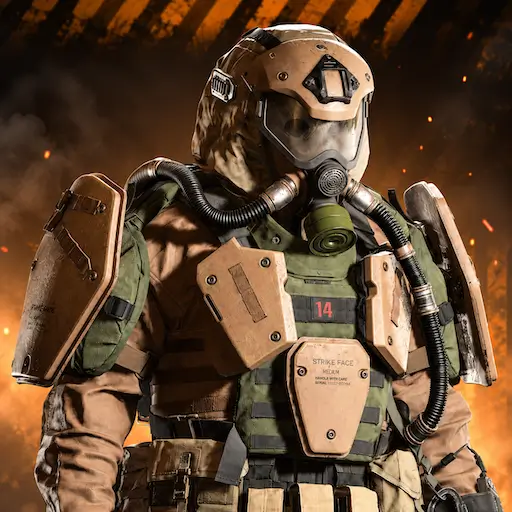 Colossus Areas · Grid F4
Colossus search area. The circle is approximate; presence and movement vary by deployment.
Reported loot
 Military Composites
Approximate reported area. Check your current Tac-Map; boundaries and activity may change.
Colossus guide →Lieutenant Towers · Grid G8Lieutenant Hunt tower location. Check the current activity before planning your route.
About Lieutenant Towers → MW4 DMZ Hunter: find and climb a Lieutenant Hunt tower →UAV Towers · Grid C4UAV tower location. Confirm the tower and its current state in game.
About UAV Towers → MW4 DMZ UAV Towers and SAM sites: activation and defence →Lieutenant Towers · Grid I5Lieutenant Hunt tower location. Check the current activity before planning your route.
About Lieutenant Towers → MW4 DMZ Hunter: find and climb a Lieutenant Hunt tower →UAV Towers · Grid B7UAV tower location. Confirm the tower and its current state in game.
About UAV Towers → MW4 DMZ UAV Towers and SAM sites: activation and defence → Colossus Areas · Grid I7Colossus search area. The circle is approximate; presence and movement vary by deployment.
Reported loot
Military Composites Approximate reported area. Check your current Tac-Map; boundaries and activity may change.
Colossus guide → Colossus Areas · Grid D8Colossus search area. The circle is approximate; presence and movement vary by deployment.
Reported loot
Military Composites Approximate reported area. Check your current Tac-Map; boundaries and activity may change.
Colossus guide → Colossus Areas · Grid E6Colossus search area. The circle is approximate; presence and movement vary by deployment.
Reported loot
Military Composites Approximate reported area. Check your current Tac-Map; boundaries and activity may change.
Colossus guide → Colossus Areas · Grid H6Colossus search area. The circle is approximate; presence and movement vary by deployment.
Reported loot
Military Composites Approximate reported area. Check your current Tac-Map; boundaries and activity may change.
Colossus guide → Colossus Areas · Grid C3Colossus search area. The circle is approximate; presence and movement vary by deployment.
Reported loot
Military Composites Approximate reported area. Check your current Tac-Map; boundaries and activity may change.
Colossus guide →Exfils · Grid H9Extraction area. Active sites vary by deployment; check your current Tac-Map.
Active extraction sites vary by deployment. Check your Tac-Map before heading to an exit.
About Exfils → DMZ exfil guide: extraction methods and emergency plans → Colossus Areas · Grid I4Colossus search area. The circle is approximate; presence and movement vary by deployment.
Reported loot
Military Composites Approximate reported area. Check your current Tac-Map; boundaries and activity may change.
Colossus guide → Colossus Areas · Grid B7Colossus search area. The circle is approximate; presence and movement vary by deployment.
Reported loot
Military Composites Approximate reported area. Check your current Tac-Map; boundaries and activity may change.
Colossus guide → Colossus Areas · Grid H7Colossus search area. The circle is approximate; presence and movement vary by deployment.
Reported loot
Military Composites Approximate reported area. Check your current Tac-Map; boundaries and activity may change.
Colossus guide → Colossus Areas · Grid F7Colossus search area. The circle is approximate; presence and movement vary by deployment.
Reported loot
Military Composites Approximate reported area. Check your current Tac-Map; boundaries and activity may change.
Colossus guide → Colossus Areas · Grid G7Colossus search area. The circle is approximate; presence and movement vary by deployment.
Reported loot
Military Composites Approximate reported area. Check your current Tac-Map; boundaries and activity may change.
Colossus guide →Exfils · Grid I6Extraction area. Active sites vary by deployment; check your current Tac-Map.
Active extraction sites vary by deployment. Check your Tac-Map before heading to an exit.
About Exfils → DMZ exfil guide: extraction methods and emergency plans →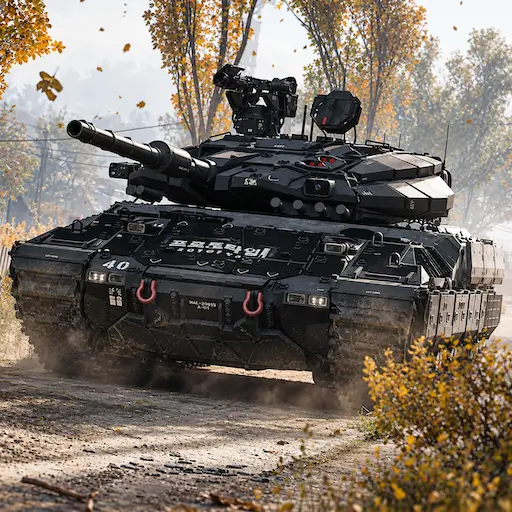 Tank Areas · Grid G8
Tank search area. The circle is approximate; presence and movement vary by deployment.
Reported loot
 Nano-Structured Alloy
Approximate reported area. Check your current Tac-Map; boundaries and activity may change.
Tank Commander guide →Exfils · Grid B7Extraction area. Active sites vary by deployment; check your current Tac-Map.
Active extraction sites vary by deployment. Check your Tac-Map before heading to an exit.
About Exfils → DMZ exfil guide: extraction methods and emergency plans →Exfils · Grid I6Extraction area. Active sites vary by deployment; check your current Tac-Map.
Active extraction sites vary by deployment. Check your Tac-Map before heading to an exit.
About Exfils → DMZ exfil guide: extraction methods and emergency plans → Tank Areas · Grid H7Tank search area. The circle is approximate; presence and movement vary by deployment.
Reported loot
Nano-Structured Alloy Approximate reported area. Check your current Tac-Map; boundaries and activity may change.
Tank Commander guide →Exfils · Grid G7Extraction area. Active sites vary by deployment; check your current Tac-Map.
Active extraction sites vary by deployment. Check your Tac-Map before heading to an exit.
About Exfils → DMZ exfil guide: extraction methods and emergency plans →Safes · Grid B5Safe area. Check the room and floor; safe counts and contents vary.
Find and open safes →Exfils · Grid I8Extraction area. Active sites vary by deployment; check your current Tac-Map.
Active extraction sites vary by deployment. Check your Tac-Map before heading to an exit.
About Exfils → DMZ exfil guide: extraction methods and emergency plans →Exfils · Grid G7Extraction area. Active sites vary by deployment; check your current Tac-Map.
Active extraction sites vary by deployment. Check your Tac-Map before heading to an exit.
About Exfils → DMZ exfil guide: extraction methods and emergency plans →Exfils · Grid F8Extraction area. Active sites vary by deployment; check your current Tac-Map.
Active extraction sites vary by deployment. Check your Tac-Map before heading to an exit.
About Exfils → DMZ exfil guide: extraction methods and emergency plans → Tank Areas · Grid E4Tank search area. The circle is approximate; presence and movement vary by deployment.
Reported loot
Nano-Structured Alloy Approximate reported area. Check your current Tac-Map; boundaries and activity may change.
Tank Commander guide → Tank Areas · Grid F4Tank search area. The circle is approximate; presence and movement vary by deployment.
Reported loot
Nano-Structured Alloy Approximate reported area. Check your current Tac-Map; boundaries and activity may change.
Tank Commander guide →Exfils · Grid A8Extraction area. Active sites vary by deployment; check your current Tac-Map.
Active extraction sites vary by deployment. Check your Tac-Map before heading to an exit.
About Exfils → DMZ exfil guide: extraction methods and emergency plans → Colossus Areas · Grid B6Colossus search area. The circle is approximate; presence and movement vary by deployment.
Reported loot
Military Composites Approximate reported area. Check your current Tac-Map; boundaries and activity may change.
Colossus guide →Exfils · Grid C1Extraction area. Active sites vary by deployment; check your current Tac-Map.
Active extraction sites vary by deployment. Check your Tac-Map before heading to an exit.
About Exfils → DMZ exfil guide: extraction methods and emergency plans →Exfils · Grid B2Extraction area. Active sites vary by deployment; check your current Tac-Map.
Active extraction sites vary by deployment. Check your Tac-Map before heading to an exit.
About Exfils → DMZ exfil guide: extraction methods and emergency plans → Colossus Areas · Grid C7Colossus search area. The circle is approximate; presence and movement vary by deployment.
Reported loot
Military Composites Approximate reported area. Check your current Tac-Map; boundaries and activity may change.
Colossus guide →Exfils · Grid D4Extraction area. Active sites vary by deployment; check your current Tac-Map.
Active extraction sites vary by deployment. Check your Tac-Map before heading to an exit.
About Exfils → DMZ exfil guide: extraction methods and emergency plans → Tank Areas · Grid H6Tank search area. The circle is approximate; presence and movement vary by deployment.
Reported loot
Nano-Structured Alloy Approximate reported area. Check your current Tac-Map; boundaries and activity may change.
Tank Commander guide →Lootable Corpses · Grid B3Lootable-body location. Search the immediate area; this is not an enemy spawn marker.
Rockets, caches & bodies →Chemical Lockers · Grid C3Chemical-cabinet area. Contents vary; match any named lock before choosing a key.
Where to find crafting materials in MW4 DMZ →Key Rooms · Grid B6Air Base armory area. Follow Iron Citadel's access-card upgrades and code objectives; the Multi Use card is not the final armory card.
Required key not identified. Match the named lock; this marker does not establish which key opens it.
Room guide → Key Rooms · Grid B6Air Base DRC locker area. Match the named locker and its separate key; reaching the armory does not unlock it.
Required key: Air Base DRC Weapons Locker → Room guide →Key Rooms · Grid C5Approximate room location. Required key unknown.
Required key not identified. Match the named lock; this marker does not establish which key opens it.
Keys & loot rooms guide →Key Rooms · Grid G7Approximate room location. Required key unknown.
Required key not identified. Match the named lock; this marker does not establish which key opens it.
Keys & loot rooms guide →Key Rooms · Grid H6Approximate room location. Required key unknown.
Required key not identified. Match the named lock; this marker does not establish which key opens it.
Open Fire Station Storage → Keys & loot rooms guide → Key Rooms · Grid F5Hospital Chemical Lab area in the hospital basement morgue. The Hospital Chemical Lab Key opens the lab entrance; individual chemical lockers inside require their own named keys. The exact entrance is unverified.
Required key: Hospital Chemical Lab Key → Keys & loot rooms guide → Key Rooms · Grid B3Approximate room location. Match the named key and lock.
Required key: Kang’s Arms Incinerator → Room guide →Key Rooms · Grid B3Approximate atrium location. Required key unknown.
Required key not identified. Match the named lock; this marker does not establish which key opens it.
Room guide →Key Rooms · Grid B2Approximate room location. Required key unknown.
Required key not identified. Match the named lock; this marker does not establish which key opens it.
Open Silo Control Room → Room guide →Key Rooms · Grid D3Approximate room location. Required key unknown.
Required key not identified. Match the named lock; this marker does not establish which key opens it.
Open Silo Control Room → Room guide → Key Rooms · Grid B3Approximate room location. Match the named key and lock.
Required key: South Block Armory → Room guide →Key Rooms · Grid C3Approximate room location. Required key unknown.
Required key not identified. Match the named lock; this marker does not establish which key opens it.
Room guide →Key Rooms · Grid B3Approximate room location. Required key unknown.
Required key not identified. Match the named lock; this marker does not establish which key opens it.
Room guide → Key Rooms · Grid B3Approximate room location. Match the named key and lock.
Required key: The Citadel Main Control Room → Room guide →Dead Drops · Grid G6Dead-drop area. Check the container and your current task before depositing items.
Dead drops & extracting gear →Dead Drops · Grid F4Dead-drop area. Check the container and your current task before depositing items.
Dead drops & extracting gear →Player Spawns · Grid I6Player starting area. Starting positions vary by deployment; a nearby team is not guaranteed.
Read spawn markers and plan →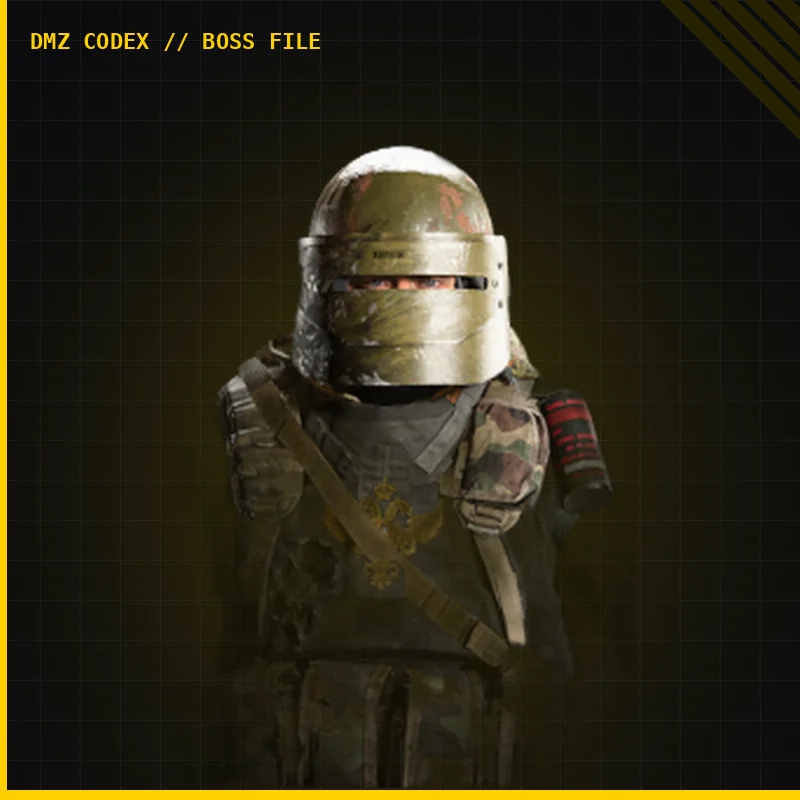 Bosses · Grid B7
Encounter area from our boss guide. The circle is an approximate search aid, not a measured spawn boundary. Follow the active Tac-Map target.
Approximate search zone around a guide landmark. The circle does not show a measured spawn or patrol boundary.
Boss guide → Bosses · Grid B5Bale is shown at the Tank Depot in official footage. This pin uses the broader Chang-san Air Base landmark; it does not locate the underground depot or an entrance. Follow the active hunt.
Approximate search zone around a guide landmark. The circle does not show a measured spawn or patrol boundary.
Boss guide →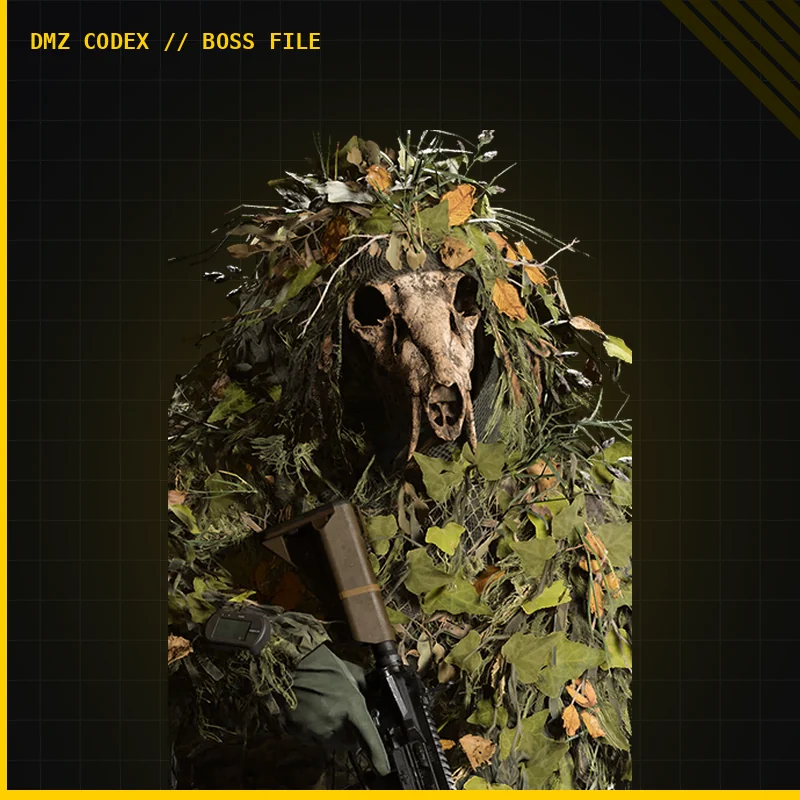 Bosses · Grid E6
Encounter area from our boss guide. The circle is an approximate search aid, not a measured spawn boundary. Follow the active Tac-Map target.
Approximate search zone around a guide landmark. The circle does not show a measured spawn or patrol boundary.
Boss guide →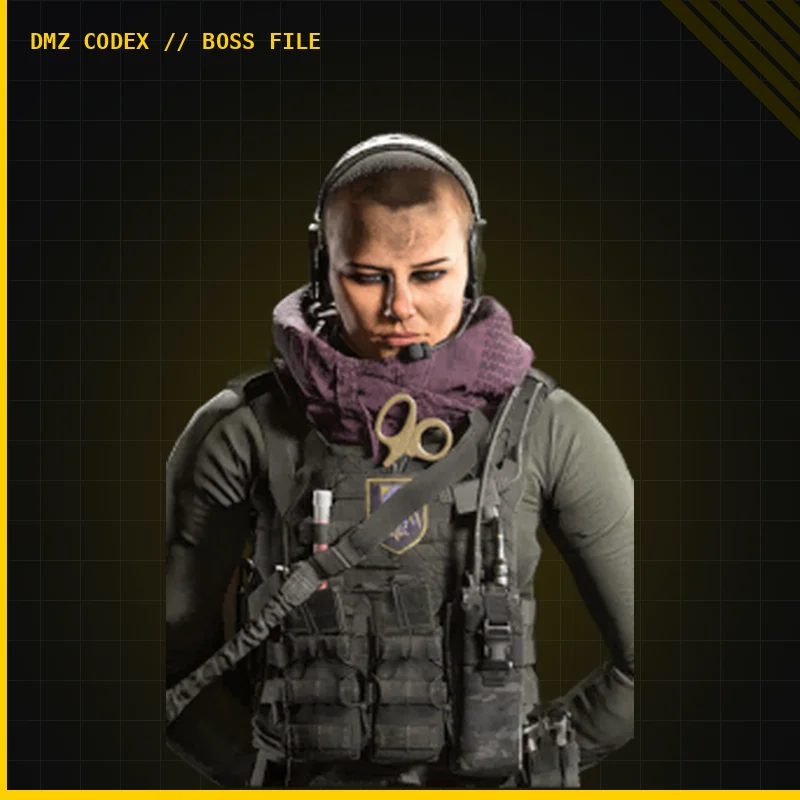 Bosses · Grid E6
Encounter area from our boss guide. The circle is an approximate search aid, not a measured spawn boundary. Follow the active Tac-Map target.
Approximate search zone around a guide landmark. The circle does not show a measured spawn or patrol boundary.
Boss guide →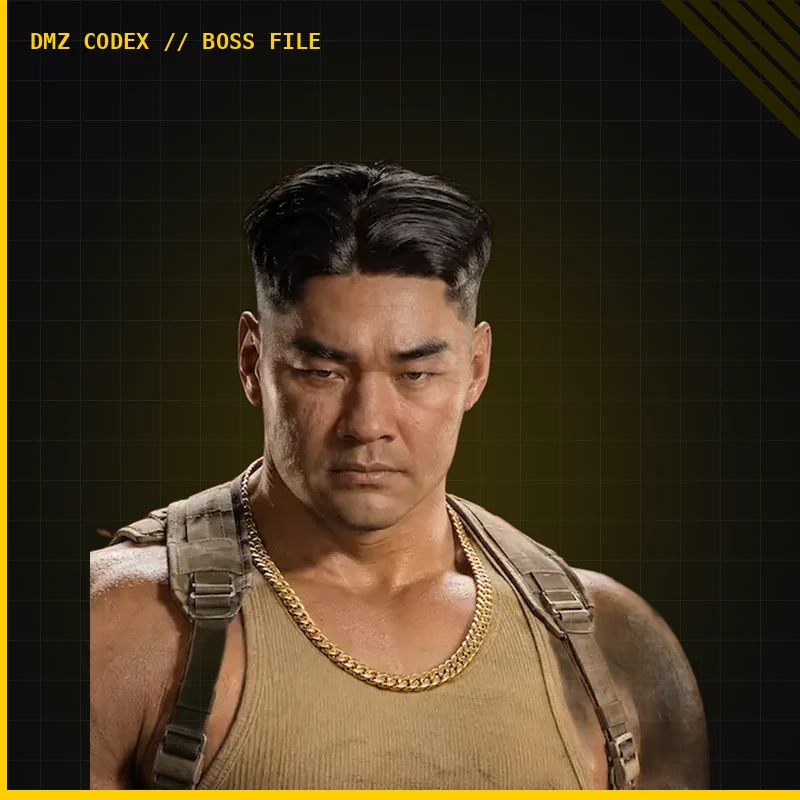 Bosses · Grid F4
Encounter area from our boss guide. The circle is an approximate search aid, not a measured spawn boundary. Follow the active Tac-Map target.
Approximate search zone around a guide landmark. The circle does not show a measured spawn or patrol boundary.
Boss guide →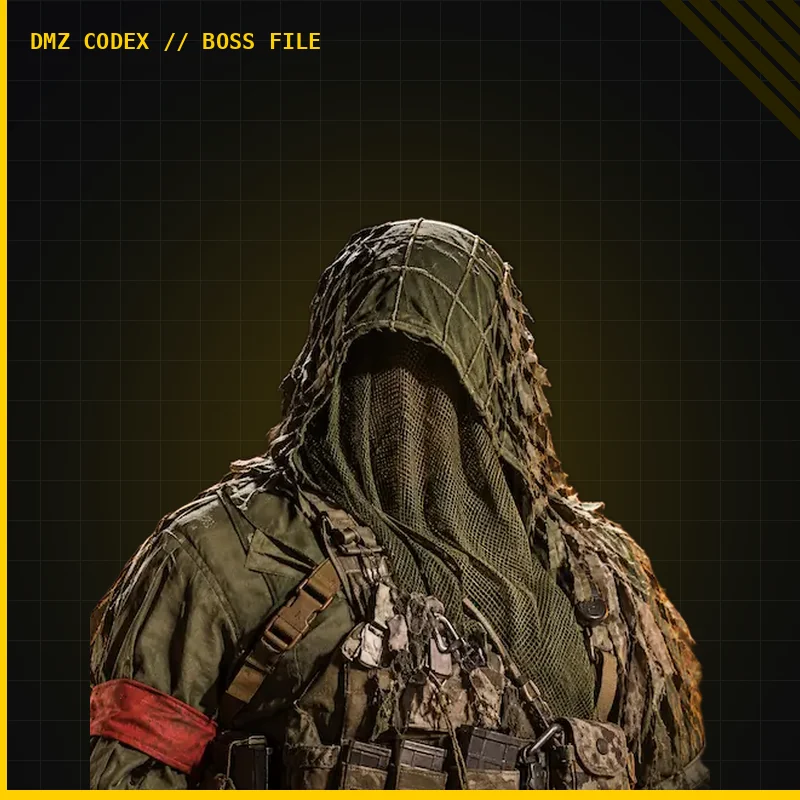 Bosses · Grid F4
Encounter area from our boss guide. The circle is an approximate search aid, not a measured spawn boundary. Follow the active Tac-Map target.
Approximate search zone around a guide landmark. The circle does not show a measured spawn or patrol boundary.
Boss guide → Bosses · Grid H8Encounter area from our boss guide. The circle is an approximate search aid, not a measured spawn boundary. Follow the active Tac-Map target.
Approximate search zone around a guide landmark. The circle does not show a measured spawn or patrol boundary.
Boss guide → Bosses · Grid G8Encounter area from our boss guide. The circle is an approximate search aid, not a measured spawn boundary. Follow the active Tac-Map target.
Approximate search zone around a guide landmark. The circle does not show a measured spawn or patrol boundary.
Boss guide →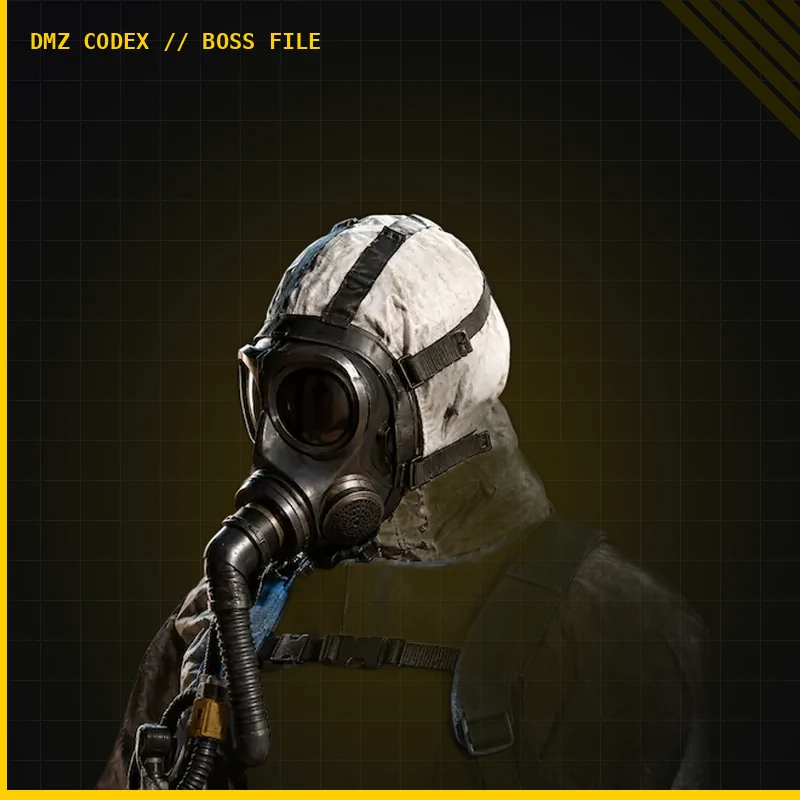 Bosses · Grid F5
Encounter area from our boss guide. The circle is an approximate search aid, not a measured spawn boundary. Follow the active Tac-Map target.
Approximate search zone around a guide landmark. The circle does not show a measured spawn or patrol boundary.
Boss guide →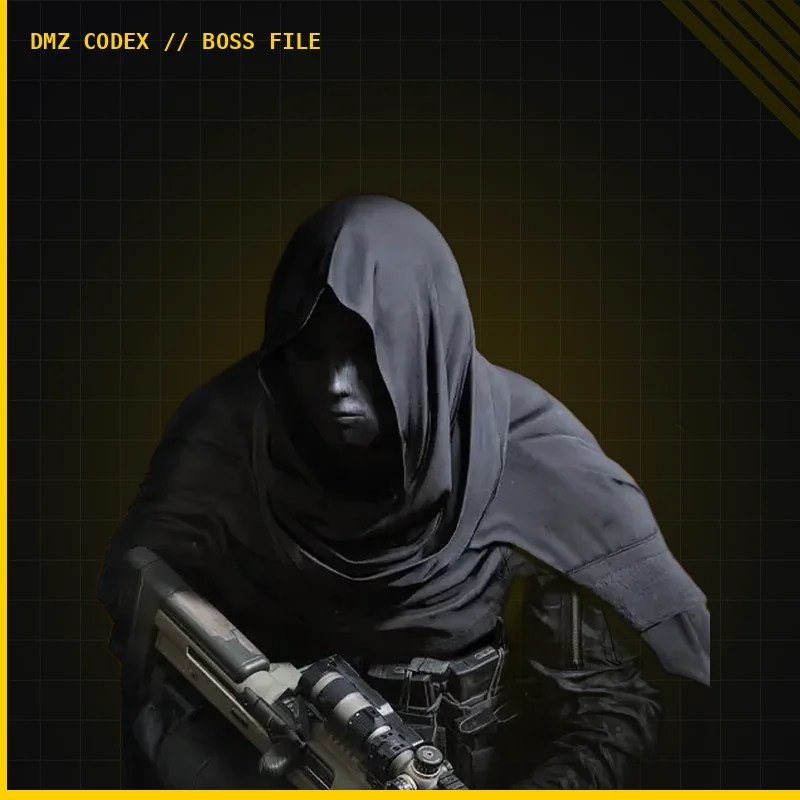 Bosses · Grid G6
Encounter area from our boss guide. The circle is an approximate search aid, not a measured spawn boundary. Follow the active Tac-Map target.
Approximate search zone around a guide landmark. The circle does not show a measured spawn or patrol boundary.
Boss guide → Bosses · Grid C3
Encounter area from our boss guide. The circle is an approximate search aid, not a measured spawn boundary. Follow the active Tac-Map target.
Approximate search zone around a guide landmark. The circle does not show a measured spawn or patrol boundary.
Boss guide → Bosses · Grid B3Encounter area from our boss guide. The circle is an approximate search aid, not a measured spawn boundary. Follow the active Tac-Map target.
Approximate search zone around a guide landmark. The circle does not show a measured spawn or patrol boundary.
Boss guide →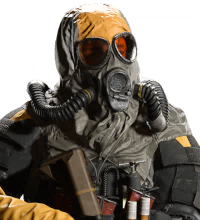 Bosses · Grid I4
Encounter area from our boss guide. The circle is an approximate search aid, not a measured spawn boundary. Follow the active Tac-Map target.
Approximate search zone around a guide landmark. The circle does not show a measured spawn or patrol boundary.
Boss guide →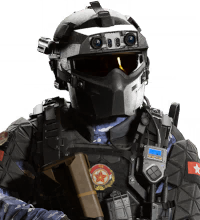 Bosses · Grid G6
A Jang-ui encounter is recorded at Netshin Tech Complex. This pin uses the broader The Grid landmark; it does not locate the boss building or a room. Follow the active hunt.
Approximate search zone around a guide landmark. The circle does not show a measured spawn or patrol boundary.
Boss guide → Bosses · Grid G6
Deathstalker encounter area. The aircraft moves; this landmark is a search lead, not a fixed spawn or patrol boundary. Check the current Tac-Map marker.
Reported loot
 Prototype RF Module
Approximate search zone around a guide landmark. The circle does not show a measured spawn or patrol boundary.
Boss guide → Bosses · Grid H6Deathstalker encounter area. The aircraft moves; this landmark is a search lead, not a fixed spawn or patrol boundary. Check the current Tac-Map marker.
Reported loot
Prototype RF Module Approximate search zone around a guide landmark. The circle does not show a measured spawn or patrol boundary.
Boss guide →Chemical Lockers · Grid I4Chemical-locker location. Check the container and any access requirement in game.
Where to find crafting materials in MW4 DMZ →Chemical Lockers · Grid I4Chemical-locker location. Check the container and any access requirement in game.
Where to find crafting materials in MW4 DMZ →Chemical Lockers · Grid A5Chemical-locker location. Check the container and any access requirement in game.
Where to find crafting materials in MW4 DMZ →Hidden Caches · Grid J9Cache location. Check the container in game.
Rockets, caches & bodies →Player Spawns · Grid A8Alternative player starting area. It may overlap another starting-area report; check your current deployment.
Read spawn markers and plan →Hidden Caches · Grid D3Cache location. Check the container in game.
Rockets, caches & bodies →Hidden Caches · Grid E6Cache location. Check the container in game.
Rockets, caches & bodies →Hidden Caches · Grid A5Cache location. Check the container in game.
Rockets, caches & bodies →Hidden Caches · Grid C4Cache location. Check the container in game.
Rockets, caches & bodies →Loot Rockets · Grid I9Unexploded rocket location. Search it for available loot.
Rockets, caches & bodies →Chemical Lockers · Grid H4Chemical-locker location. Check the container and any access requirement in game.
Where to find crafting materials in MW4 DMZ →Key Rooms · Grid F5Chemical-locker room at Mirae General Hospital. Match the named door and required key in game.
Required key not identified. Match the named lock; this marker does not establish which key opens it.
Keys & loot rooms guide →Hidden Caches · Grid C7Cache location. Check the container in game.
Rockets, caches & bodies →Hidden Caches · Grid B6Cache location. Check the container in game.
Rockets, caches & bodies →UAV Towers · Grid B7Alternative UAV-tower position. Check the tower in game; another nearby reference is retained.
About UAV Towers → MW4 DMZ UAV Towers and SAM sites: activation and defence →Chemical Lockers · Grid D8Chemical-locker location. Check the container and any access requirement in game.
Where to find crafting materials in MW4 DMZ →Chemical Lockers · Grid E4Chemical-locker location. Check the container and any access requirement in game.
Where to find crafting materials in MW4 DMZ →Chemical Lockers · Grid H5Chemical-locker location. Check the container and any access requirement in game.
Where to find crafting materials in MW4 DMZ →Chemical Lockers · Grid I4Chemical-locker location. Check the container and any access requirement in game.
Where to find crafting materials in MW4 DMZ → Train Stations · Grid H8
Train-station location. Check transport availability in your deployment.
Train Stations · Grid I6Train-station location. Check transport availability in your deployment.
Train Stations · Grid E5Train-station location. Check transport availability in your deployment.
 Tram Stations · Grid I7
Tram-station location. Check transport availability in your deployment.
Tram Stations · Grid H6Tram-station location. Check transport availability in your deployment.
Tram Stations · Grid F7Tram-station location. Check transport availability in your deployment.
Sniper Towers · Grid B5Sniper-tower location. Check the tower and nearby threats in game.
Sniper Towers · Grid C5Sniper-tower location. Check the tower and nearby threats in game.
Sniper Towers · Grid C6Sniper-tower location. Check the tower and nearby threats in game.
Sniper Towers · Grid B7Sniper-tower location. Check the tower and nearby threats in game.
Hidden Caches · Grid D3Cache location. Check the container in game.
Rockets, caches & bodies →Hidden Caches · Grid C3Cache location. Check the container in game.
Rockets, caches & bodies →Hidden Caches · Grid C4Cache location. Check the container in game.
Rockets, caches & bodies →Hidden Caches · Grid A4Cache location. Check the container in game.
Rockets, caches & bodies →Hidden Caches · Grid B6Cache location. Check the container in game.
Rockets, caches & bodies →Hidden Caches · Grid B7Cache location. Check the container in game.
Rockets, caches & bodies →Hidden Caches · Grid B8Cache location. Check the container in game.
Rockets, caches & bodies →Hidden Caches · Grid B8Cache location. Check the container in game.
Rockets, caches & bodies →Hidden Caches · Grid C9Cache location. Check the container in game.
Rockets, caches & bodies →Hidden Caches · Grid C6Cache location. Check the container in game.
Rockets, caches & bodies →Hidden Caches · Grid D5Cache location. Check the container in game.
Rockets, caches & bodies →Hidden Caches · Grid E7Cache location. Check the container in game.
Rockets, caches & bodies →Hidden Caches · Grid E7Cache location. Check the container in game.
Rockets, caches & bodies →Hidden Caches · Grid E8Cache location. Check the container in game.
Rockets, caches & bodies →Hidden Caches · Grid F8Cache location. Check the container in game.
Rockets, caches & bodies →Hidden Caches · Grid G9Cache location. Check the container in game.
Rockets, caches & bodies →Hidden Caches · Grid H8Cache location. Check the container in game.
Rockets, caches & bodies →Hidden Caches · Grid H9Cache location. Check the container in game.
Rockets, caches & bodies →Hidden Caches · Grid I7Cache location. Check the container in game.
Rockets, caches & bodies →Hidden Caches · Grid H7Cache location. Check the container in game.
Rockets, caches & bodies →Hidden Caches · Grid H7Cache location. Check the container in game.
Rockets, caches & bodies →Hidden Caches · Grid H7Cache location. Check the container in game.
Rockets, caches & bodies →Hidden Caches · Grid F4Cache location. Check the container in game.
Rockets, caches & bodies →Hidden Caches · Grid G4Cache location. Check the container in game.
Rockets, caches & bodies →Hidden Caches · Grid H4Cache location. Check the container in game.
Rockets, caches & bodies →Hidden Caches · Grid H4Cache location. Check the container in game.
Rockets, caches & bodies →Hidden Caches · Grid I4Cache location. Check the container in game.
Rockets, caches & bodies →Hidden Caches · Grid I4Cache location. Check the container in game.
Rockets, caches & bodies →Hidden Caches · Grid I4Cache location. Check the container in game.
Rockets, caches & bodies →Hidden Caches · Grid I4Cache location. Check the container in game.
Rockets, caches & bodies →Hidden Caches · Grid I4Cache location. Check the container in game.
Rockets, caches & bodies →Hidden Caches · Grid A6Cache location. Check the container in game.
Rockets, caches & bodies →Hidden Caches · Grid D8Cache location. Check the container in game.
Rockets, caches & bodies →Hidden Caches · Grid E8Cache location. Check the container in game.
Rockets, caches & bodies →Hidden Caches · Grid E5Cache location. Check the container in game.
Rockets, caches & bodies →Player Spawns · Grid G4Alternative player starting area. It may overlap another starting-area report; check your current deployment.
Read spawn markers and plan →Banks · Grid G7Bank location. Match the building before following a vault route.
Bank vault guide →Chemical Lockers · Grid H4Chemical-locker location. Check the container and any access requirement in game.
Where to find crafting materials in MW4 DMZ → Tank Areas · Grid D7Tank search area. Presence and movement vary by deployment.
Reported loot
Nano-Structured Alloy Approximate reported area. Check your current Tac-Map; boundaries and activity may change.
Tank Commander guide → Weapon Lockers · Grid C4
Weapon-locker location. Check the locker and any required key in game.
Weapon Lockers · Grid E7Weapon-locker location. Check the locker and any required key in game.
Loot Rockets · Grid D5Unexploded rocket location. Search it for available loot.
Rockets, caches & bodies →Loot Rockets · Grid D6Unexploded rocket location. Search it for available loot.
Rockets, caches & bodies →Loot Rockets · Grid C6Unexploded rocket location. Search it for available loot.
Rockets, caches & bodies →Loot Rockets · Grid D7Unexploded rocket location. Search it for available loot.
Rockets, caches & bodies →Loot Rockets · Grid C7Unexploded rocket location. Search it for available loot.
Rockets, caches & bodies →Loot Rockets · Grid D7Unexploded rocket location. Search it for available loot.
Rockets, caches & bodies →Loot Rockets · Grid C7Unexploded rocket location. Search it for available loot.
Rockets, caches & bodies →Loot Rockets · Grid C8Unexploded rocket location. Search it for available loot.
Rockets, caches & bodies →Loot Rockets · Grid C8Unexploded rocket location. Search it for available loot.
Rockets, caches & bodies →Loot Rockets · Grid C8Unexploded rocket location. Search it for available loot.
Rockets, caches & bodies →Loot Rockets · Grid D8Unexploded rocket location. Search it for available loot.
Rockets, caches & bodies →Loot Rockets · Grid E8Unexploded rocket location. Search it for available loot.
Rockets, caches & bodies →Loot Rockets · Grid E8Unexploded rocket location. Search it for available loot.
Rockets, caches & bodies →Loot Rockets · Grid F8Unexploded rocket location. Search it for available loot.
Rockets, caches & bodies →Loot Rockets · Grid F8Unexploded rocket location. Search it for available loot.
Rockets, caches & bodies →Loot Rockets · Grid G9Unexploded rocket location. Search it for available loot.
Rockets, caches & bodies →Loot Rockets · Grid G8Unexploded rocket location. Search it for available loot.
Rockets, caches & bodies →Loot Rockets · Grid G8Unexploded rocket location. Search it for available loot.
Rockets, caches & bodies →Loot Rockets · Grid F7Unexploded rocket location. Search it for available loot.
Rockets, caches & bodies →Loot Rockets · Grid G7Unexploded rocket location. Search it for available loot.
Rockets, caches & bodies →Loot Rockets · Grid F8Unexploded rocket location. Search it for available loot.
Rockets, caches & bodies →Loot Rockets · Grid F7Unexploded rocket location. Search it for available loot.
Rockets, caches & bodies →Loot Rockets · Grid F7Unexploded rocket location. Search it for available loot.
Rockets, caches & bodies →Loot Rockets · Grid F7Unexploded rocket location. Search it for available loot.
Rockets, caches & bodies →Loot Rockets · Grid E7Unexploded rocket location. Search it for available loot.
Rockets, caches & bodies →Loot Rockets · Grid F7Unexploded rocket location. Search it for available loot.
Rockets, caches & bodies →Loot Rockets · Grid H8Unexploded rocket location. Search it for available loot.
Rockets, caches & bodies →Loot Rockets · Grid H8Unexploded rocket location. Search it for available loot.
Rockets, caches & bodies →Loot Rockets · Grid I7Unexploded rocket location. Search it for available loot.
Rockets, caches & bodies →Loot Rockets · Grid H7Unexploded rocket location. Search it for available loot.
Rockets, caches & bodies →Loot Rockets · Grid G7Unexploded rocket location. Search it for available loot.
Rockets, caches & bodies →Loot Rockets · Grid F6Unexploded rocket location. Search it for available loot.
Rockets, caches & bodies →Loot Rockets · Grid F6Unexploded rocket location. Search it for available loot.
Rockets, caches & bodies →Loot Rockets · Grid F6Unexploded rocket location. Search it for available loot.
Rockets, caches & bodies →Loot Rockets · Grid E6Unexploded rocket location. Search it for available loot.
Rockets, caches & bodies →Loot Rockets · Grid F6Unexploded rocket location. Search it for available loot.
Rockets, caches & bodies →Loot Rockets · Grid G5Unexploded rocket location. Search it for available loot.
Rockets, caches & bodies →Loot Rockets · Grid H5Unexploded rocket location. Search it for available loot.
Rockets, caches & bodies →Loot Rockets · Grid G4Unexploded rocket location. Search it for available loot.
Rockets, caches & bodies →Loot Rockets · Grid G4Unexploded rocket location. Search it for available loot.
Rockets, caches & bodies →Loot Rockets · Grid F5Unexploded rocket location. Search it for available loot.
Rockets, caches & bodies →Loot Rockets · Grid E4Unexploded rocket location. Search it for available loot.
Rockets, caches & bodies → Crashed Drones · Grid C7
Crashed-drone location. Check the wreck for available loot.
Reported loot
 Comms Module Crashed Drones · Grid C8
Crashed-drone location. Check the wreck for available loot.
Reported loot
Comms Module Crashed Drones · Grid D8Crashed-drone location. Check the wreck for available loot.
Reported loot
Comms Module Crashed Drones · Grid D7Crashed-drone location. Check the wreck for available loot.
Reported loot
Comms Module Crashed Drones · Grid D7Crashed-drone location. Check the wreck for available loot.
Reported loot
Comms Module Crashed Drones · Grid D7Crashed-drone location. Check the wreck for available loot.
Reported loot
Comms Module Crashed Drones · Grid D7Crashed-drone location. Check the wreck for available loot.
Reported loot
Comms Module Crashed Drones · Grid F7Crashed-drone location. Check the wreck for available loot.
Reported loot
Comms Module Crashed Drones · Grid G7Crashed-drone location. Check the wreck for available loot.
Reported loot
Comms Module Crashed Drones · Grid G7Crashed-drone location. Check the wreck for available loot.
Reported loot
Comms Module Crashed Drones · Grid G8Crashed-drone location. Check the wreck for available loot.
Reported loot
Comms Module Crashed Drones · Grid I7Crashed-drone location. Check the wreck for available loot.
Reported loot
Comms Module Crashed Drones · Grid I7Crashed-drone location. Check the wreck for available loot.
Reported loot
Comms Module Crashed Drones · Grid H7Crashed-drone location. Check the wreck for available loot.
Reported loot
Comms Module Crashed Drones · Grid E6Crashed-drone location. Check the wreck for available loot.
Reported loot
Comms Module Crashed Drones · Grid F5Crashed-drone location. Check the wreck for available loot.
Reported loot
Comms Module Crashed Drones · Grid E4Crashed-drone location. Check the wreck for available loot.
Reported loot
Comms Module Named area near the northwestern side of Hajin.
Lost Supply Drops · Grid H4Supply-drop search area. A drop is not present in every deployment.
MW4 DMZ Crashed Crate: Lost Supply Drops and Loot Radio Tower →Key Rooms · Grid C5Armory location at the Pyonghwa Village police station. Match the named door and required key in game.
Required key not identified. Match the named lock; this marker does not establish which key opens it.
Keys & loot rooms guide → Hidden Entrances · Grid B3
Tunnel, underground access or wall breach. Check the entrance and follow the route in game.
Hidden Entrances · Grid F6Tunnel, underground access or wall breach. Check the entrance and follow the route in game.
 Area Boundaries · Grid G6
District outline for orientation. It is not a live danger boundary.
Area Boundaries · Grid B5District outline for orientation. It is not a live danger boundary.
Search location · Grid G6Epic crafting ingredient. Search reported tech-loot areas, or print one with 100 Electronics and 3 CPU after unlocking Epic Ingredient Printing.
Search Netshin Tech Complex and Cheonwang Peak Array server rooms, and Deadtown hillside buildings. These are search areas, not guaranteed spawns.
Area reference; the exact pickup spot is not mapped.
Open item page → Search location · Grid C7Epic crafting ingredient. Search reported tech-loot areas, or print one with 100 Electronics and 3 CPU after unlocking Epic Ingredient Printing.
Search Netshin Tech Complex and Cheonwang Peak Array server rooms, and Deadtown hillside buildings. These are search areas, not guaranteed spawns.
Area reference; the exact pickup spot is not mapped.
Open item page → Search location · Grid E6Epic crafting ingredient. Search reported tech-loot areas, or print one with 100 Electronics and 3 CPU after unlocking Epic Ingredient Printing.
Search Netshin Tech Complex and Cheonwang Peak Array server rooms, and Deadtown hillside buildings. These are search areas, not guaranteed spawns.
Area reference; the exact pickup spot is not mapped.
Open item page → Search location · Grid I4
An Epic ingredient for equipment recipes and FOB upgrades. Search reactor storage and tables, or print it after unlocking Epic Ingredient Printing.
At Haneul Nuclear Reactor, check yellow Chemical Storage, tool chests and loose items on tables across the interior levels. Regulators are reported here; no container or quantity is guaranteed. Prepare radiation protection before entering.
Area reference; the exact pickup spot is not mapped.
Open item page → Search location · Grid H4An Epic ingredient for equipment recipes and FOB upgrades. Search reactor storage and tables, or print it after unlocking Epic Ingredient Printing.
At Haneul Nuclear Reactor, check yellow Chemical Storage, tool chests and loose items on tables across the interior levels. Regulators are reported here; no container or quantity is guaranteed. Prepare radiation protection before entering.
Area reference; the exact pickup spot is not mapped.
Open item page →Hidden Entrances · Grid C5Tunnel, underground access or wall breach. Check the entrance and follow the route in game.
 Search location · Grid H8
A crafting ingredient used for Bomb Gliders and Door Breacher Charges.
Imjin Farmland rice mill, Hajin City construction area and Namjjog Station. Community report; availability varies.
Area reference; the exact pickup spot is not mapped.
Open item page → Search location · Grid E5A crafting ingredient used for Bomb Gliders and Door Breacher Charges.
Imjin Farmland rice mill, Hajin City construction area and Namjjog Station. Community report; availability varies.
Area reference; the exact pickup spot is not mapped.
Open item page → Tram Routes · Grid G7
Tram circuit. Check transport availability in your deployment.
Hidden Entrances · Grid B6Tunnel, underground access or wall breach. Check the entrance and follow the route in game.
Hidden Entrances · Grid B6Tunnel, underground access or wall breach. Check the entrance and follow the route in game.
Hidden Entrances · Grid F4Tunnel, underground access or wall breach. Check the entrance and follow the route in game.
Hidden Entrances · Grid F4Tunnel, underground access or wall breach. Check the entrance and follow the route in game.
Search location · Grid D6Epic crafting ingredient. Search reported tech-loot areas, or print one with 100 Electronics and 3 CPU after unlocking Epic Ingredient Printing.
Search Netshin Tech Complex and Cheonwang Peak Array server rooms, and Deadtown hillside buildings. These are search areas, not guaranteed spawns.
Area reference; the exact pickup spot is not mapped.
Open item page → Search location · Grid I7
A Rare printer ingredient for backpacks, gas masks and Ballistic Fabric; also needed for Uncommon Ingredient Printing.
Chang-san Air Base armory/barracks and La Grande Vie rooftop at Songdo Wharf are reported menu-hint areas, not guaranteed spawns.
Area reference; the exact pickup spot is not mapped.
Open item page → Search location · Grid B5A Rare printer ingredient for backpacks, gas masks and Ballistic Fabric; also needed for Uncommon Ingredient Printing.
Chang-san Air Base armory/barracks and La Grande Vie rooftop at Songdo Wharf are reported menu-hint areas, not guaranteed spawns.
Area reference; the exact pickup spot is not mapped.
Open item page → Search location · Grid E7A Rare printer ingredient for backpacks, gas masks and Ballistic Fabric; also needed for Uncommon Ingredient Printing.
Chang-san Air Base armory/barracks and La Grande Vie rooftop at Songdo Wharf are reported menu-hint areas, not guaranteed spawns.
Area reference; the exact pickup spot is not mapped.
Open item page →Hidden Entrances · Grid B6Tunnel, underground access or wall breach. Check the entrance and follow the route in game.
Hidden Entrances · Grid B6Tunnel, underground access or wall breach. Check the entrance and follow the route in game.
Hidden Entrances · Grid A6Tunnel, underground access or wall breach. Check the entrance and follow the route in game.
Hidden Entrances · Grid A5Tunnel, underground access or wall breach. Check the entrance and follow the route in game.
Hidden Entrances · Grid A5Tunnel, underground access or wall breach. Check the entrance and follow the route in game.
Hidden Entrances · Grid B5Tunnel, underground access or wall breach. Check the entrance and follow the route in game.
Hidden Entrances · Grid B5Tunnel, underground access or wall breach. Check the entrance and follow the route in game.
Hidden Entrances · Grid B7Tunnel, underground access or wall breach. Check the entrance and follow the route in game.
Hidden Entrances · Grid B7Tunnel, underground access or wall breach. Check the entrance and follow the route in game.
 Search location · Grid A4
Epic ingredient used for Secure Backpacks, the 3-Plate Helmet Armor Vest and later item-Stash upgrades.
Search Military Lockers inside Revolution Dam buildings around D3. Alloyed Plating has been found in one locker; this is not a fixed spawn.
Area reference; the exact pickup spot is not mapped.
Open item page → Search location · Grid D8A crafting ingredient used for Bomb Gliders and Door Breacher Charges.
Imjin Farmland rice mill, Hajin City construction area and Namjjog Station. Community report; availability varies.
Area reference; the exact pickup spot is not mapped.
Open item page → Search location · Grid G6
A Rare printer ingredient used in electronics, equipment and FOB upgrades. Search server rooms and computers.
Search Netshin Tech Complex and Cheonwang Peak Array server rooms, and Deadtown hillside buildings. Check computers and server containers; loot varies.
Search location: Netshin Tech Complex
Area reference; the exact pickup spot is not mapped.
Open item page → Search location · Grid C7A Rare printer ingredient used in electronics, equipment and FOB upgrades. Search server rooms and computers.
Search Netshin Tech Complex and Cheonwang Peak Array server rooms, and Deadtown hillside buildings. Check computers and server containers; loot varies.
Search location: Deadtown
Area reference; the exact pickup spot is not mapped.
Open item page → Search location · Grid E6A Rare printer ingredient used in electronics, equipment and FOB upgrades. Search server rooms and computers.
Search Netshin Tech Complex and Cheonwang Peak Array server rooms, and Deadtown hillside buildings. Check computers and server containers; loot varies.
Search location: Cheonwang Peak Array
Area reference; the exact pickup spot is not mapped.
Open item page → Search location · Grid F4
A 3D Printer ingredient.
Search computers and tech bags. Reported examples include a police-station cache in Cheongun Village and a computer at Songdo Pier.
Search location: Cheongun Village
Area reference; the exact pickup spot is not mapped.
Open item page → Search location · Grid I7A 3D Printer ingredient.
Search computers and tech bags. Reported examples include a police-station cache in Cheongun Village and a computer at Songdo Pier.
Search location: Songdo Pier
Area reference; the exact pickup spot is not mapped.
Open item page → Search location · Grid E6A 3D Printer ingredient.
Search computers and tech bags. Reported examples include a police-station cache in Cheongun Village and a computer at Songdo Pier.
Search location: Cheonwang Peak Array
Area reference; the exact pickup spot is not mapped.
Open item page → Search location · Grid F4
A crafting ingredient for UAVs and FOB storage upgrades.
Search tech bags and commercial areas. Reported finds include computers and IT bags; check each container rather than expecting a fixed spawn.
Search location: Cheongun Village
Area reference; the exact pickup spot is not mapped.
Open item page → Search location · Grid B5A crafting ingredient for UAVs and FOB storage upgrades.
Search tech bags and commercial areas. Reported finds include computers and IT bags; check each container rather than expecting a fixed spawn.
Search location: Chang-san Air Base
Area reference; the exact pickup spot is not mapped.
Open item page → Search location · Grid G7A crafting ingredient for UAVs and FOB storage upgrades.
Search tech bags and commercial areas. Reported finds include computers and IT bags; check each container rather than expecting a fixed spawn.
Search location: Wolves Stadium
Area reference; the exact pickup spot is not mapped.
Open item page → Search location · Grid F4A crafting ingredient for UAVs and FOB storage upgrades.
Search tech bags and commercial areas. Reported finds include computers and IT bags; check each container rather than expecting a fixed spawn.
Search location: Heavenly Luck Casino
Area reference; the exact pickup spot is not mapped.
Open item page → Search location · Grid D7A crafting ingredient for UAVs and FOB storage upgrades.
Search tech bags and commercial areas. Reported finds include computers and IT bags; check each container rather than expecting a fixed spawn.
Search location: Imjin Farmland
Area reference; the exact pickup spot is not mapped.
Open item page → Search location · Grid I4
A 3D Printer ingredient used in the recipes listed below.
Haneul Nuclear Reactor and electrical substations; also observed on an airbase bunker shelf. Community report; availability varies.
Search location: Haneul Nuclear Reactor
Area reference; the exact pickup spot is not mapped.
Open item page → Search location · Grid B5A 3D Printer ingredient used in the recipes listed below.
Haneul Nuclear Reactor and electrical substations; also observed on an airbase bunker shelf. Community report; availability varies.
Search location: Chang-san Air Base
Area reference; the exact pickup spot is not mapped.
Open item page → Search location · Grid A4
Ingredient used to print the Small Secure Backpack.
Chang-san Air Base hangars and repair bays, and Bubun Yard. Community report; availability varies.
Search location: Bubun Yard
Area reference; the exact pickup spot is not mapped.
Open item page → Search location · Grid B5Ingredient used to print the Small Secure Backpack.
Chang-san Air Base hangars and repair bays, and Bubun Yard. Community report; availability varies.
Search location: Chang-san Air Base
Area reference; the exact pickup spot is not mapped.
Open item page → Search location · Grid B5
A crafting ingredient used by the 3D Printer.
Chang-san Air Base armory and barracks, and the La Grande Vie rooftop at Songdo Wharf. Community report; availability varies.
Search location: Chang-san Air Base
Area reference; the exact pickup spot is not mapped.
Open item page → Search location · Grid I7A crafting ingredient used by the 3D Printer.
Chang-san Air Base armory and barracks, and the La Grande Vie rooftop at Songdo Wharf. Community report; availability varies.
Search location: La Grande Vie
Area reference; the exact pickup spot is not mapped.
Open item page → Search location · Grid D8
A 3D Printer ingredient used in the recipes listed below.
Search the Imjin Farmland rice mill, Hajin City construction zone and Namjjog Station. Reported finds include an industrial locker in North Korean Wilderness and a Construction Zone hidden cache during Special Delivery; these are not guaranteed spawns.
Search location: Rice Mill
Area reference; the exact pickup spot is not mapped.
Open item page → Search location · Grid H7A 3D Printer ingredient used in the recipes listed below.
Search the Imjin Farmland rice mill, Hajin City construction zone and Namjjog Station. Reported finds include an industrial locker in North Korean Wilderness and a Construction Zone hidden cache during Special Delivery; these are not guaranteed spawns.
Search location: Construction Zone
Area reference; the exact pickup spot is not mapped.
Open item page → Search location · Grid B5
A 3D Printer ingredient.
Search military and industrial areas, especially toolboxes and chemical storage. Reported finds include Chang-san Air Base and Cheongun Outskirts.
Search location: Chang-san Air Base
Area reference; the exact pickup spot is not mapped.
Open item page → Search location · Grid E4A 3D Printer ingredient.
Search military and industrial areas, especially toolboxes and chemical storage. Reported finds include Chang-san Air Base and Cheongun Outskirts.
Search location: Cheongun Outskirts
Area reference; the exact pickup spot is not mapped.
Open item page → Search location · Grid F5
Used to craft: - Medkit (5)
Search hospitals and chemical lockers. Medical bags, first aid kits and medicine cabinets are also reported sources.
Search location: Mirae General Hospital
Area reference; the exact pickup spot is not mapped.
Open item page → Search location · Grid E4Used to craft: - Medkit (5)
Search hospitals and chemical lockers. Medical bags, first aid kits and medicine cabinets are also reported sources.
Search location: Fire Station Storage · additional location
Area reference; the exact pickup spot is not mapped.
Open item page → Search location · Grid F5
A crafting ingredient used by the 3D Printer.
Search Mirae General Hospital and medical tents. Reported finds also include chemical storage, first aid kits and medicine cabinets.
Search location: Mirae General Hospital
Area reference; the exact pickup spot is not mapped.
Open item page → Search location · Grid F5
Epic crafting ingredient.
A community ingredient guide recommends Mirae General Hospital and medical tents. Search guidance only; a fixed pickup is not verified.
Search location: Mirae General Hospital
Area reference; the exact pickup spot is not mapped.
Open item page → Search location · Grid H6
Rare loot item.
Search the NuriGO Mall DRC lab, Citadel Prison Yard chemical buildings and Imjin Farmland storage tents. Nitro Compounds has been found in Chemical Storage at NuriGO Mall during Shopping Hacks; loot varies.
Search location: NuriGO Mall
Area reference; the exact pickup spot is not mapped.
Open item page → Search location · Grid C3Rare loot item.
Search the NuriGO Mall DRC lab, Citadel Prison Yard chemical buildings and Imjin Farmland storage tents. Nitro Compounds has been found in Chemical Storage at NuriGO Mall during Shopping Hacks; loot varies.
Search location: 14th Political Prison
Area reference; the exact pickup spot is not mapped.
Open item page → Search location · Grid D7Rare loot item.
Search the NuriGO Mall DRC lab, Citadel Prison Yard chemical buildings and Imjin Farmland storage tents. Nitro Compounds has been found in Chemical Storage at NuriGO Mall during Shopping Hacks; loot varies.
Search location: Imjin Farmland
Area reference; the exact pickup spot is not mapped.
Open item page → Search location · Grid H6
Epic loot item.
Search the NuriGO Mall DRC lab, Citadel Prison Yard chemical buildings and Imjin Farmland storage tents. Volatile Explosives has been found in an Oamsik Turtle Island Hidden Cache during Dead Man’s Cache; loot varies.
Search location: NuriGO Mall
Area reference; the exact pickup spot is not mapped.
Open item page → Search location · Grid C3Epic loot item.
Search the NuriGO Mall DRC lab, Citadel Prison Yard chemical buildings and Imjin Farmland storage tents. Volatile Explosives has been found in an Oamsik Turtle Island Hidden Cache during Dead Man’s Cache; loot varies.
Search location: 14th Political Prison
Area reference; the exact pickup spot is not mapped.
Open item page → Search location · Grid D7Epic loot item.
Search the NuriGO Mall DRC lab, Citadel Prison Yard chemical buildings and Imjin Farmland storage tents. Volatile Explosives has been found in an Oamsik Turtle Island Hidden Cache during Dead Man’s Cache; loot varies.
Search location: Imjin Farmland
Area reference; the exact pickup spot is not mapped.
Open item page → Search location · Grid I5Epic loot item.
Search the NuriGO Mall DRC lab, Citadel Prison Yard chemical buildings and Imjin Farmland storage tents. Volatile Explosives has been found in an Oamsik Turtle Island Hidden Cache during Dead Man’s Cache; loot varies.
Search location: Oamsik Turtle Islands
Area reference; the exact pickup spot is not mapped.
Open item page → Search location · Grid B3
3D Printer ingredient. Found primarily in Citadel main building wings, Deadtown underground holding area, and Mujin Nightclub at Heavenly Luck Casino.
Citadel main building wings, Deadtown underground holding area, and Mujin Nightclub at Heavenly Luck Casino.
Search location: The Citadel
Area reference; the exact pickup spot is not mapped.
Open item page → Search location · Grid C73D Printer ingredient. Found primarily in Citadel main building wings, Deadtown underground holding area, and Mujin Nightclub at Heavenly Luck Casino.
Citadel main building wings, Deadtown underground holding area, and Mujin Nightclub at Heavenly Luck Casino.
Search location: Deadtown
Area reference; the exact pickup spot is not mapped.
Open item page → Search location · Grid F43D Printer ingredient. Found primarily in Citadel main building wings, Deadtown underground holding area, and Mujin Nightclub at Heavenly Luck Casino.
Citadel main building wings, Deadtown underground holding area, and Mujin Nightclub at Heavenly Luck Casino.
Search location: Heavenly Luck Casino
Area reference; the exact pickup spot is not mapped.
Open item page → Search location · Grid B3
Found in military holding or high class civilian locations.
Military holdings or high-class civilian locations; a general loot hint, not a fixed spawn.
Search location: The Citadel
Area reference; the exact pickup spot is not mapped.
Open item page → Search location · Grid C7Found in military holding or high class civilian locations.
Military holdings or high-class civilian locations; a general loot hint, not a fixed spawn.
Search location: Deadtown
Area reference; the exact pickup spot is not mapped.
Open item page → Search location · Grid F4Found in military holding or high class civilian locations.
Military holdings or high-class civilian locations; a general loot hint, not a fixed spawn.
Search location: Heavenly Luck Casino
Area reference; the exact pickup spot is not mapped.
Open item page → Search location · Grid B5
Found in industrial areas and toolboxes. Used to craft: Secure Scavenger Backpack
Industrial areas and toolboxes; a general loot hint, not a fixed spawn.
Search location: Chang-san Air Base
Area reference; the exact pickup spot is not mapped.
Open item page → Search location · Grid F8
Material required for the community-reported first MIA Recovery Discount upgrade.
Check care packages, the Compound Bravo safe and Special Delivery reward crates. These are reported finds, not guaranteed contents.
Search location: Compound Bravo
Area reference; the exact pickup spot is not mapped.
Open item page → Search location · Grid D2Epic ingredient used for Secure Backpacks, the 3-Plate Helmet Armor Vest and later item-Stash upgrades.
Search Military Lockers inside Revolution Dam buildings around D3. Alloyed Plating has been found in one locker; this is not a fixed spawn.
Search location: Revolution Dam
Area reference; the exact pickup spot is not mapped.
Open item page → Search location · Grid B5Epic ingredient used for Secure Backpacks, the 3-Plate Helmet Armor Vest and later item-Stash upgrades.
Search Military Lockers inside Revolution Dam buildings around D3. Alloyed Plating has been found in one locker; this is not a fixed spawn.
Search location: Chang-san Air Base
Area reference; the exact pickup spot is not mapped.
Open item page → Search location · Grid E6An Epic ingredient for equipment recipes and FOB upgrades. Search reactor storage and tables, or print it after unlocking Epic Ingredient Printing.
At Haneul Nuclear Reactor, check yellow Chemical Storage, tool chests and loose items on tables across the interior levels. Regulators are reported here; no container or quantity is guaranteed. Prepare radiation protection before entering.
Search location: Cheonwang Peak Array
Area reference; the exact pickup spot is not mapped.
Open item page → Search location · Grid F5An Epic ingredient for equipment recipes and FOB upgrades. Search reactor storage and tables, or print it after unlocking Epic Ingredient Printing.
At Haneul Nuclear Reactor, check yellow Chemical Storage, tool chests and loose items on tables across the interior levels. Regulators are reported here; no container or quantity is guaranteed. Prepare radiation protection before entering.
Search location: Mechanic's Shack area
Area reference; the exact pickup spot is not mapped.
Open item page → Search location · Grid E9A Rare printer ingredient for backpacks, gas masks and Ballistic Fabric; also needed for Uncommon Ingredient Printing.
Chang-san Air Base armory/barracks and La Grande Vie rooftop at Songdo Wharf are reported menu-hint areas, not guaranteed spawns.
Search location: Namjin Riverside
Area reference; the exact pickup spot is not mapped.
Open item page → Search location · Grid H7A crafting ingredient used for Bomb Gliders and Door Breacher Charges.
Imjin Farmland rice mill, Hajin City construction area and Namjjog Station. Community report; availability varies.
Search location: Construction Zone
Area reference; the exact pickup spot is not mapped.
Open item page →Basic Weapons Lockers · Grid A5Basic Weapons Locker area. Search nearby; the exact cabinet, floor and current availability are unverified.
Basic Weapons Lockers · Grid A7Basic Weapons Locker area. Search nearby; the exact cabinet, floor and current availability are unverified.
Basic Weapons Lockers · Grid A7Basic Weapons Locker area. Search nearby; the exact cabinet, floor and current availability are unverified.
Basic Weapons Lockers · Grid B2Basic Weapons Locker area. Search nearby; the exact cabinet, floor and current availability are unverified.
Basic Weapons Lockers · Grid B4Basic Weapons Locker area. Search nearby; the exact cabinet, floor and current availability are unverified.
Basic Weapons Lockers · Grid C5Basic Weapons Locker area. Search nearby; the exact cabinet, floor and current availability are unverified.
Basic Weapons Lockers · Grid C7Basic Weapons Locker area. Search nearby; the exact cabinet, floor and current availability are unverified.
Basic Weapons Lockers · Grid D3Basic Weapons Locker area. Search nearby; the exact cabinet, floor and current availability are unverified.
Basic Weapons Lockers · Grid D3Basic Weapons Locker area. Search nearby; the exact cabinet, floor and current availability are unverified.
Basic Weapons Lockers · Grid D5Basic Weapons Locker area. Search nearby; the exact cabinet, floor and current availability are unverified.
Basic Weapons Lockers · Grid E6Basic Weapons Locker area. Search nearby; the exact cabinet, floor and current availability are unverified.
Basic Weapons Lockers · Grid E6Basic Weapons Locker area. Search nearby; the exact cabinet, floor and current availability are unverified.
Basic Weapons Lockers · Grid F4Basic Weapons Locker area. Search nearby; the exact cabinet, floor and current availability are unverified.
Basic Weapons Lockers · Grid F4Basic Weapons Locker area. Search nearby; the exact cabinet, floor and current availability are unverified.
Basic Weapons Lockers · Grid F4Basic Weapons Locker area. Search nearby; the exact cabinet, floor and current availability are unverified.
Basic Weapons Lockers · Grid F8Basic Weapons Locker area. Search nearby; the exact cabinet, floor and current availability are unverified.
Basic Weapons Lockers · Grid G6Basic Weapons Locker area. Search nearby; the exact cabinet, floor and current availability are unverified.
Basic Weapons Lockers · Grid H5Basic Weapons Locker area. Search nearby; the exact cabinet, floor and current availability are unverified.
Basic Weapons Lockers · Grid H5Basic Weapons Locker area. Search nearby; the exact cabinet, floor and current availability are unverified.
Basic Weapons Lockers · Grid H6Basic Weapons Locker area. Search nearby; the exact cabinet, floor and current availability are unverified.
Basic Weapons Lockers · Grid H6Basic Weapons Locker area. Search nearby; the exact cabinet, floor and current availability are unverified.
Basic Weapons Lockers · Grid I7Basic Weapons Locker area. Search nearby; the exact cabinet, floor and current availability are unverified.
Chemical Lockers · Grid B6Chemical Storage area. Search nearby; the exact cabinet, floor and current availability are unverified.
Where to find crafting materials in MW4 DMZ →Chemical Lockers · Grid B6Chemical Storage area. Search nearby; the exact cabinet, floor and current availability are unverified.
Where to find crafting materials in MW4 DMZ →Chemical Lockers · Grid D5Chemical Storage area. Search nearby; the exact cabinet, floor and current availability are unverified.
Where to find crafting materials in MW4 DMZ →Chemical Lockers · Grid H6Chemical Storage area. Search nearby; the exact cabinet, floor and current availability are unverified.
Where to find crafting materials in MW4 DMZ →Weapon Lockers · Grid B6Weapon locker area. Search nearby; the exact cabinet, floor and current availability are unverified.
Weapon Lockers · Grid B6Weapon locker area. Search nearby; the exact cabinet, floor and current availability are unverified.
Weapon Lockers · Grid B6Weapon locker area. Search nearby; the exact cabinet, floor and current availability are unverified.
Weapon Lockers · Grid B6Weapon locker area. Search nearby; the exact cabinet, floor and current availability are unverified.
Weapon Lockers · Grid B6Weapon locker area. Search nearby; the exact cabinet, floor and current availability are unverified.
Weapon Lockers · Grid B6Weapon locker area. Search nearby; the exact cabinet, floor and current availability are unverified.
Weapon Lockers · Grid B6Weapon locker area. Search nearby; the exact cabinet, floor and current availability are unverified.
Weapon Lockers · Grid B6Weapon locker area. Search nearby; the exact cabinet, floor and current availability are unverified.
Weapon Lockers · Grid B6Weapon locker area. Search nearby; the exact cabinet, floor and current availability are unverified.
Weapon Lockers · Grid B7Weapon locker area. Search nearby; the exact cabinet, floor and current availability are unverified.
Weapon Lockers · Grid D8Weapon locker area. Search nearby; the exact cabinet, floor and current availability are unverified.
Weapon Lockers · Grid D8Weapon locker area. Search nearby; the exact cabinet, floor and current availability are unverified.
Weapon Lockers · Grid F4Weapon locker area. Search nearby; the exact cabinet, floor and current availability are unverified.
Weapon Lockers · Grid F4Weapon locker area. Search nearby; the exact cabinet, floor and current availability are unverified.
Weapon Lockers · Grid F4Weapon locker area. Search nearby; the exact cabinet, floor and current availability are unverified.
Weapon Lockers · Grid F4Weapon locker area. Search nearby; the exact cabinet, floor and current availability are unverified.
Weapon Lockers · Grid F4Weapon locker area. Search nearby; the exact cabinet, floor and current availability are unverified.
Weapon Lockers · Grid G6Weapon locker area. Search nearby; the exact cabinet, floor and current availability are unverified.
Weapon Lockers · Grid G6Weapon locker area. Search nearby; the exact cabinet, floor and current availability are unverified.
Weapon Lockers · Grid G7Weapon locker area. Search nearby; the exact cabinet, floor and current availability are unverified.
Weapon Lockers · Grid G7Weapon locker area. Search nearby; the exact cabinet, floor and current availability are unverified.
Weapon Lockers · Grid H5Weapon locker area. Search nearby; the exact cabinet, floor and current availability are unverified.
Weapon Lockers · Grid H5Weapon locker area. Search nearby; the exact cabinet, floor and current availability are unverified.
Weapon Lockers · Grid H6Weapon locker area. Search nearby; the exact cabinet, floor and current availability are unverified.
Weapon Lockers · Grid H6Weapon locker area. Search nearby; the exact cabinet, floor and current availability are unverified.
Weapon Lockers · Grid H6Weapon locker area. Search nearby; the exact cabinet, floor and current availability are unverified.
Key Rooms · Grid G8Locked entrance for Gangbyeon Apartment A. Exact doorway and key details are unverified; this reference is separate from Apartment B.
Required key not identified. Match the named lock; this marker does not establish which key opens it.
Keys & loot rooms guide →Key Rooms · Grid H7Locked entrance for Hotel Lucera Lobby. Exact doorway and key details are unverified; this reference is separate from the Suite 703 bedroom.
Required key not identified. Match the named lock; this marker does not establish which key opens it.
Keys & loot rooms guide →SAM Sites · Grid B5SAM search area at Chang-san Air Base. Availability and objectives vary; follow the current mission and Tac-Map before approaching or capturing it.
About SAM Sites → MW4 DMZ UAV Towers and SAM sites: activation and defence →SAM Sites · Grid B5SAM search area at Chang-san Air Base. Availability and objectives vary; follow the current mission and Tac-Map before approaching or capturing it.
About SAM Sites → MW4 DMZ UAV Towers and SAM sites: activation and defence →SAM Sites · Grid B6SAM search area at Chang-san Air Base. Availability and objectives vary; follow the current mission and Tac-Map before approaching or capturing it.
About SAM Sites → MW4 DMZ UAV Towers and SAM sites: activation and defence →Key Rooms · Grid F4Police Station armory area. The exact doorway and required key are unverified; check the named lock in game.
Required key not identified. Match the named lock; this marker does not establish which key opens it.
Keys & loot rooms guide →Key Rooms · Grid H5Police Station armory area. The exact doorway and required key are unverified; check the named lock in game.
Required key not identified. Match the named lock; this marker does not establish which key opens it.
Keys & loot rooms guide →Lost Supply Drops · Grid F4Lost Supply Drop search area. A drop is not guaranteed here in every deployment; check the current objective and in-game signs before approaching.
MW4 DMZ Crashed Crate: Lost Supply Drops and Loot Radio Tower →Safes · Grid C3Safe search area. The exact cabinet and floor are unverified; loot and availability vary by deployment.
Find and open safes →Safes · Grid D5Safe search area. The exact cabinet and floor are unverified; loot and availability vary by deployment.
Find and open safes →Safes · Grid D5Safe search area. The exact cabinet and floor are unverified; loot and availability vary by deployment.
Find and open safes →Safes · Grid D6Safe search area. The exact cabinet and floor are unverified; loot and availability vary by deployment.
Find and open safes →Safes · Grid D8Safe search area. The exact cabinet and floor are unverified; loot and availability vary by deployment.
Find and open safes →Safes · Grid I5Safe search area. The exact cabinet and floor are unverified; loot and availability vary by deployment.
Find and open safes →Crashed Drones · Grid I7Crashed-drone search area. Check the wreck and current side-op objective; loot and availability vary by deployment.
Reported loot
Comms Module Exfils · Grid G4Candidate extraction area. The exact pad and extraction method are unverified. It may be inactive; use the current Tac-Map to choose an active exit.
Active extraction sites vary by deployment. Check your Tac-Map before heading to an exit.
About Exfils → DMZ exfil guide: extraction methods and emergency plans →Exfils · Grid E5Candidate extraction area. The exact pad and extraction method are unverified. It may be inactive; use the current Tac-Map to choose an active exit.
Active extraction sites vary by deployment. Check your Tac-Map before heading to an exit.
About Exfils → DMZ exfil guide: extraction methods and emergency plans →Exfils · Grid D6Candidate extraction area. The exact pad and extraction method are unverified. It may be inactive; use the current Tac-Map to choose an active exit.
Active extraction sites vary by deployment. Check your Tac-Map before heading to an exit.
About Exfils → DMZ exfil guide: extraction methods and emergency plans →Exfils · Grid B6Candidate extraction area. The exact pad and extraction method are unverified. It may be inactive; use the current Tac-Map to choose an active exit.
Active extraction sites vary by deployment. Check your Tac-Map before heading to an exit.
About Exfils → DMZ exfil guide: extraction methods and emergency plans →Exfils · Grid I7Candidate extraction area. The exact pad and extraction method are unverified. It may be inactive; use the current Tac-Map to choose an active exit.
Active extraction sites vary by deployment. Check your Tac-Map before heading to an exit.
About Exfils → DMZ exfil guide: extraction methods and emergency plans →Safes · Grid F8Safe search area. The exact cabinet and floor are unverified; loot and availability vary by deployment.
Find and open safes →Lost Supply Drops · Grid E4Lost Supply Drop search area. A drop is not guaranteed here in every deployment; check the current objective and in-game signs before approaching.
MW4 DMZ Crashed Crate: Lost Supply Drops and Loot Radio Tower → Key Rooms · Grid D8Mill Explosives Lab entrance. Match the lock prompt before using the key; the exact door is unverified.
Required key: Mill Explosives Lab → Keys & loot rooms guide →Hidden Entrances · Grid D8Underground entrance route. Check the entrance and current access in game.
Hidden Entrances · Grid E6Underground entrance route. Check the entrance and current access in game.
Keypad Doors · Grid I4Keypad door. The code and exact entrance are unverified.
MW4 DMZ keypad codes: find your mission's code and the right lock → Search area · Grid I4
Radiation-protection gear be discarded when you exfil.
Search the tents between the reactor buildings at Haneul Nuclear Reactor and their loot containers.
Reported search area; loot is not guaranteed.
Open item page → Search area · Grid H4Radiation-protection gear be discarded when you exfil.
Search the tents between the reactor buildings at Haneul Nuclear Reactor and their loot containers.
Reported search area; loot is not guaranteed.
Open item page → Search area · Grid I4Radiation-protection gear be discarded when you exfil.
Search the tents between the reactor buildings at Haneul Nuclear Reactor and their loot containers.
Reported search area; loot is not guaranteed.
Open item page →Safes · Grid G7Safe location. Check the building and current availability in game.
Find and open safes →Safes · Grid E4Safe location. Check the building and current availability in game.
Find and open safes →Safes · Grid I4Safe location. Check the building and current availability in game.
Find and open safes →Safes · Grid I4Safe location. Check the building and current availability in game.
Find and open safes →Safes · Grid D4Safe location. Check the building and current availability in game.
Find and open safes → Key Rooms · Grid I4Locked room location. Match the named door and required key before entering.
Required key: The Chemist's Secure Armory → Keys & loot rooms guide →Safes · Grid E6Safe location. Check the building and current availability in game.
Find and open safes →Safes · Grid D8Safe location. Check the building and current availability in game.
Find and open safes →Weapon Lockers · Grid E6Weapon-locker location. Check the locker and any required key in game.
Weapon Lockers · Grid C2Weapon-locker location. Check the locker and any required key in game.
Weapon Lockers · Grid I7Weapon-locker location. Check the locker and any required key in game.
Safes · Grid C3Safe location. Check the building and current availability in game.
Find and open safes →Lootable Corpses · Grid C3Search the body inside the cage for loot.
Rockets, caches & bodies → Tank Areas · Grid F4Tank Commander location. Presence and movement vary by deployment.
Reported loot
Nano-Structured Alloy Approximate reported area. Check your current Tac-Map; boundaries and activity may change.
Tank Commander guide →Hidden Entrances · Grid B0Use the elevator to enter X01 Black Site from Hajin. Check its current access prompt.
Open route guide →Exfils · Grid H6Active extraction sites vary by deployment. Check your Tac-Map before heading to an exit.
Active extraction sites vary by deployment. Check your Tac-Map before heading to an exit.
About Exfils → DMZ exfil guide: extraction methods and emergency plans →Keypad Doors · Grid G5Keypad door. The code and exact entrance are unverified.
MW4 DMZ keypad codes: find your mission's code and the right lock →Chemical Lockers · Grid I5Chemical-cabinet area. Contents vary; match any named lock before choosing a key.
Where to find crafting materials in MW4 DMZ →Chemical Lockers · Grid I5Chemical-cabinet area. Contents vary; match any named lock before choosing a key.
Where to find crafting materials in MW4 DMZ →Safes · Grid C6Safe location. Check the building and current availability in game.
Find and open safes →Safes · Grid D8Safe location. Check the building and current availability in game.
Find and open safes →Weapon Lockers · Grid A7Weapon-locker location. Check the locker and any required key in game.
Search area · Grid H4Radiation-protection gear be discarded when you exfil.
Search the tents between the reactor buildings at Haneul Nuclear Reactor and their loot containers.
Reported search area; loot is not guaranteed.
Open item page → Search area · Grid I4Radiation-protection gear be discarded when you exfil.
Search the tents between the reactor buildings at Haneul Nuclear Reactor and their loot containers.
Reported search area; loot is not guaranteed.
Open item page → Search area · Grid H4Radiation-protection gear be discarded when you exfil.
Search the tents between the reactor buildings at Haneul Nuclear Reactor and their loot containers.
Reported search area; loot is not guaranteed.
Open item page → Search area · Grid I4Radiation-protection gear be discarded when you exfil.
Search the tents between the reactor buildings at Haneul Nuclear Reactor and their loot containers.
Reported search area; loot is not guaranteed.
Open item page → Search area · Grid H4Radiation-protection gear be discarded when you exfil.
Search the tents between the reactor buildings at Haneul Nuclear Reactor and their loot containers.
Reported search area; loot is not guaranteed.
Open item page →Weapon Lockers · Grid B2Weapon-locker location. Check the locker and any required key in game.
Weapon Lockers · Grid A5Weapon-locker location. Check the locker and any required key in game.
Search area · Grid H4Radiation-protection gear be discarded when you exfil.
Search the tents between the reactor buildings at Haneul Nuclear Reactor and their loot containers.
Hazmat Suit location requiring the Reactor 02 Control Room key. Availability varies by deployment.
Open item page → Search area · Grid I4Radiation-protection gear be discarded when you exfil.
Search the tents between the reactor buildings at Haneul Nuclear Reactor and their loot containers.
Reported search area; loot is not guaranteed.
Open item page → Search area · Grid H4Radiation-protection gear be discarded when you exfil.
Search the tents between the reactor buildings at Haneul Nuclear Reactor and their loot containers.
Hazmat Suit location requiring the Reactor 02 Control Room key. Availability varies by deployment.
Open item page → Colossus Areas · Grid I4Colossus location. Presence and movement vary by deployment.
Reported loot
Military Composites Safes · Grid G6Safe location. Check the building and current availability in game.
Find and open safes →Weapon Lockers · Grid C7Weapon-locker location. Check the locker and any required key in game.
Weapon Lockers · Grid E4Weapon-locker location. Check the locker and any required key in game.
Weapon Lockers · Grid F8Weapon-locker location. Check the locker and any required key in game.
Weapon Lockers · Grid A7Weapon-locker location. Check the locker and any required key in game.
Keypad Doors · Grid G7Keypad door. The code and exact entrance are unverified.
MW4 DMZ keypad codes: find your mission's code and the right lock →Weapon Lockers · Grid D3Weapon-locker location. Check the locker and any required key in game.
Key Rooms · Grid B3Locked room location. Match the named door and required key before entering.
Required key: The Citadel South Wing → Keys & loot rooms guide → Search area · Grid H4Radiation-protection gear be discarded when you exfil.
Search the tents between the reactor buildings at Haneul Nuclear Reactor and their loot containers.
Reported search area; loot is not guaranteed.
Open item page → Search area · Grid H4Radiation-protection gear be discarded when you exfil.
Search the tents between the reactor buildings at Haneul Nuclear Reactor and their loot containers.
Reported search area; loot is not guaranteed.
Open item page → Search area · Grid H4Radiation-protection gear be discarded when you exfil.
Search the tents between the reactor buildings at Haneul Nuclear Reactor and their loot containers.
Reported search area; loot is not guaranteed.
Open item page → Search area · Grid H4Radiation-protection gear be discarded when you exfil.
Search the tents between the reactor buildings at Haneul Nuclear Reactor and their loot containers.
Reported search area; loot is not guaranteed.
Open item page → Search area · Grid H4Radiation-protection gear be discarded when you exfil.
Search the tents between the reactor buildings at Haneul Nuclear Reactor and their loot containers.
Hazmat Suit location requiring the Reactor 02 Control Room key. Availability varies by deployment.
Open item page →Keypad Doors · Grid F5Keypad door. The code and exact entrance are unverified.
MW4 DMZ keypad codes: find your mission's code and the right lock →Exfils · Grid F6Active extraction sites vary by deployment. Check your Tac-Map before heading to an exit.
Active extraction sites vary by deployment. Check your Tac-Map before heading to an exit.
About Exfils → DMZ exfil guide: extraction methods and emergency plans →Hidden Entrances · Grid B3Climb the truck, follow the white-taped ledge to the copper pipe, then climb onto the walkway.
Lost Supply Drops · Grid H6Supply-drop search area. A drop is not present in every deployment.
MW4 DMZ Crashed Crate: Lost Supply Drops and Loot Radio Tower →Lost Supply Drops · Grid C6Supply-drop search area. A drop is not present in every deployment.
MW4 DMZ Crashed Crate: Lost Supply Drops and Loot Radio Tower →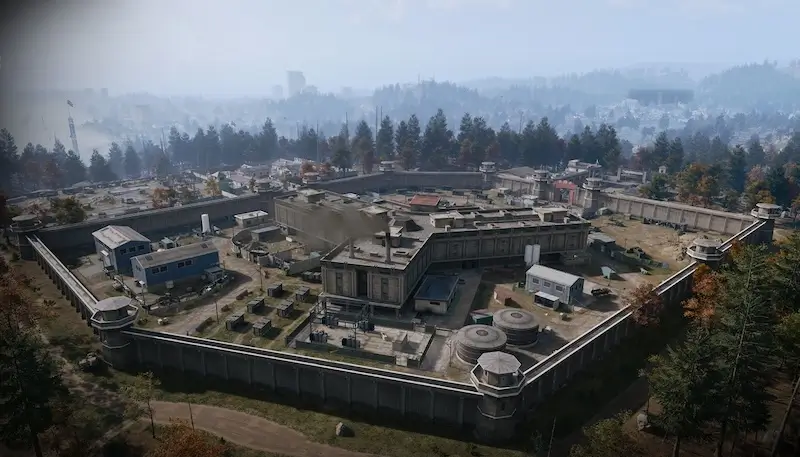
A concrete-walled detention facility on a cleared plateau in the North Korean northwest, with watchtowers on every corner, barracks to the east and the main gate and checkpoint to the south.
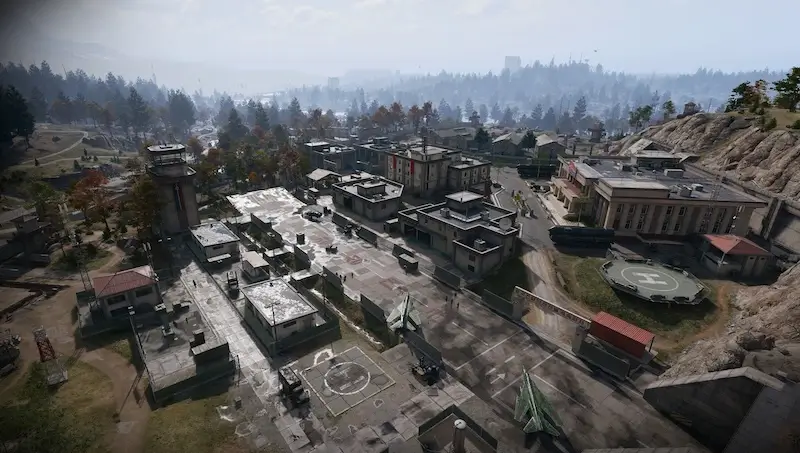
A heavily guarded North Korean air base in western Hajin, cut into a granite hillside, with a runway, helipad, hospital, barracks and command building above a vast underground complex.
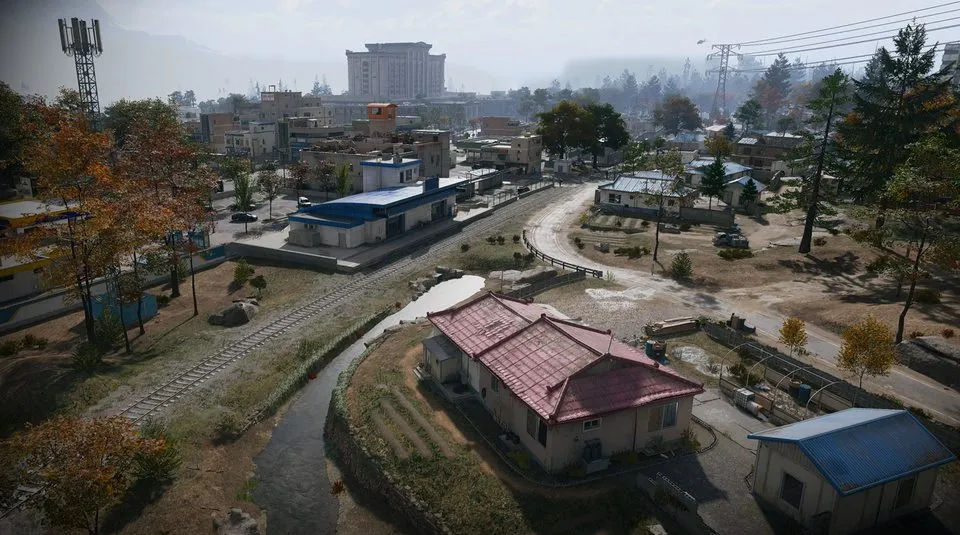
The northernmost South Korean village on the Hajin River, split by border controls, with outskirts to the west and the Heavenly Luck Casino at its heart.
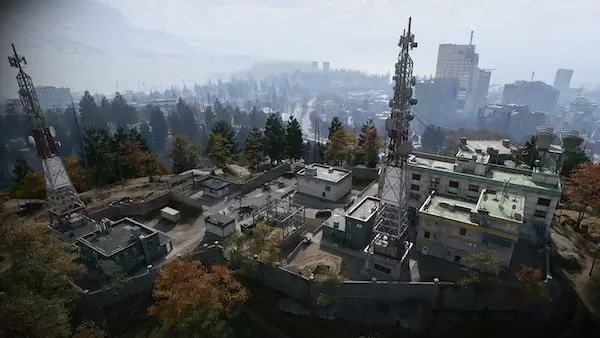
The largest telecommunications array in Hajin, on a central summit, now an enemy barracks with a rooftop helipad and long views.
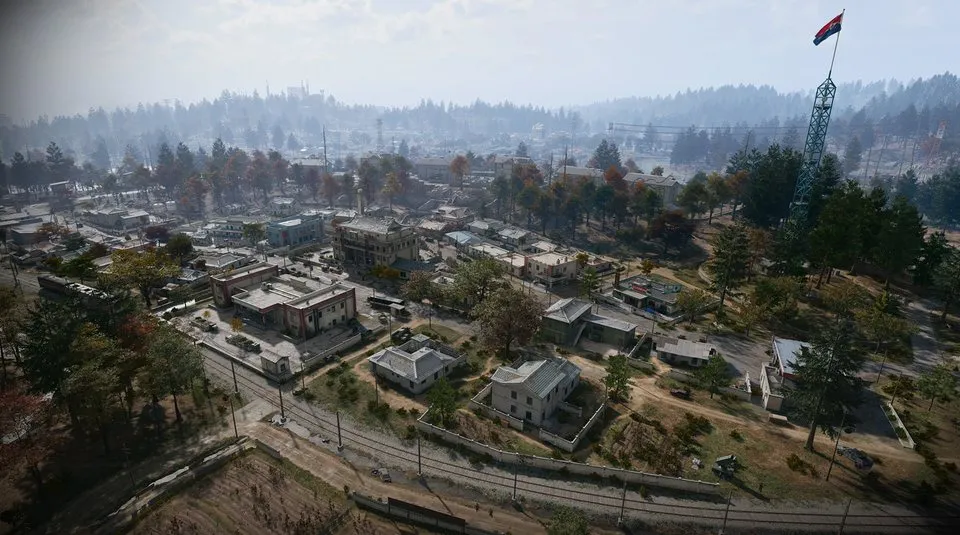
A deserted North Korean farming town in the southwest, taken over by the military. Street fights, sewers under the old buildings, a clinic and gas stations at each end of town.
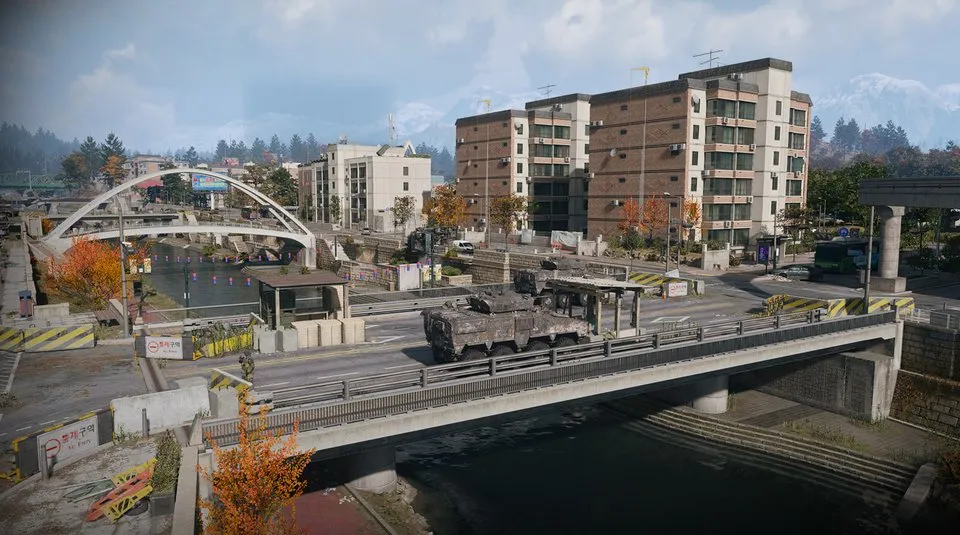
A battered residential district in the southeast, rising towards the South Fork of the Hajin River.
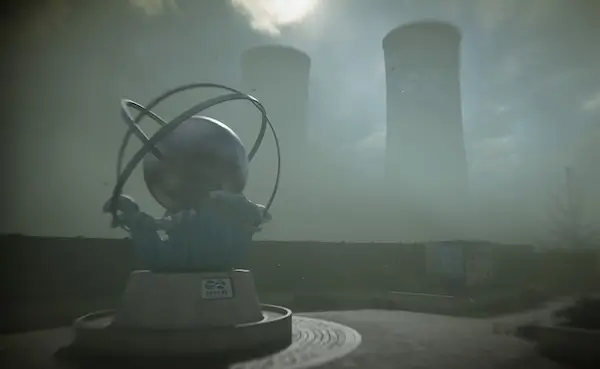
A damaged nuclear plant in the northeast under a cloud of radioactive vapour. Protective gear and a gas mask are required.
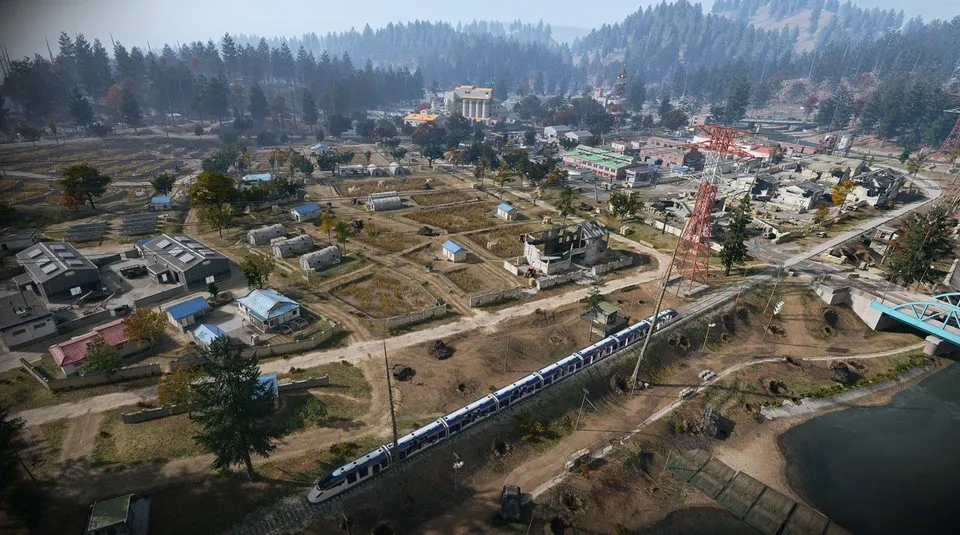
Open rice fields, waterways, farms and rail lines on a low floodplain on the southwestern border, with long sightlines and little cover.
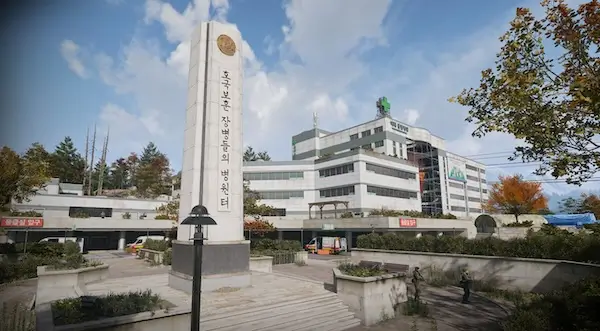
Hajin’s main hospital in the north centre, next to a train station, with triage tents and barracks outside and close-quarters fighting through its wards inside.
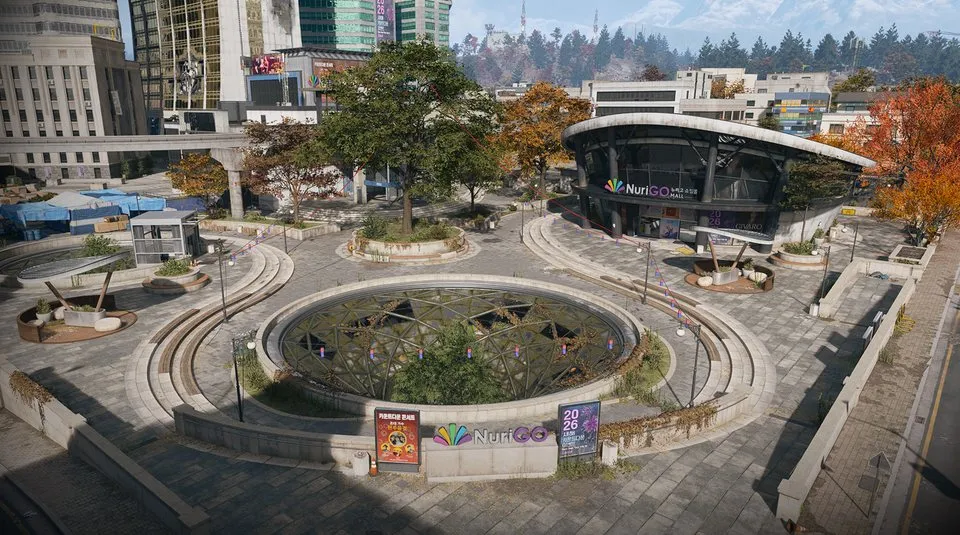
A shopping district in northeast Hajin City with shops, a police station, a clinic and City Hall above a large unlit underground mall.
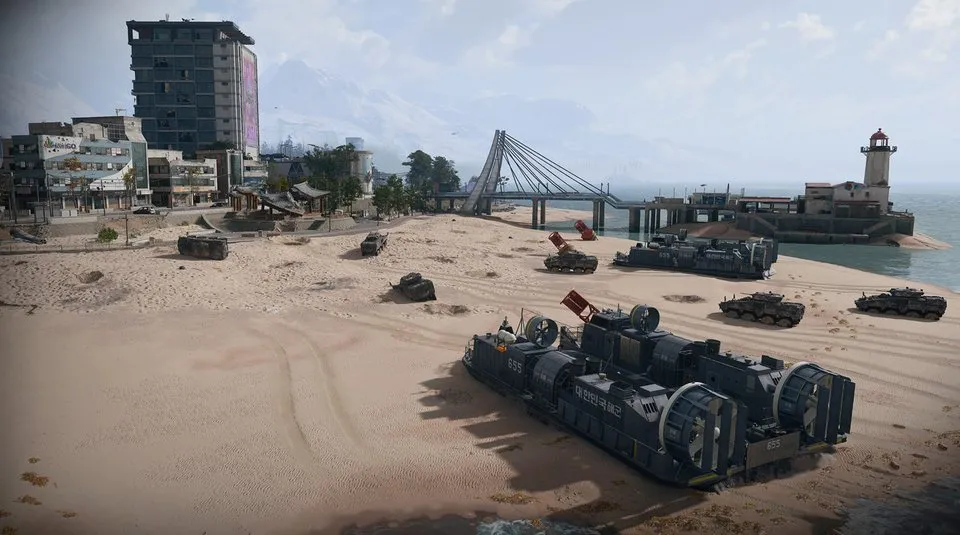
The waterfront of eastern Hajin City: apartments, a market, a pier and lighthouse, and working train and monorail lines.
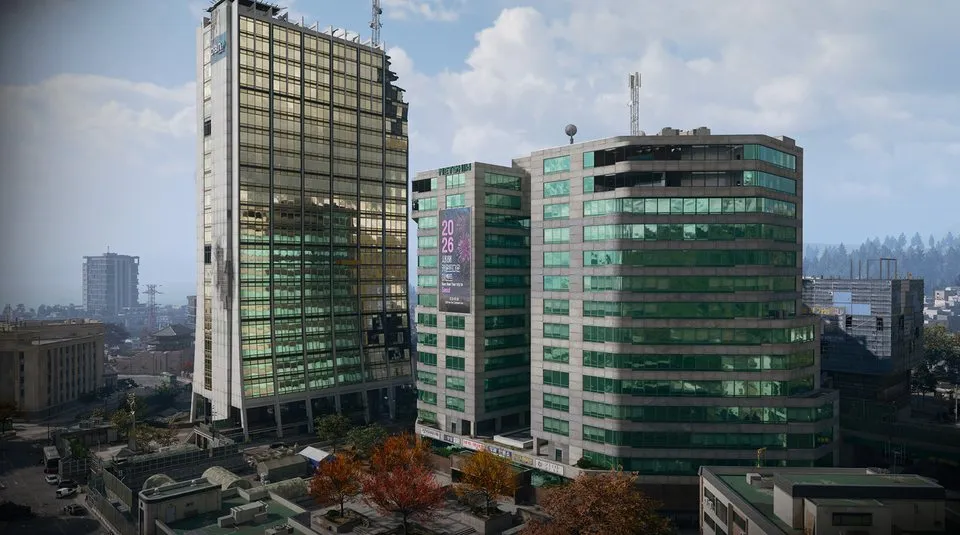
The fortified business district of central Hajin City, walled off with barricades and watchtowers, with fighting on the rooftops and in the streets.
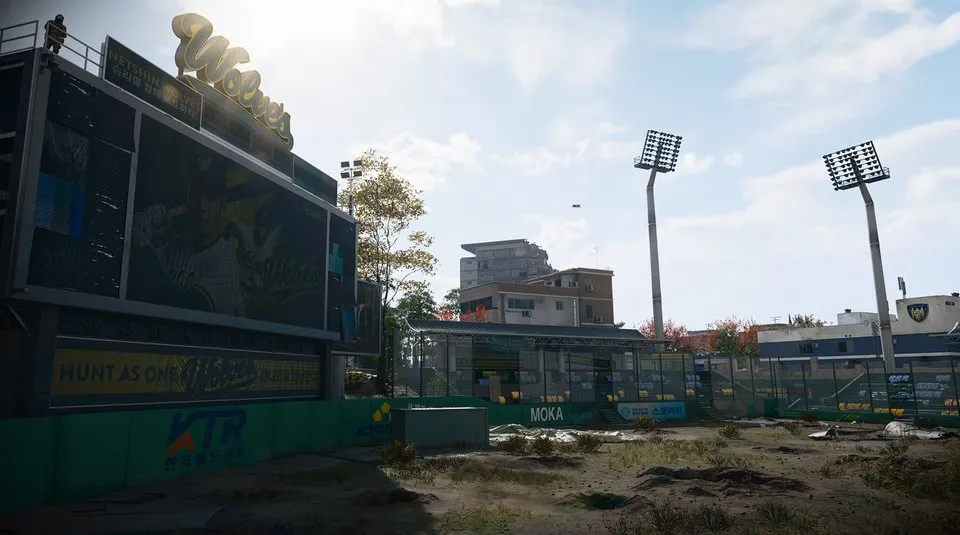
The ruined home of the local baseball team in south central Hajin City, among streets of shops, apartments and a police station.
Searching the Codex…
Try a key, item or boss name.