


 Area · Grid C2
Deep Vault
Deep Vault 301 opens the gate without being consumed there, and also unlocks Room 301 inside.
Related key → Read Vault guide → Area · Grid C2
Deep Vault 301 opens the gate without being consumed there, and also unlocks Room 301 inside.
Related key → Read Vault guide → Area · Grid F2
X01 landmark. Use this location with the floor map to plan your route.
Read floor guide → Open X01 guide → Area · Grid G3
X01 landmark. Use this location with the floor map to plan your route.
Read floor guide → Open X01 guide → Area · Grid H3
X01 landmark. Use this location with the floor map to plan your route.
Read floor guide → Open X01 guide → Area · Grid E4
X01 landmark. Use this location with the floor map to plan your route.
Related key → Read floor guide → Area · Grid F4
X01 landmark. Use this location with the floor map to plan your route.
Read floor guide → Open X01 guide → Area · Grid C4
X01 landmark. Use this location with the floor map to plan your route.
Read floor guide → Open X01 guide → Area · Grid F5
X01 landmark. Use this location with the floor map to plan your route.
Read floor guide → Open X01 guide → Area · Grid H5
X01 landmark. Use this location with the floor map to plan your route.
Read floor guide → Open X01 guide → Area · Grid F2
X01 landmark. Use this location with the floor map to plan your route.
Read floor guide → Open X01 guide → Area · Grid G3
Search five unopened containers here for the Sight Seeing Order; Control Room has its own counter.
Read floor guide → Open X01 guide →Area · Grid H3X01 landmark. Use this location with the floor map to plan your route.
Read floor guide → Open X01 guide → Area · Grid D5
X01 landmark. Use this location with the floor map to plan your route.
Related key → Read floor guide → Area · Grid F4
Search five unopened containers here for the Sight Seeing Order; Control Room has its own counter.
Related key → Read floor guide → Area · Grid F7
X01 landmark. Use this location with the floor map to plan your route.
Read floor guide → Open X01 guide → Emergency Exfil · Grid C4
Emergency extraction shaft. Check its in-game prompt and the Staff Emergency Exfil Keycard details before planning your escape.
Open keycard page → Read extraction guide →Emergency Exfil · Grid E2Emergency extraction shaft. Check its in-game prompt and the Staff Emergency Exfil Keycard details before planning your escape.
Open keycard page → Read extraction guide → Exit · Grid E4
Use the active Tac-Map exit and follow its extraction prompts. Standard and final exits can change during shutdown.
Read extraction guide → Open X01 guide →Exit · Grid G5Use the active Tac-Map exit and follow its extraction prompts. Standard and final exits can change during shutdown.
Read extraction guide → Open X01 guide →Exit · Grid F8Use the active Tac-Map exit and follow its extraction prompts. Standard and final exits can change during shutdown.
Read extraction guide → Open X01 guide →Exit · Grid E4Use the active Tac-Map exit and follow its extraction prompts. Standard and final exits can change during shutdown.
Read extraction guide → Open X01 guide →Exit · Grid G5Use the active Tac-Map exit and follow its extraction prompts. Standard and final exits can change during shutdown.
Read extraction guide → Open X01 guide →Exit · Grid F8Use the active Tac-Map exit and follow its extraction prompts. Standard and final exits can change during shutdown.
Read extraction guide → Open X01 guide → Player Spawn · Grid E2
A possible Operator starting position. Watch nearby approaches when entering this area.
Open X01 guide → Read floor guide →Player Spawn · Grid D6A possible Operator starting position. Watch nearby approaches when entering this area.
Open X01 guide → Read floor guide →X01 landmark. Use this location with the floor map to plan your route.
Read floor guide → Open X01 guide → Ammo & Armor Cache · Grid C2
Restock ammunition and armor plates here. The cache has a cooldown before it can be used again.
About ammo & armor caches → Read resupply guide →Player Spawn · Grid D5A possible Operator starting position. Watch nearby approaches when entering this area.
Open X01 guide → Read floor guide →Ammo & Armor Cache · Grid C5Restock ammunition and armor plates here. The cache has a cooldown before it can be used again.
About ammo & armor caches → Read resupply guide →Ammo & Armor Cache · Grid F5Restock ammunition and armor plates here. The cache has a cooldown before it can be used again.
About ammo & armor caches → Read resupply guide →Ammo & Armor Cache · Grid F4Restock ammunition and armor plates here. The cache has a cooldown before it can be used again.
About ammo & armor caches → Read resupply guide →Ammo & Armor Cache · Grid H3Restock ammunition and armor plates here. The cache has a cooldown before it can be used again.
About ammo & armor caches → Read resupply guide →Ammo & Armor Cache · Grid H6Restock ammunition and armor plates here. The cache has a cooldown before it can be used again.
About ammo & armor caches → Read resupply guide → Lootable Corpse · Grid C4
A lootable body is marked here. Inspect it in game; its contents are not guaranteed.
Read loot container guide → Open X01 guide →Lootable Corpse · Grid C5A lootable body is marked here. Inspect it in game; its contents are not guaranteed.
Read loot container guide → Open X01 guide → Stairs · Grid E5
Connects the facility floors. Use the Level 1 and Level 2 controls to follow your route.
View Level 2 endpoint → Read floor guide →Stairs · Grid C5Connects the facility floors. Use the Level 1 and Level 2 controls to follow your route.
View Level 2 endpoint → Read floor guide →Stairs · Grid D4Connects the facility floors. Use the Level 1 and Level 2 controls to follow your route.
View Level 2 endpoint → Read floor guide →Stairs · Grid F6Connects the facility floors. Use the Level 1 and Level 2 controls to follow your route.
View Level 2 endpoint → Read floor guide →Stairs · Grid F4Connects the facility floors. Use the Level 1 and Level 2 controls to follow your route.
View Level 2 endpoint → Read floor guide →Exit · Grid I3Use the active Tac-Map exit and follow its extraction prompts. Standard and final exits can change during shutdown.
Read extraction guide → Open X01 guide →Player Spawn · Grid C4A possible Operator starting position. Watch nearby approaches when entering this area.
Open X01 guide → Read floor guide → Keycard Encoder · Grid F2
Encode a blank keycard here for Maintenance Access or Executive Access. Check the station menu before confirming.
Open keycard page → Read Vault guide → Key Room · Grid E4
This room requires the Small Test Chamber key. It is in X01 Tech Lab, opposite the security checkpoints.
View required key → Read Vault guide → Key Room · Grid E4
This room requires the Superintendent’s Office card. Reach it across the elevated platform in Main Warehouse.
View required key → Read Vault guide →Player Spawn · Grid E2A possible Operator starting position. Watch nearby approaches when entering this area.
Open X01 guide → Read floor guide →Ammo & Armor Cache · Grid F7Restock ammunition and armor plates here. The cache has a cooldown before it can be used again.
About ammo & armor caches → Read resupply guide →Ammo & Armor Cache · Grid F5Restock ammunition and armor plates here. The cache has a cooldown before it can be used again.
About ammo & armor caches → Read resupply guide →Ammo & Armor Cache · Grid C5Restock ammunition and armor plates here. The cache has a cooldown before it can be used again.
About ammo & armor caches → Read resupply guide →Ammo & Armor Cache · Grid F2Restock ammunition and armor plates here. The cache has a cooldown before it can be used again.
About ammo & armor caches → Read resupply guide → Bounty Terminal · Grid E5
Use the terminal to review Operator bounties or pay your own bounty.
About bounty stations → Read bounty guide → Weapon Locker · Grid E5
Weapon locker location. Check the locker in game for its contents and access prompt.
Read loot container guide → Open X01 guide →Player Spawn · Grid E5A possible Operator starting position. Watch nearby approaches when entering this area.
Open X01 guide → Read floor guide →Player Spawn · Grid H3A possible Operator starting position. Watch nearby approaches when entering this area.
Open X01 guide → Read floor guide →Player Spawn · Grid G6A possible Operator starting position. Watch nearby approaches when entering this area.
Open X01 guide → Read floor guide → Mine Trap · Grid C5
A mine trap is marked at this passage. Check the crossing before moving through it.
Read floor guide → Open X01 guide →Mine Trap · Grid D5A mine trap is marked at this passage. Check the crossing before moving through it.
Read floor guide → Open X01 guide →Player Spawn · Grid I4A possible Operator starting position. Watch nearby approaches when entering this area.
Open X01 guide → Read floor guide →Player Spawn · Grid H6A possible Operator starting position. Watch nearby approaches when entering this area.
Open X01 guide → Read floor guide →Player Spawn · Grid H2A possible Operator starting position. Watch nearby approaches when entering this area.
Open X01 guide → Read floor guide →Stairs · Grid F2Connects the facility floors. Use the Level 1 and Level 2 controls to follow your route.
View Level 2 endpoint → Read floor guide →Weapon Locker · Grid D3Weapon locker location. Check the locker in game for its contents and access prompt.
Read loot container guide → Open X01 guide → Key Room · Grid C2
Room 301 is inside Deep Vault and is opened with Deep Vault 301. Check the door label before using the key.
View required key → Read Vault guide → Key Room · Grid C5
Executive Room requires its matching key. Find it upstairs in Admin Offices near the statue.
View required key → Read Vault guide → Key Room · Grid G5
Audit Room is on the upper floor and requires its matching key. Check the room’s access prompt.
View required key → Read Vault guide → Key Room · Grid E5
Maintenance Room requires its matching key. Check the room’s access prompt before entering.
View required key → Read Vault guide →Stairs · Grid E5Approximate upper-floor stair landing. Follow the stairs and confirm the route in game.
View Level 1 endpoint → Read floor guide →Stairs · Grid D5Approximate upper-floor stair landing. Follow the stairs and confirm the route in game.
View Level 1 endpoint → Read floor guide →Stairs · Grid C4Approximate upper-floor stair landing. Follow the stairs and confirm the route in game.
View Level 1 endpoint → Read floor guide →Stairs · Grid F6Approximate upper-floor stair landing. Follow the stairs and confirm the route in game.
View Level 1 endpoint → Read floor guide →Stairs · Grid F4Approximate upper-floor stair landing. Follow the stairs and confirm the route in game.
View Level 1 endpoint → Read floor guide →Stairs · Grid F2Approximate upper-floor stair landing. Follow the stairs and confirm the route in game.
View Level 1 endpoint → Read floor guide →Stairs · Grid G4Connects the facility floors. Use the Level 1 and Level 2 controls to follow your route.
View Level 2 endpoint → Read floor guide →Stairs · Grid G4Approximate upper-floor stair landing. Follow the stairs and confirm the route in game.
View Level 1 endpoint → Read floor guide →Stairs · Grid G5Connects the facility floors. Use the Level 1 and Level 2 controls to follow your route.
View Level 2 endpoint → Read floor guide →Stairs · Grid G5Approximate upper-floor stair landing. Follow the stairs and confirm the route in game.
View Level 1 endpoint → Read floor guide →Stairs · Grid G6Connects the facility floors. Use the Level 1 and Level 2 controls to follow your route.
View Level 2 endpoint → Read floor guide →Stairs · Grid G6Approximate upper-floor stair landing. Follow the stairs and confirm the route in game.
View Level 1 endpoint → Read floor guide → Ascender · Grid C5
Use the rope ascender to move between the facility floors.
View Level 2 endpoint → Read floor guide →Ascender · Grid C5Approximate upper-floor ascender endpoint. Confirm the rope and route in game.
View Level 1 endpoint → Read floor guide →Ascender · Grid G2Use the rope ascender to move between the facility floors.
View Level 2 endpoint → Read floor guide →Ascender · Grid G2Approximate upper-floor ascender endpoint. Confirm the rope and route in game.
View Level 1 endpoint → Read floor guide →Ascender · Grid H3Use the rope ascender to move between the facility floors.
View Level 2 endpoint → Read floor guide →Ascender · Grid H3Approximate upper-floor ascender endpoint. Confirm the rope and route in game.
View Level 1 endpoint → Read floor guide → 3D Printer · Grid E5
3D Printer in the west-side mezzanine office of Production Assembly. Open Print Item to check recipes and materials.
Read Printer guide → Read Orders guide →Keycard Encoder · Grid I5Encode a blank keycard here for Engineering Access or Audit Officer Access. Check the station menu before confirming.
Open keycard page → Read Vault guide → Hidden Passage · Grid F5
Move the yellow tool cabinet at the north side of Production Assembly and follow the opening to the hidden stash.
Read Orders guide → Open X01 guide →Lootable Corpse · Grid C2A lootable body is marked here. Inspect it in game; its contents are not guaranteed.
Read loot container guide → Open X01 guide →Player Spawn · Grid B5A possible Operator starting position. Watch nearby approaches when entering this area.
Open X01 guide → Read floor guide → Key Room · Grid E7
Locked stash room on the upper catwalk of Motor Pool. Match the room’s keycard prompt before entering.
Read floor guide → Read Vault guide →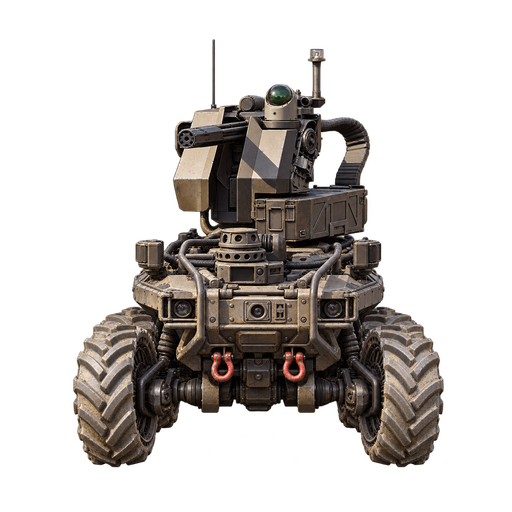 Wheelson · Grid F5
Reported Wheelson patrol route on Level 1. Watch the outer ring; its position changes as it moves.
Open Wheelson page → Open X01 guide →Ascender · Grid E7Use the rope ascender to move between the facility floors.
View Level 2 endpoint → Read floor guide → Key Room · Grid C2
Locked room location. Match the named door and required key before entering.
View required key → Read Vault guide → Safe · Grid C4
Search this safe for loot. Contents and availability can vary.
Read loot container guide → Open X01 guide →Hidden Passage · Grid E5Climb the ladder and move the yellow toolbox to reach the hatch into the locked room. Check the room for a safe.
Open X01 guide → Open X01 guide →Safe · Grid E5Search this safe for loot. Contents and availability can vary.
Read loot container guide → Open X01 guide → Argonaut Armor · Grid C2
Argonaut Armor is reported inside the Deep Vault Core Room. Check the room and current access in game.
Open item page → Open X01 guide →Weapon Locker · Grid C2Weapon locker location. Check the locker in game for its contents and access prompt.
Read loot container guide → Open X01 guide →Weapon Locker · Grid C2Weapon locker location. Check the locker in game for its contents and access prompt.
Read loot container guide → Open X01 guide →Weapon Locker · Grid C2Weapon locker location. Check the locker in game for its contents and access prompt.
Read loot container guide → Open X01 guide →Weapon Locker · Grid C2Weapon locker location. Check the locker in game for its contents and access prompt.
Read loot container guide → Open X01 guide →Weapon Locker · Grid C2Weapon locker location. Check the locker in game for its contents and access prompt.
Read loot container guide → Open X01 guide →Lootable Corpse · Grid C2A lootable body is marked here. Inspect it in game; its contents are not guaranteed.
Read loot container guide → Open X01 guide → Key Room · Grid D2
Locked room location. Match the named door and required key before entering.
View required key → Read Vault guide →Safe · Grid D2Search this safe for loot. Contents and availability can vary.
Read loot container guide → Open X01 guide →Safe · Grid D2Search this safe for loot. Contents and availability can vary.
Read loot container guide → Open X01 guide →Safe · Grid D2Search this safe for loot. Contents and availability can vary.
Read loot container guide → Open X01 guide →Safe · Grid D3Search this safe for loot. Contents and availability can vary.
Read loot container guide → Open X01 guide → Key Room · Grid D2
Locked room location. Match the named door and required key before entering.
View required key → Read Vault guide →Weapon Locker · Grid D2Weapon locker location. Check the locker in game for its contents and access prompt.
Read loot container guide → Open X01 guide →Weapon Locker · Grid D2Weapon locker location. Check the locker in game for its contents and access prompt.
Read loot container guide → Open X01 guide →Weapon Locker · Grid D2Weapon locker location. Check the locker in game for its contents and access prompt.
Read loot container guide → Open X01 guide →Safe · Grid F4Search this safe for loot. Contents and availability can vary.
Read loot container guide → Open X01 guide →Weapon Locker · Grid F4Weapon locker location. Check the locker in game for its contents and access prompt.
Read loot container guide → Open X01 guide →Player Spawn · Grid F8A possible Operator starting position. Watch nearby approaches when entering this area.
Open X01 guide → Read floor guide →Emergency Exfil · Grid C4Emergency extraction shaft. Check its in-game prompt and the Staff Emergency Exfil Keycard details before planning your escape.
Open keycard page → Read extraction guide →Ascender · Grid E7Use the rope ascender to move between the facility floors.
View Level 1 endpoint → Read floor guide →Hidden Passage · Grid E7Cross using the crane-held tank turret, follow the ledge right and drop through the hatch into the hidden room.
Open X01 guide → Open X01 guide →Weapon Locker · Grid E7Weapon locker location. Check the locker in game for its contents and access prompt.
Read loot container guide → Open X01 guide →Weapon Locker · Grid D7Weapon locker location. Check the locker in game for its contents and access prompt.
Read loot container guide → Open X01 guide →Hidden Passage · Grid C4In upstairs Admin Offices, enter the opening between floors in the central hole to reach the hidden room.
Open X01 guide → Open X01 guide →Hidden Passage · Grid D4Enter the room on the right and break the large glass window to reach the locked room.
Open X01 guide → Open X01 guide →Weapon Locker · Grid C5Weapon locker location. Check the locker in game for its contents and access prompt.
Read loot container guide → Open X01 guide →Weapon Locker · Grid C5Weapon locker location. Check the locker in game for its contents and access prompt.
Read loot container guide → Open X01 guide →Weapon Locker · Grid E4Weapon locker location. Check the locker in game for its contents and access prompt.
Read loot container guide → Open X01 guide →Weapon Locker · Grid E4Weapon locker location. Check the locker in game for its contents and access prompt.
Read loot container guide → Open X01 guide →Searching the Codex…
Try a key, item or boss name.