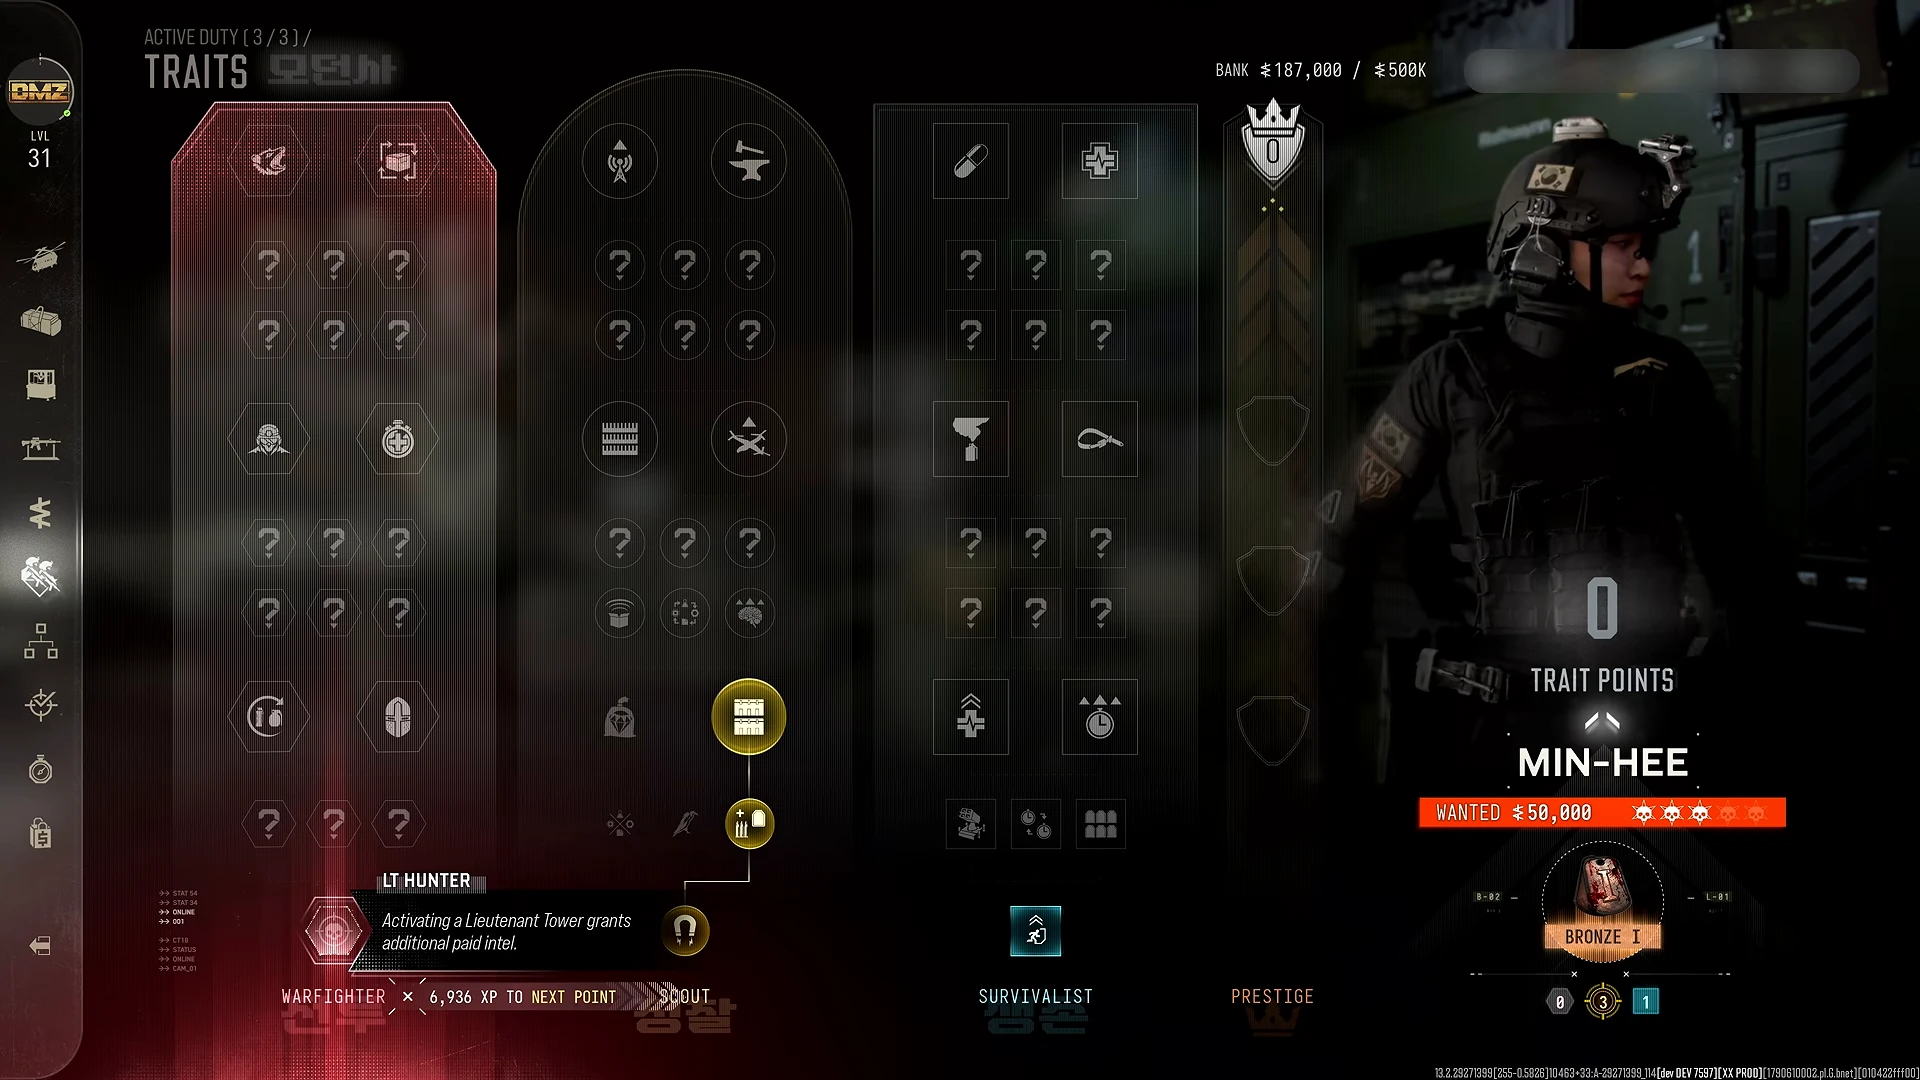
DMZ Trait builds: solo survival, looting and squad support
Three complete 18-point plans · Major choices at tree rows 3, 6 and 9 · Random Minor rolls need your own decisions
For solo survival, plan Survivalist 9 + Warfighter 9. For ingredient collection, use Scout 9 + Warfighter 9 with loot and field-supply choices. For squad support, use Scout 9 + Survivalist 6 + Warfighter 3; adapt the connected Minor positions to your actual random rolls.
- Three complete 18-point plans
- Major choices at tree rows 3, 6 and 9
- Random Minor rolls need your own decisions
Choose the job before spending the first point. A solo Operator needs ways to recover without a teammate. A looter wants useful containers and fewer forced fights. A squad supporter needs to get someone else back up. These three plans make those trade-offs explicit instead of calling one build best at everything.
These plans use the documented effects and connected board paths; they are not measured win-rate rankings. Each plan spends 18 points. Open its planner link to inspect the path before making an irreversible in-game choice.
How to follow the spending order
One point buys one connected row. Rows 1–2, 4–5 and 7–8 contain random Minor choices; rows 3, 6 and 9 offer the Major decisions. Reaching row 6 costs six points in that tree in total, not another six after row 3.
The links use connected central Minor positions as planning placeholders. Read the traits revealed on your board and keep a path to the next Major you want. A stronger-looking Minor on an outside branch can restrict the next available Major. The full tree rules explain the connections.
Solo survival: repair first, emergency exit second
Start with Survivalist and finish Warfighter afterward. Consumable Duration helps the supplies you use yourself; Free Revive repairs the first Wound; Die Hard gives a Last Stand extraction option. Warfighter then adds Combat Resistance, Quick Fix and Possum.
| Points spent overall | Tree / row reached | Major choice |
|---|---|---|
| 3 | Survivalist / 3 | Consumable Duration |
| 6 | Survivalist / 6 | Free Revive |
| 9 | Survivalist / 9 | Die Hard |
| 12 | Warfighter / 3 | Combat Resistance |
| 15 | Warfighter / 6 | Quick Fix |
| 18 | Warfighter / 9 | Possum |






Open this connected 18-point plan
This gives up Scout’s loot and UAV options. It also takes nine earned points to reach Die Hard: a fresh Operator does not have the finished build’s escape tools. Until then, carry healing and use the solo extraction precautions. Possum remains restricted while the killing squad is too close. Season 1 increased that clearance distance by 2.5 times and made the activation failsafe five minutes if the squad stays nearby; it is not a required five-minute wait after every death.
Ingredient looter: supply yourself and avoid detection
Build Scout first: Container Looter suits a container search, Field Crafting supplies items from Common resources in the field, and Thermal Padding addresses UAV detection. Warfighter then adds Equipment Professional, Viper Sense and Adaptive Restock.
| Points spent overall | Tree / row reached | Major choice |
|---|---|---|
| 3 | Scout / 3 | Container Looter |
| 6 | Scout / 6 | Field Crafting |
| 9 | Scout / 9 | Thermal Padding |
| 12 | Warfighter / 3 | Equipment Professional |
| 15 | Warfighter / 6 | Viper Sense |
| 18 | Warfighter / 9 | Adaptive Restock |





Open this connected 18-point plan
The choice at Scout row 6 is real: taking Field Crafting means giving up UAV Upgrade on that row. Thermal Padding likewise replaces Overwatch at row 9. This plan also gives up Possum for Adaptive Restock. It is a supply-focused Operator, not a promise of rare ingredients or immunity from players. Field Crafting only offers its supported resource actions; see the actual backpack interaction.
If most of your useful loot comes from fighting AI, compare Hostile Looter with Container Looter before spending the third Scout point. Do not make that change on an already committed Operator by merely editing a saved plan.
Squad support: intel and a covered revive
Start with Scout for Hostile Looter, UAV Upgrade and Overwatch. Add six Survivalist points for Faster Revive and Impact Smokes, then three Warfighter points for Combat Resistance.
| Points spent overall | Tree / row reached | Major choice |
|---|---|---|
| 3 | Scout / 3 | Hostile Looter |
| 6 | Scout / 6 | UAV Upgrade |
| 9 | Scout / 9 | Overwatch |
| 12 | Survivalist / 3 | Faster Revive |
| 15 | Survivalist / 6 | Impact Smokes |
| 18 | Warfighter / 3 | Combat Resistance |





Open this connected 18-point plan
This is a 9 + 6 + 3 split. You deliberately stop Survivalist before row 9 and Warfighter before Quick Fix or Possum. Impact Smokes uses the row where the solo plan takes Free Revive; decide whether covered squad recovery or your own first-Wound repair matters more. Smoke and faster interactions do not make a revive safe under direct fire.
Agree who activates a tower and who watches the downed teammate before committing to the revive. A solo player gets little value from a plan built around reviving someone else.
Adapt an existing Operator without wasting progress
- Count the points already spent in each tree and compare the selected Majors.
- If a Major differs, decide whether to keep a useful variation rather than abandon the Operator.
- Use the remaining points to complete a connected path. Check your remaining point budget before planning two ninth-row traits after investing in a third tree.
- Record the actual Minor rolls in the planner and copy the build link. A shared link saves a plan, not in-game progress.
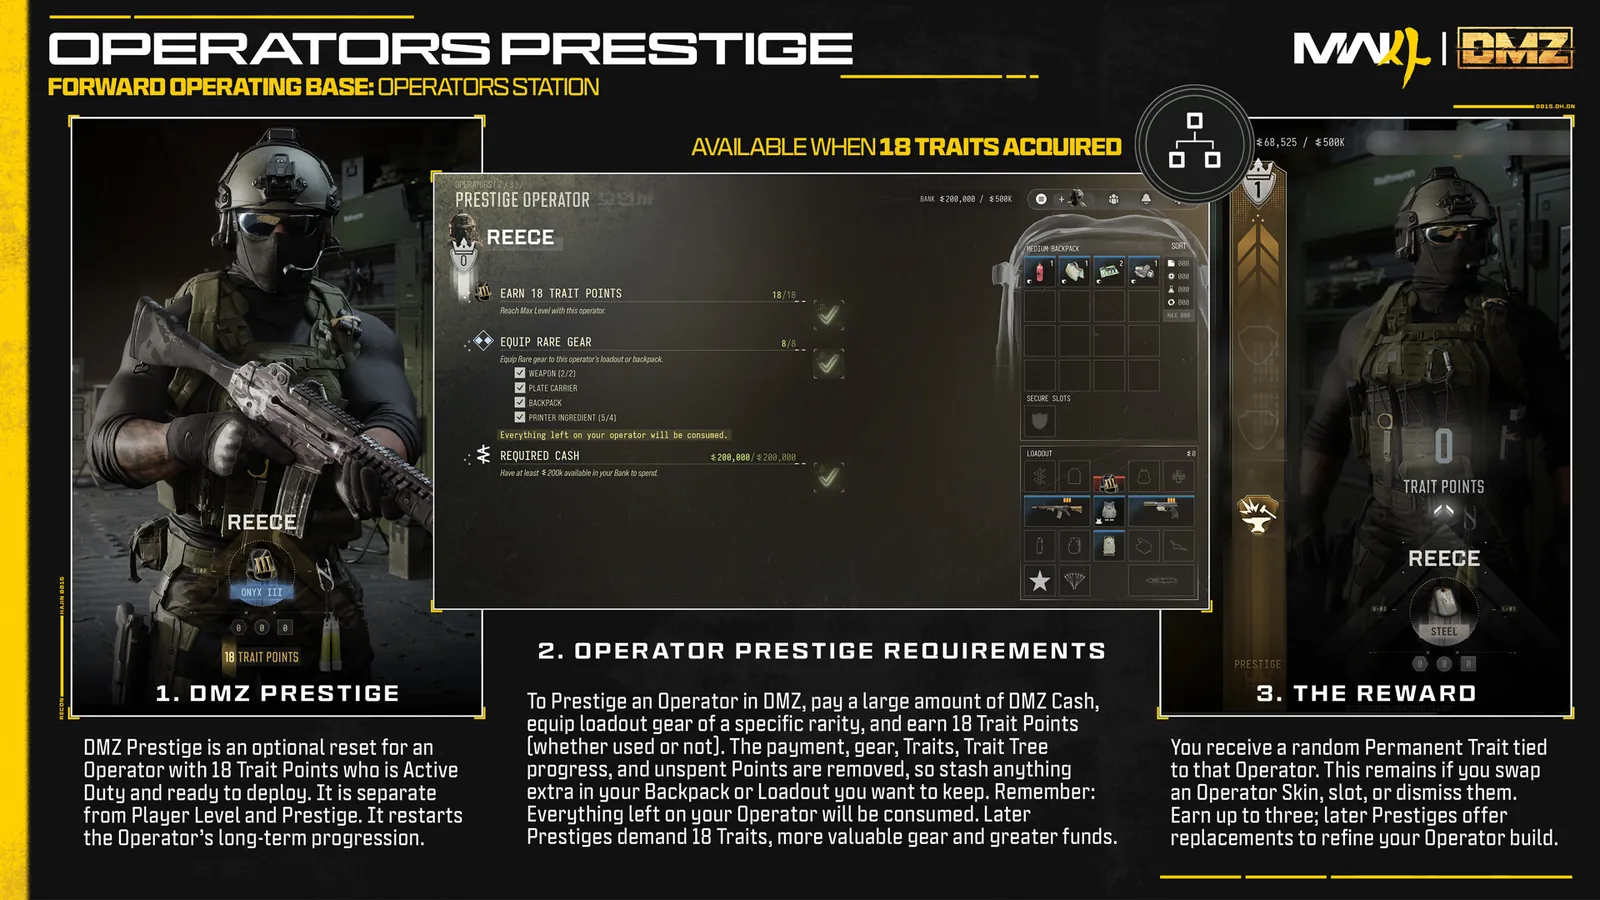
- Compare the next Operator Prestige bill before treating a reset as a cheap respec.
For the next deployment, pair the chosen build with a specific loot objective. Traits support the route; they do not replace the equipment and extraction plan.
Quick questions
Can I copy every named trait in a build?
Copy the Major goals and connected branches, then adapt to the Minor traits actually shown on your Operator. Random Minor names are not guaranteed.
Can I change to another build after spending points?
The planner can be edited, but in-game choices cannot be refunded. Check an existing Operator's selections before following a new plan; Prestige is a separate reset with a cost.
Mentioned in this guide
Spotted something wrong? Send a correction.